Posts describing the use and configuration of the MikroTik RouterOS platform.
While it has its shortcomings (and a very loose interpretation of the GPL), it remains one of the most affordable, most flexible SOHO network hardware providers.
This post is about setting up and configuring a dnsmasq container on a MikroTik RouterOS device to be used as an authoritative DNS server and a forwarding cache at the same time.
Introduction
Recently I joined DN42, a world-wide overlay network created for experimenting with IP routing and for connecting communities, hack-spaces, and networking nerds who are not allowed 😜 to break the real Internet.
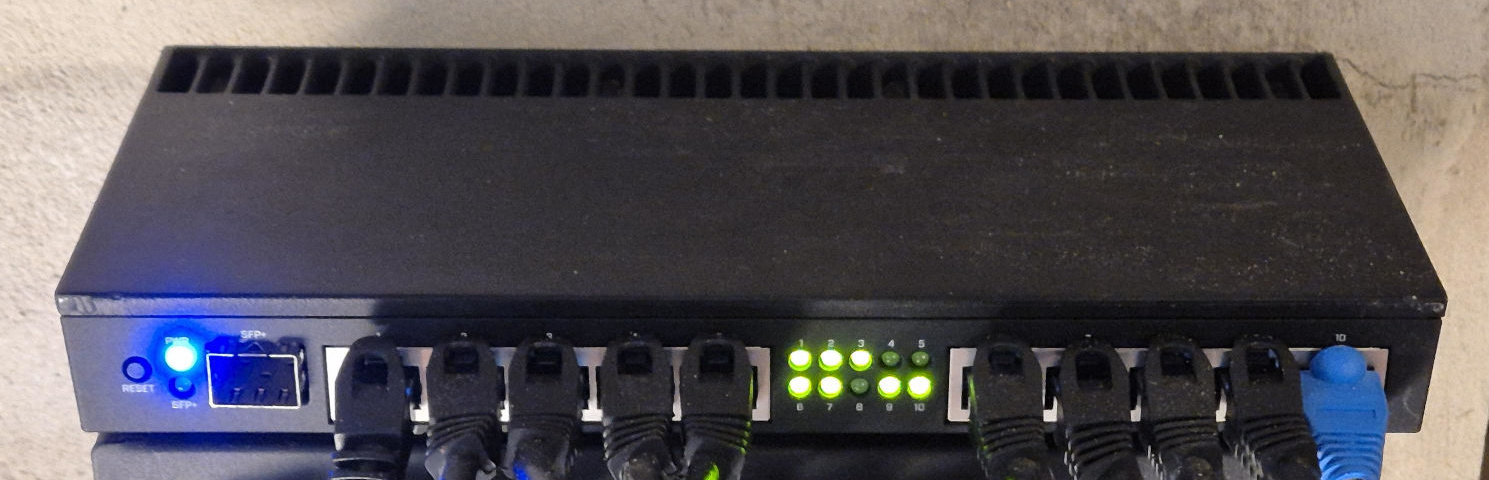
I wanted to play on hard mode, so I configured the DN42 tunnels in a
VRF on my home
lab switch, a MikroTik RB4011. And of course I wanted to provide
authoritative DNS
for my .dn42 zone from the same switch.
MikroTik routers come with a built-in DNS service, but it can't act as an authoritative server, and there is a shared DNS cache for all clients, which would leak my home lab to DN42.
I already run prosody and iperf on my switch, so the "obvious" "solution" was to add another container.
MikroTik Containers
MikroTik routers with ARM and ARM64 CPUs support Docker containers. The manufacturer strongly recommends using external USB / SD card storage to not wear out internal flash. Ignoring that recommendation might cause the flash in your router to fail and turn the router into an expensive paperweight.
The RB4011 doesn't have USB or SD ports, and
adding NVMe looks complicated.
It is possible to use the
Storage package to mount remote
disks, but I hate circular dependencies between my devices. Then again,
people reports millions of flash writes,
so I'm going to YOLO my containers on the internal 512MB flash, using
/docker for the images and volumes.
Nevertheless, if you look for a MikroTik router to run containers, maybe pick one with ARM64 and a physical storage port.
Enabling containers requires a walk to the switch to ensure physical presence, and will increase your attack surface. Then we can configure it to fetch from Docker Hub, which gives us access to some 117k ARM images:
/container config
set registry-url=https://registry-1.docker.io tmpdir=/docker
Installing a dnsmasq container
I've settled with the
dockurr/dnsmasq image based on
Alpine which needs around 12MB of flash space. It accepts DNS1 to DNS4
from the environment and allows to bind-mount /etc/dnsmasq.d for additional
config files:
/container envs
add key=DNS1 list=ENV_DNSMASQ value=fd42:d42:d42:54::1
add key=DNS2 list=ENV_DNSMASQ value=fd42:d42:d42:53::1
/container mounts
add dst=/etc/dnsmasq.d list=MOUNT_DNSMASQ_DNSMASQD src=/docker/dnsmasq-dnsmasq.d
/container
add remote-image=dockurr/dnsmasq name=dn42-dnsmasq \
    envlists=ENV_DNSMASQ mountlists=MOUNT_DNSMASQ_DNSMASQD \
    root-dir=/docker/images/dnsmasq interface=veth5 start-on-boot=yes
The two upstream servers are taken from the DN42 anycast DNS.
The veth5 interface is a virtual interface bridged into my DN42 LAN on
a dedicated dn42 VRF. I've added two addresses to veth5, ::2 for
the authoritative DNS, and ::53 for the forwarder. Initially, I only had one
address, but dnsmasq refuses to operate a DNS forwarder on the same
IP/interface as an authoritative server.
/inteface bridge
add comment="dn42 bridge with containers" name=dn42-bridge
/ipv6 address
add address=fd16:9939:ecc0::1/64 advertise=no interface=dn42-bridge
/ip vrf
add interfaces=<snip>,dn42-bridge name=dn42
/inteface veth
add address=fd16:9939:ecc0::2/64,fd16:9939:ecc0::53/64 comment="DN42 dnsmasq" \
    gateway6=fd16:9939:ecc0::1 name=veth5
/interface bridge port
add bridge=dn42-bridge interface=veth5
Note: don't add the veth to your VRF, or you'll end up with
"port is already slave"!
When you add the container, RouterOS will download and extract the image in the
background. Later you can update it with /container/update - both will show
the download progress in the UI:
/container update dn42-dnsmasq
/container print
*snip*
#   NAME          ROOT-DIR                INTERFACE  CONTAINER-SIZE  TAG
;;; downloading layer 0/6 0%/7.7M
3 E dn42-dnsmasq  /docker/images/dnsmasq  veth5      7.7MiB          registry-1.docker.io/dockurr/dnsmasq:latest
*snip*
Dual-use dnsmasq
dnsmasq strictly separates authoritative DNS (being the main DNS server for a specific domain) and forwarding DNS (providing DNS responses for whatever a client is asking for). Normally, when you run dnsmasq on a router, you can configure it to be authoritative on the WAN interface and forwarding on the LAN interface.
If you misconfigure it, it will return Host not found: 5(REFUSED) for remote
domains, and/or will fail to return a SOA for your domain.
When we run it in a container, we could either add two different virtual interfaces, or we set up two different addresses for the two tasks.
Now, we can create a ge0rg.conf file either directly in the container
(/container/shell dn42-dnsmasq and it helpfully comes with busybox' vi), or
on our computer, and scp it to /docker/dnsmasq-dnsmasq.d/ge0rg.conf on the
RB4011:
# Be the authoritative server on the ::2 address
auth-server=ns1.ge0rg.dn42,fd16:9939:ecc0::2

# Serve two zones: ge0rg.dn42 and reverse lookups for the ULA IPv6 range
auth-zone=ge0rg.dn42,fd16:9939:ecc0::/48

# Define the Start of Authority resource record parameters:
# <serial>,<email>,<refresh>,<retry>,<expire>,<min_ttl>
auth-soa=2026072403, ge0rg.ge0rg.dn42, 1200, 120, 1209600, 86400

# Create the actual AAAA and PTR records, one line per host:
# <primary hostname>,<hostnames>,<IPv6>
host-record=gw.ge0rg.dn42,gw,fd16:9939:ecc0::1
host-record=dnsmasq.ge0rg.dn42,dnsmasq,ns1.ge0rg.dn42,fd16:9939:ecc0::2

host-record=lan.gw.ge0rg.dn42,lan.gw,fd16:9939:ecc0:42::1

host-record=wg.gw.ge0rg.dn42,wg.gw,fd16:9939:ecc0:7390::1
You need to restart dnsmasq after each change to a config file (it will only
reload /etc/hosts on SIGHUP):
/container/restart dn42-dnsmasq
DN42 comes with a helper script to verify the correct working of your DNS zone:
$ ./validate-my-dns.py GE0RG-MNT
NOTE:  ge0rg.dn42 doesn't have any ds-rdata specified
NOTE:  0.c.c.e.9.3.9.9.6.1.d.f.ip6.arpa doesn't have any ds-rdata specified

Summary:

domain name                       | success | dnssec fail | wrong NS | wrong SOA | NXDOMAIN | REFUSED | SERVFAIL | timeout
----------------------------------|---------|-------------|----------|-----------|----------|---------| -------- | -------
 ge0rg.dn42                       |       1 |           0 |        0 |         0 |        0 |       0 |        0 |       0
 0.c.c.e.9.3.9.9.6.1.d.f.ip6.arpa |       1 |           0 |        0 |         0 |        0 |       0 |        0 |       0
The missing ds-rdata is about DNSSEC.
If you want to sign your zone, use a "grown-up" DNS implementation 😉
The final result looks like this, taken from my peer:
$ mtr --report darkwing.ge0rg.dn42
Start: 2026-07-24T15:49:32+0200
HOST: peerhost                    Loss%   Snt   Last   Avg  Best  Wrst StDev
  1.|-- dn42-peerhost.mypeer.dn42  0.0%    10  124.0  82.4  31.8 132.8  36.0
  2.|-- gw.ge0rg.dn42              0.0%    10   96.6 100.8  48.8 153.6  34.6
  3.|-- darkwing.ge0rg.dn42        0.0%    10   55.3 108.7  55.3 159.5  35.8
Zone transfers
Now of course we want the hostnames to resolve even when the dnsmasq VM (or my whole network) is down.
DNS allows this by synchronizing the whole zone (domain) from the primary
authoritative server to secondary servers, whenever the serial number in the
SOA record increases.
The secondary servers need to be registered as NS records in the parent
domain, and they need to be known to the primary server to allow zone
transfers (AXFR).
In dnsmasq, the auth-sec-servers directive will add the listed server(s) as
authorized secondary name servers, and allow them to request domain transfers:
auth-sec-servers=ns1.mypeer.dn42
dnsmasq will add the NS record to the zone (but you need to manually add it
to the parent zone as well):
$ dig +noall +answer NS ge0rg.dn42 @dnsmasq.ge0rg.dn42
ge0rg.dn42.     600 IN  NS  ns1.ge0rg.dn42.
ge0rg.dn42.     600 IN  NS  ns1.mypeer.dn42.
It will also look up the IP address of the listed server on its own and allow it to perform zone transfers:
dnsmasq: auth[SOA] ge0rg.dn42 from fdc7:29a9:xxxx:xxxx
dnsmasq: auth ge0rg.dn42 is <SOA>
dnsmasq: auth[AXFR] ge0rg.dn42 from fdc7:29a9:xxxx:xxxx
dnsmasq: auth ge0rg.dn42 is <AXFR>
There is one quirk in the config that's not made very clear by the
documentation. If you add an auth-peer line (e.g. for debug purposes), then
the implicit transfer permissions for auth-sec-servers will be revoked, and
you need to add the secondary servers as dedicated auth-peer items as well.
No reverse gear
Zone transfers in dnsmasq work for the forward resolution (hostname to IP address), but unfortunately, there is no code for reverse zone transfers, and it seems not to be a priority feature.
From a rough look, it will require ~100 LoC from somebody who understands both AXFR and the dnsmasq internal data structures.